
Web Automation With Selenium And Python
Hi everyone! 👋 I recently moved to Redmond, WA, and tried to get into some sports that could keep me active and moving. After looking around for a bit I realized that half the people here play badminton so it was an easy decision for me to sign up for a local badminton academy. However, after signing up I realized that most of the courts were already booked for prime-time (between 4-8 pm). I found out that the booking for the courts opens up on Saturday at around 10 am and the good timeslots for the next whole week are booked in the first 15-20 minutes. I did what any sane programmer would do and started thinking about how to automate the whole booking process. This article is going to walk you through the manual booking process and explain how I automated it.
tldr: you can download the source for the bot from GitHub
Manual booking process
It is always important to fully explore the manual workflow before you attempt to automate anything. We will be automating the Northwest Badminton Academy booking system. This is their reservations page (link).
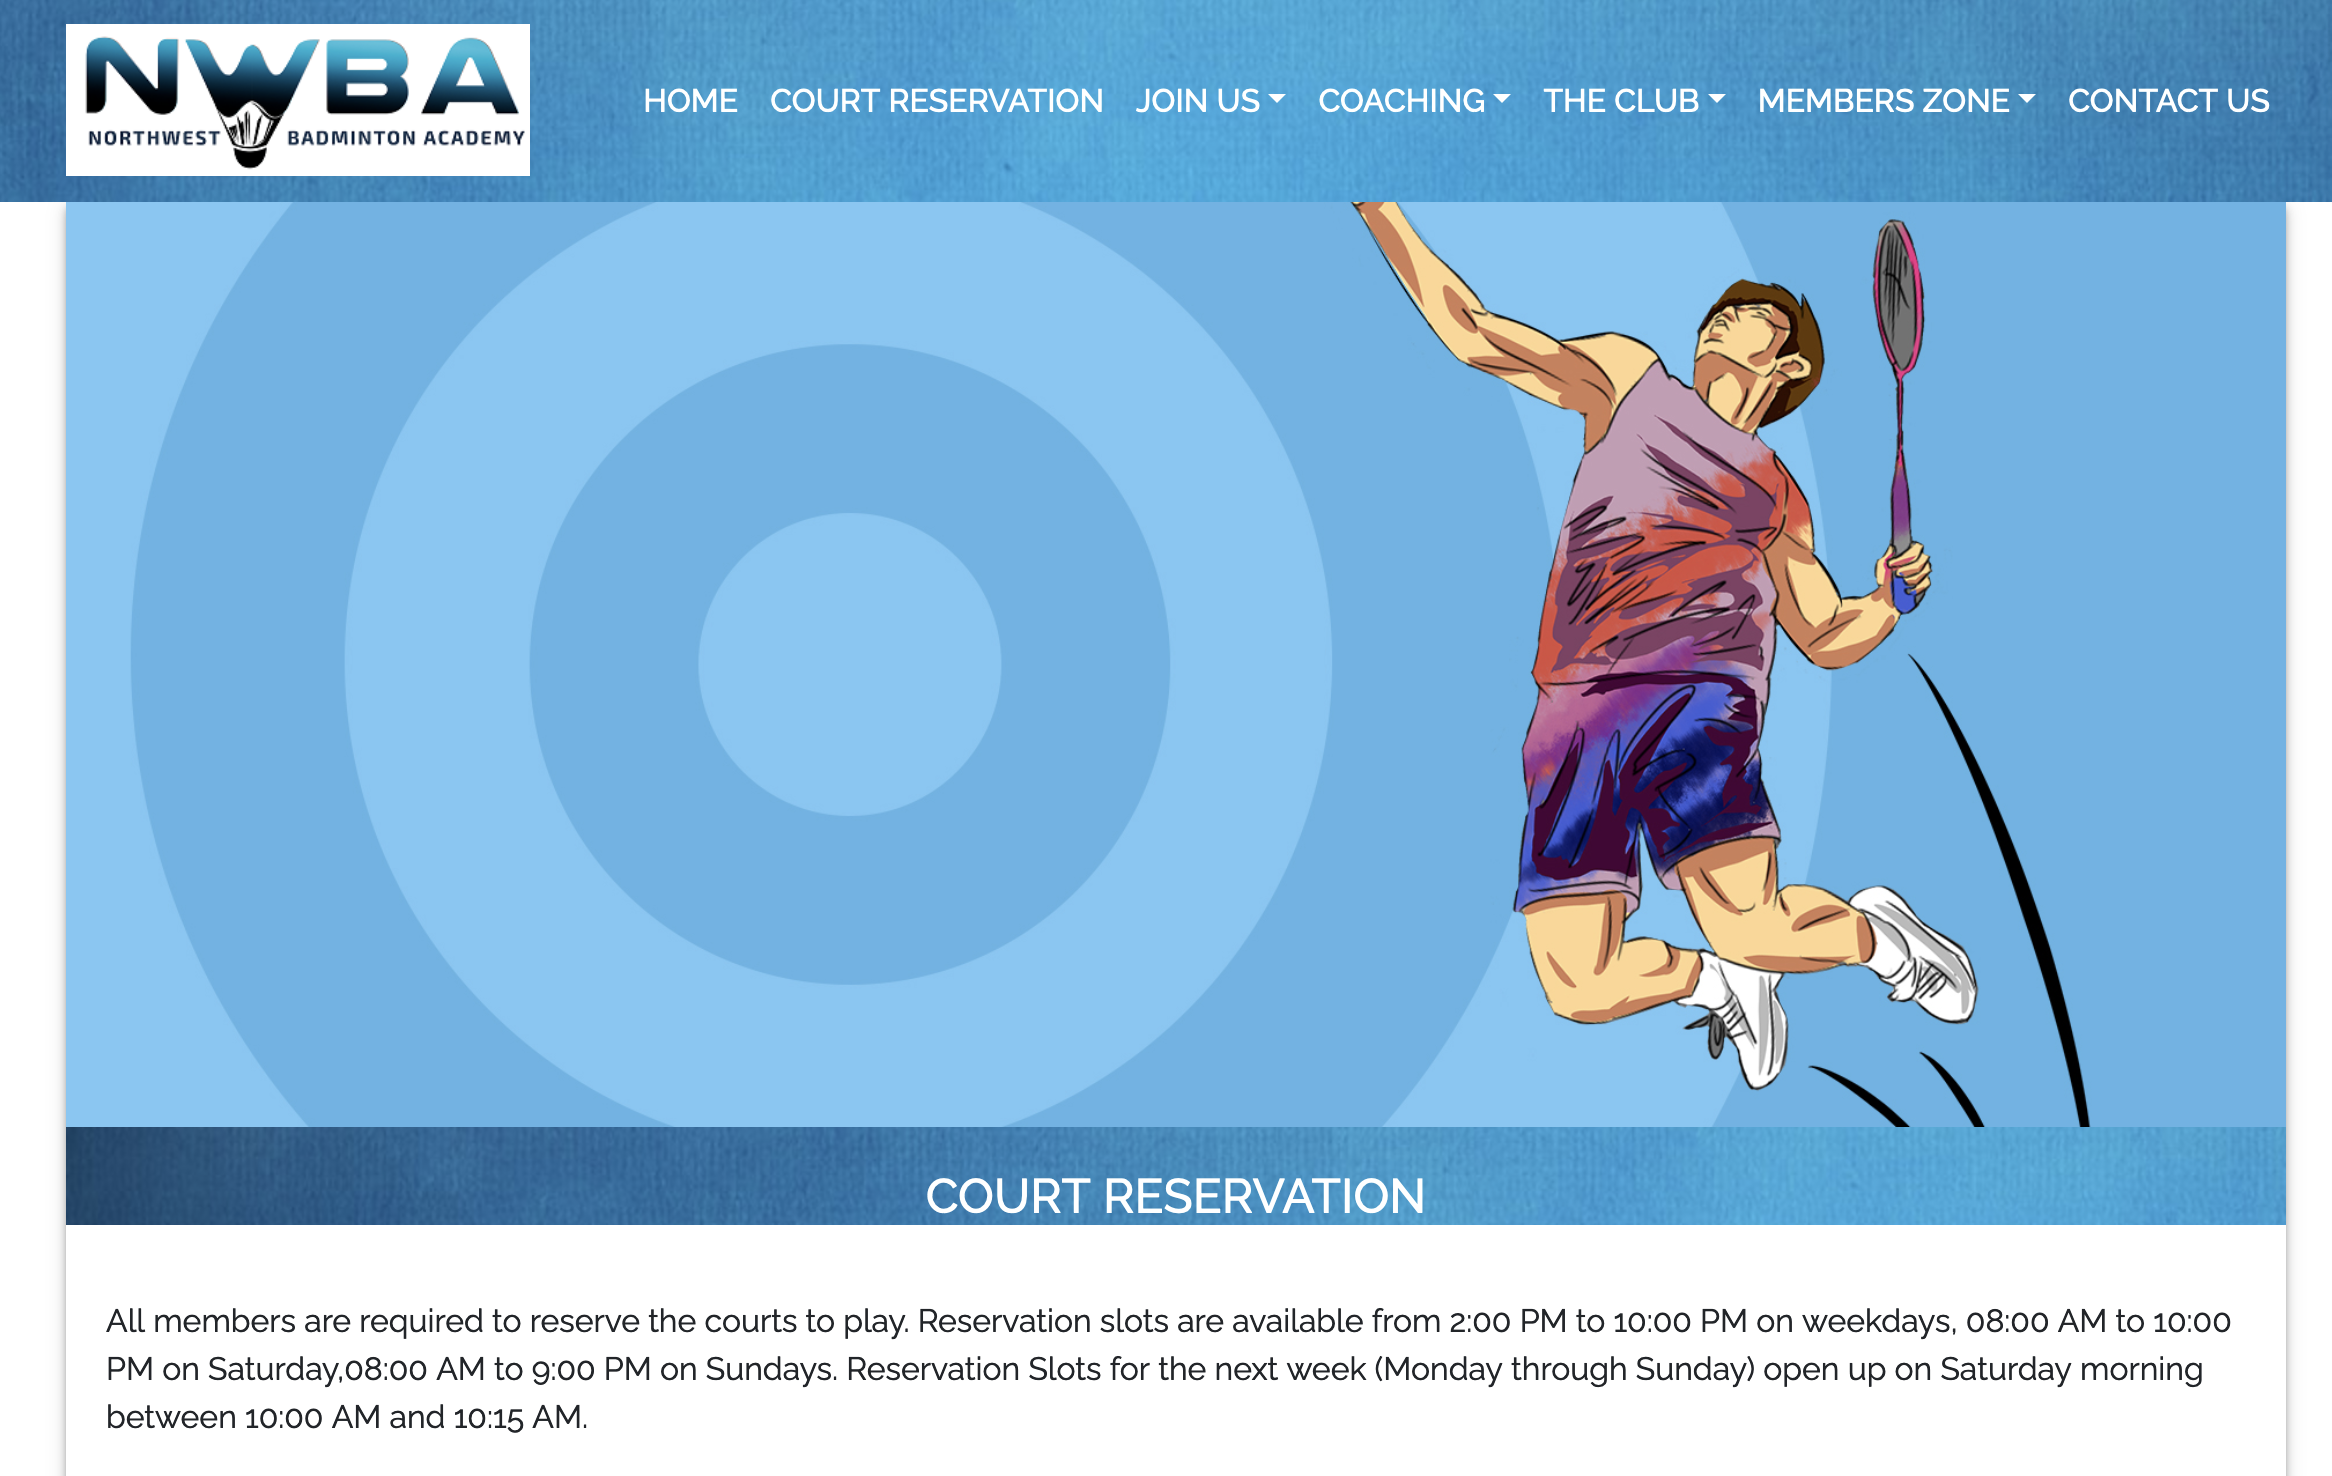
This page lists all the court reservation rules. It is important for us to keep these in mind as they will play a role in how we automate the bookings. The important rules are:
- We may only book 1 slot each day
- We may book only 3 slots during weekdays (Mon-Fri)
- We may book 1 slot each day on Saturday and Sunday
At the bottom of the page, they also link to the reservation page with a full calendar (link). Once you click on that you will be redirected to this page:
Interestingly, the booking is not hosted by NWBA themselves. They outsource it to zen planner. So essentially, we will be automating zen planner bookings. This also means that the final automation should work for most other places as well that use zen planner.
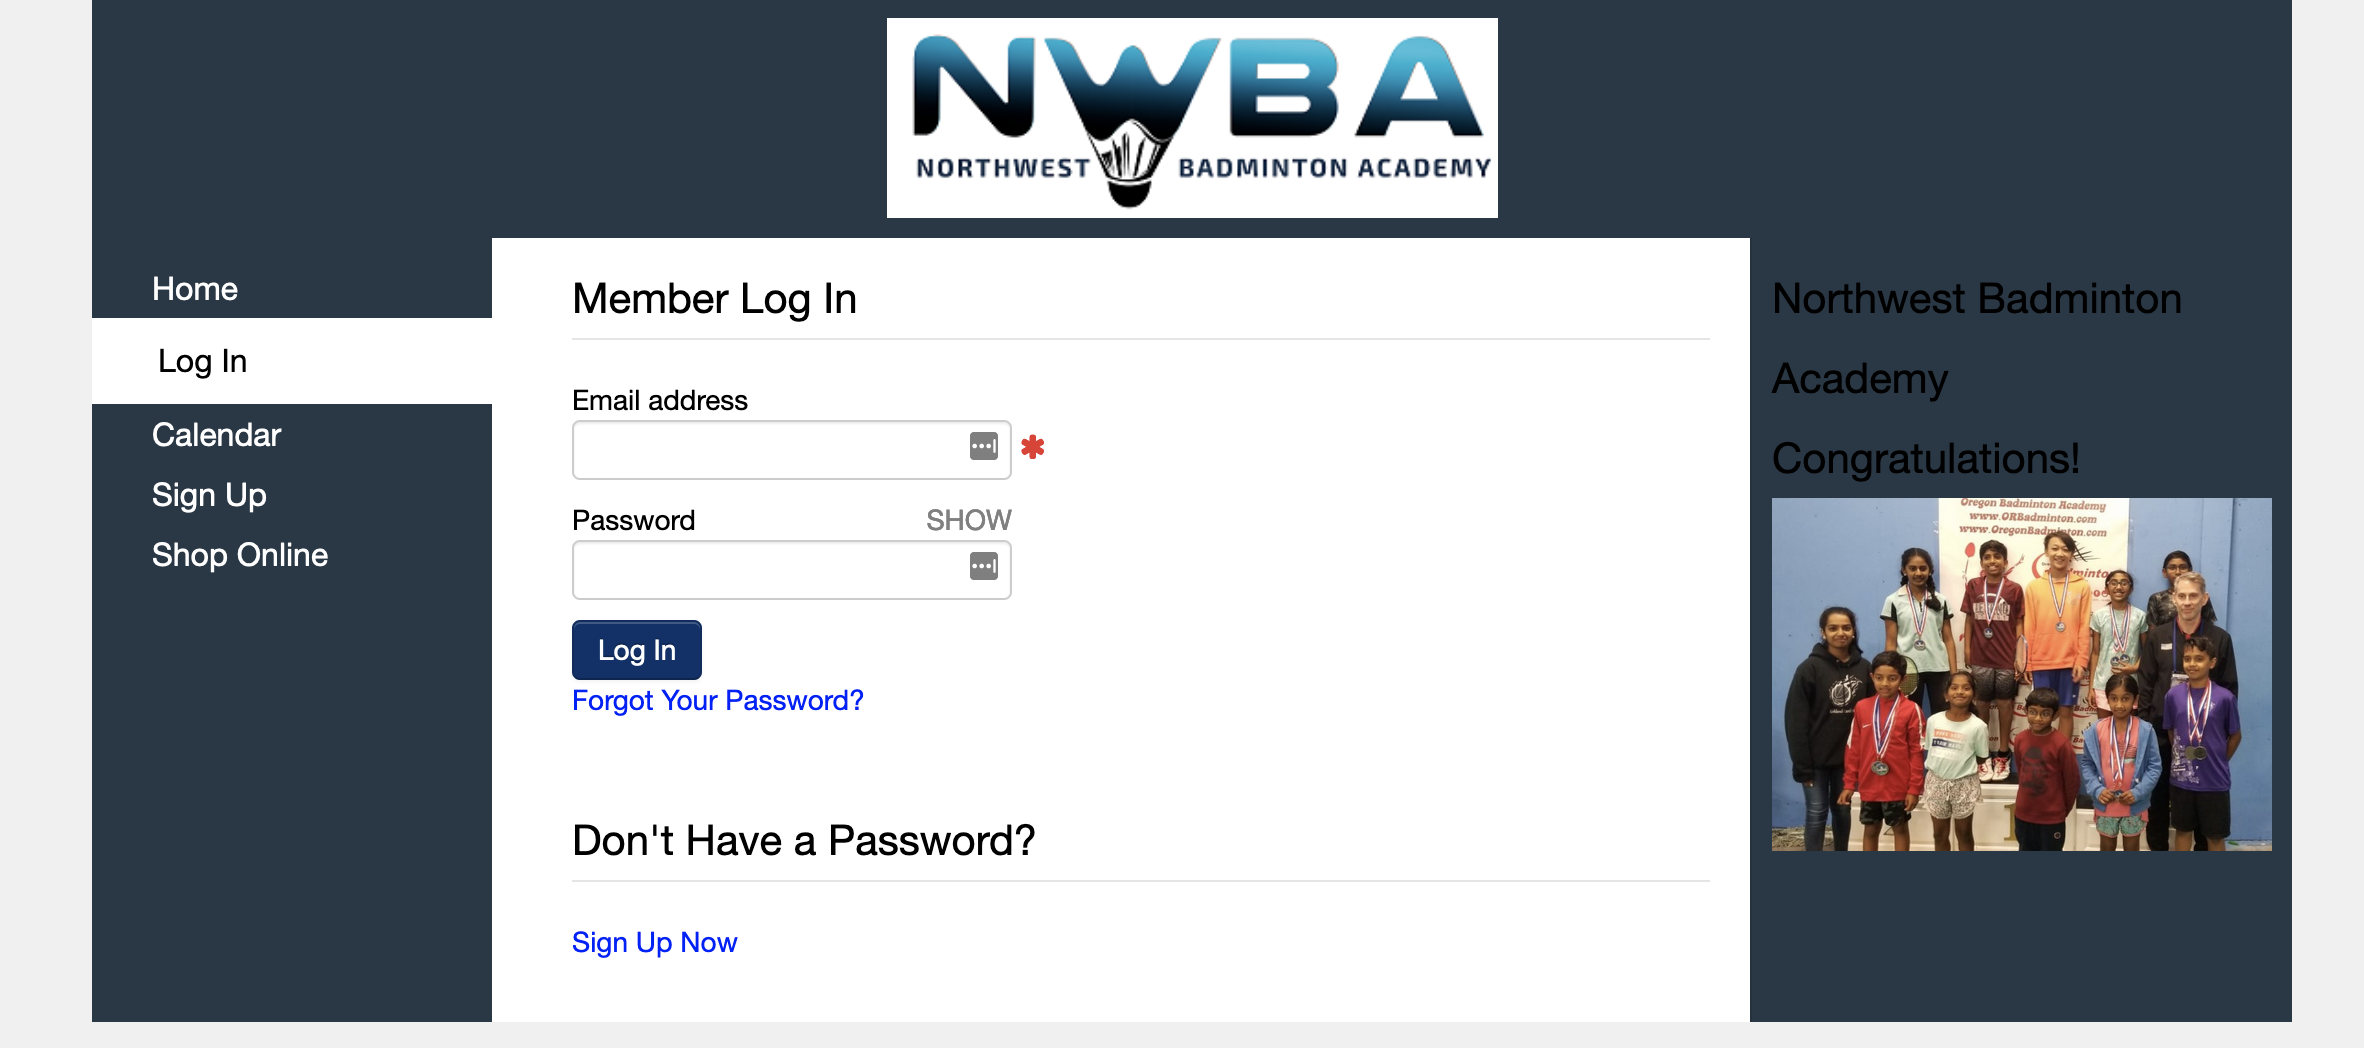
Once you go ahead and log in, you can go to the calendar page (link):
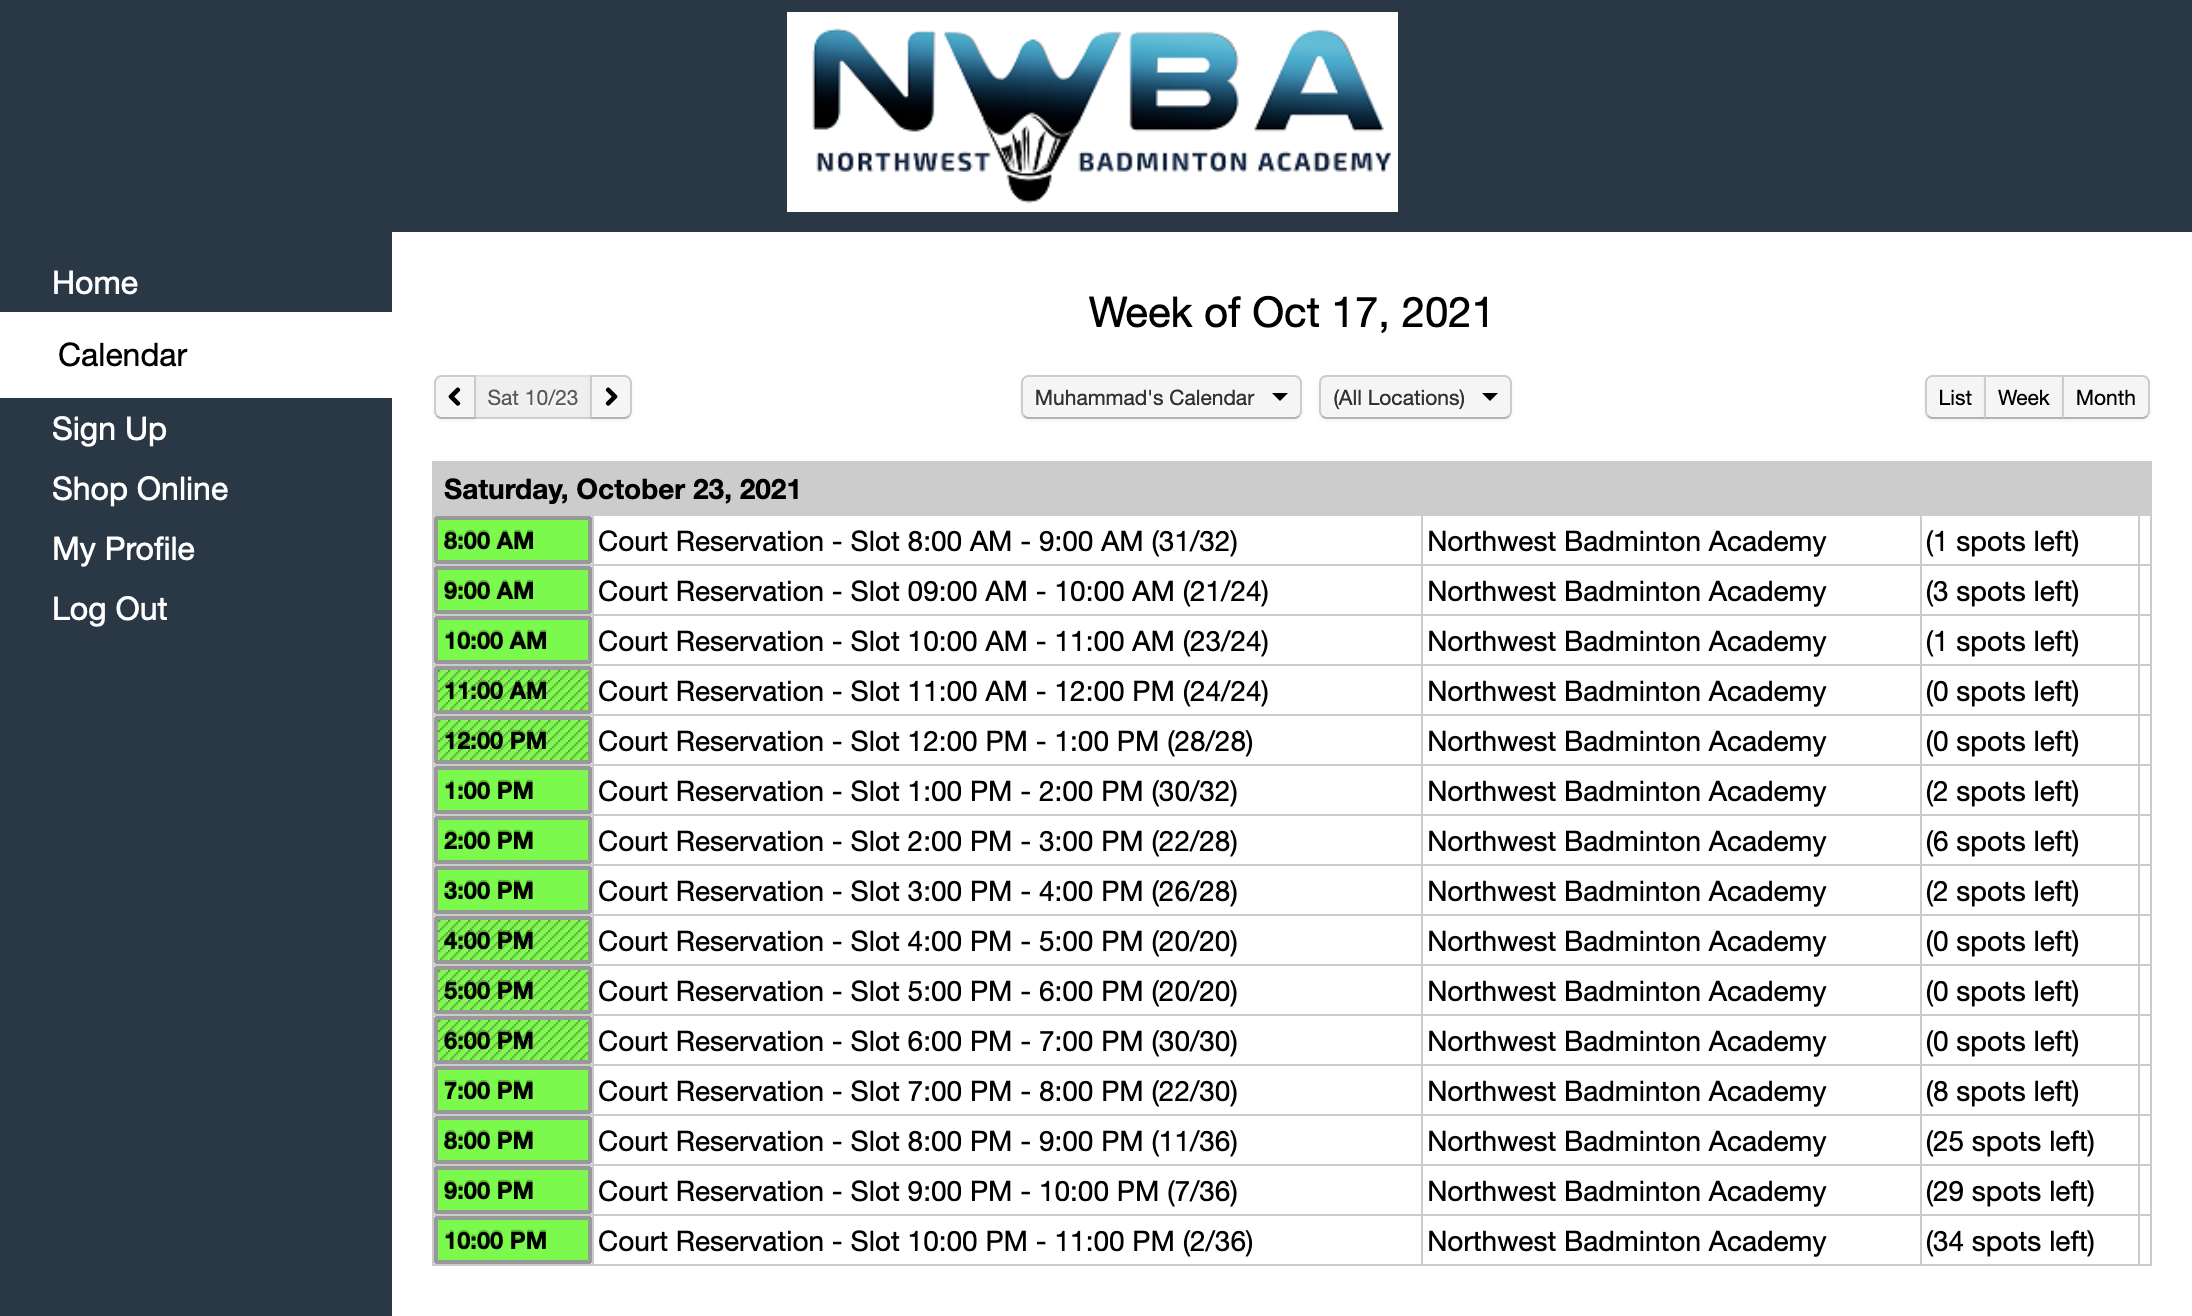
The calendar shows which timeslots are available, you can click on any time which has a few slots open and it will take you to the timeslot reservation page:
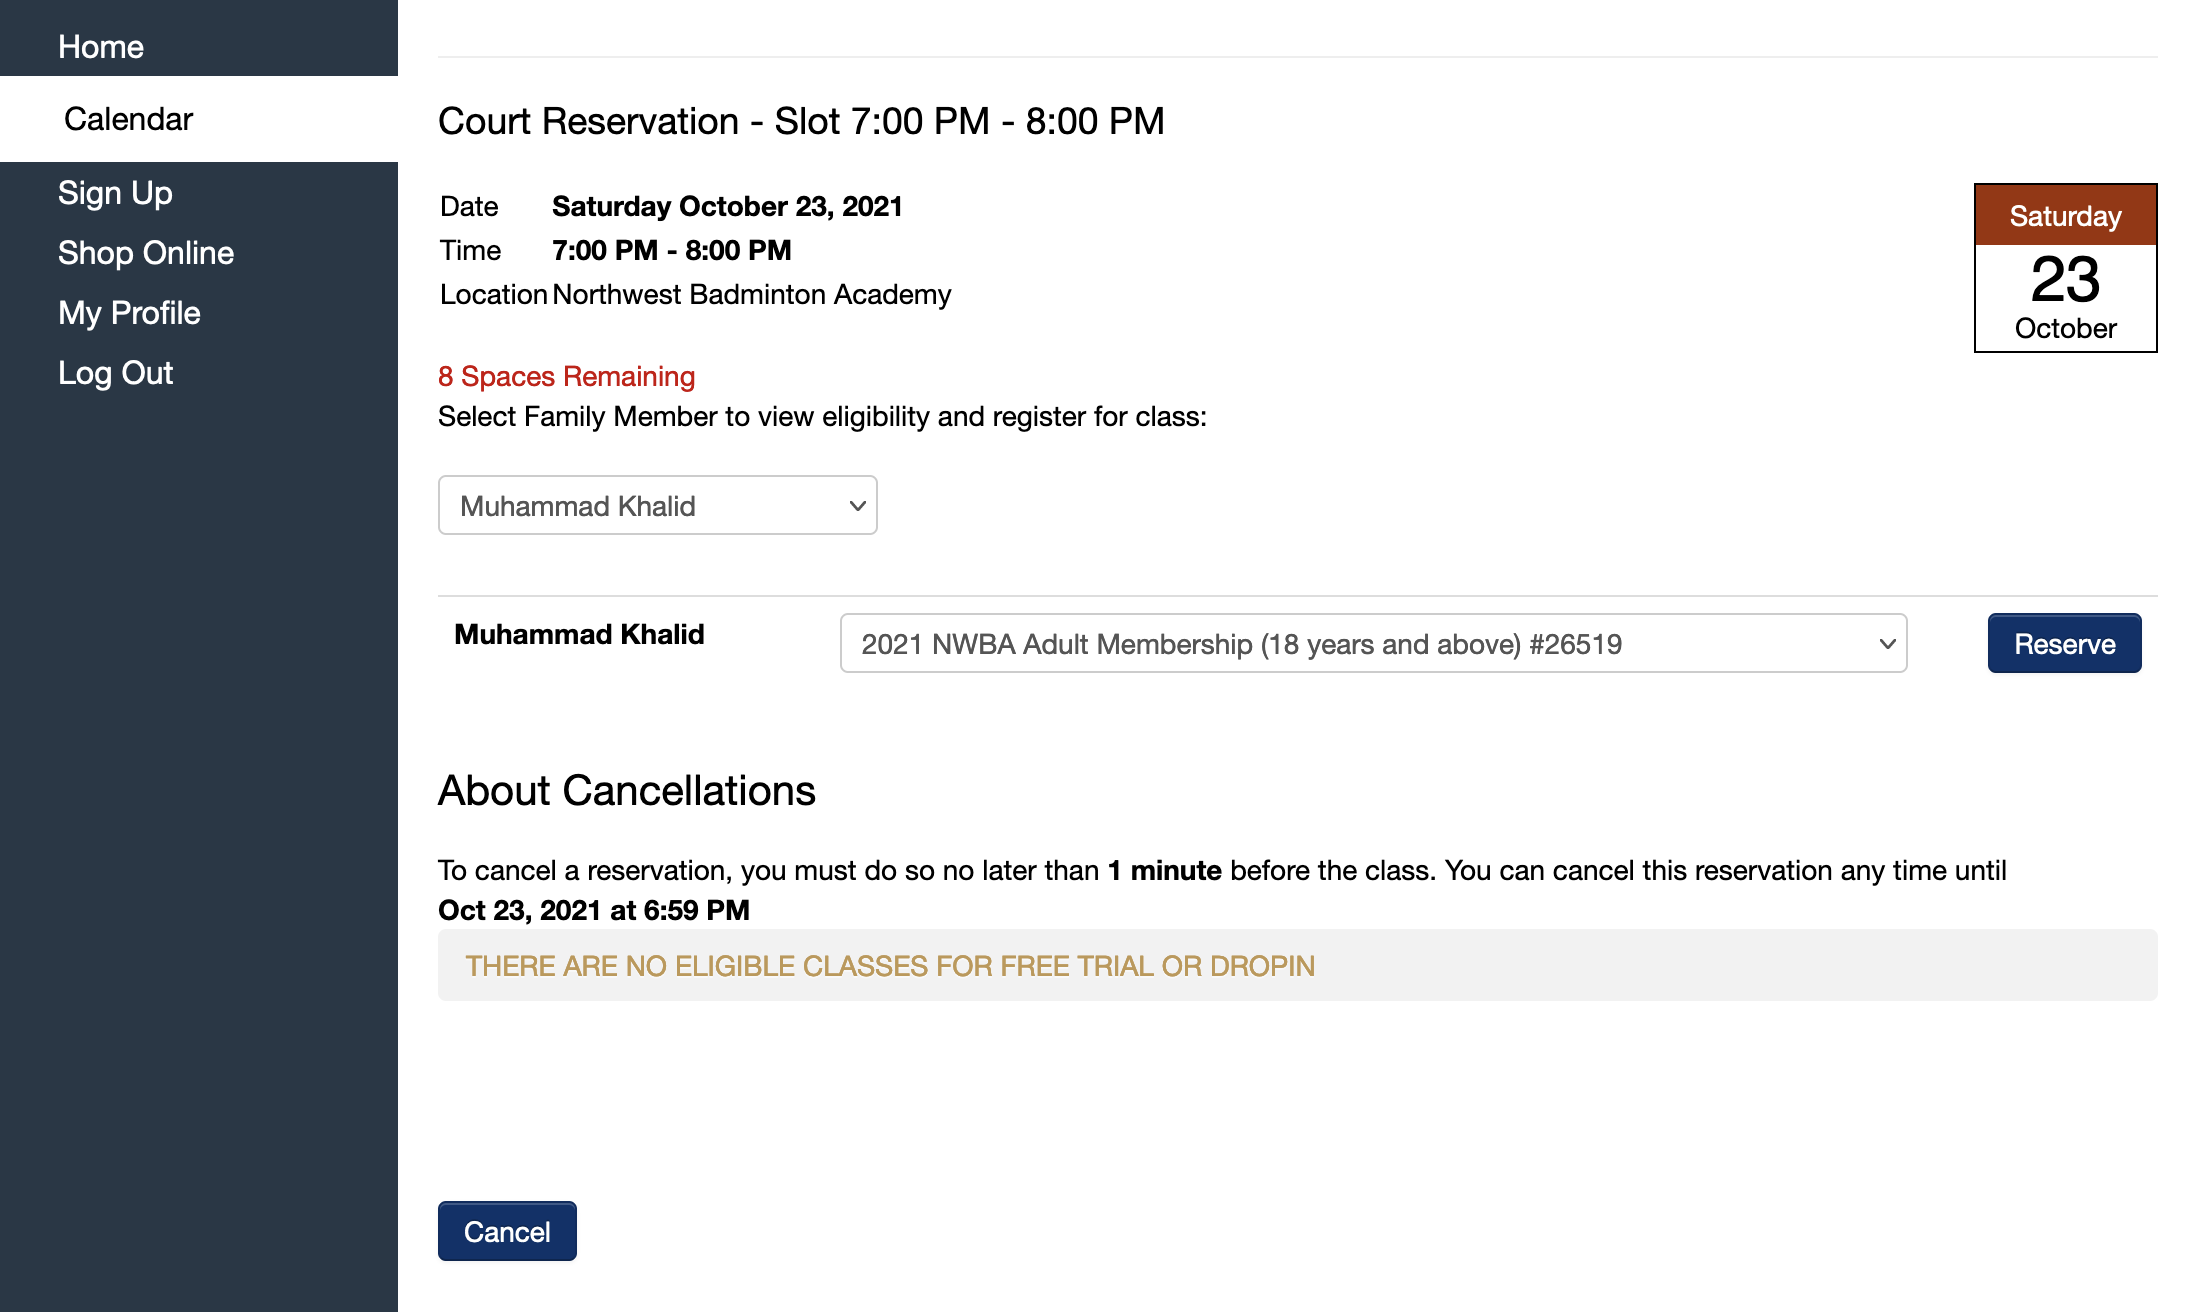
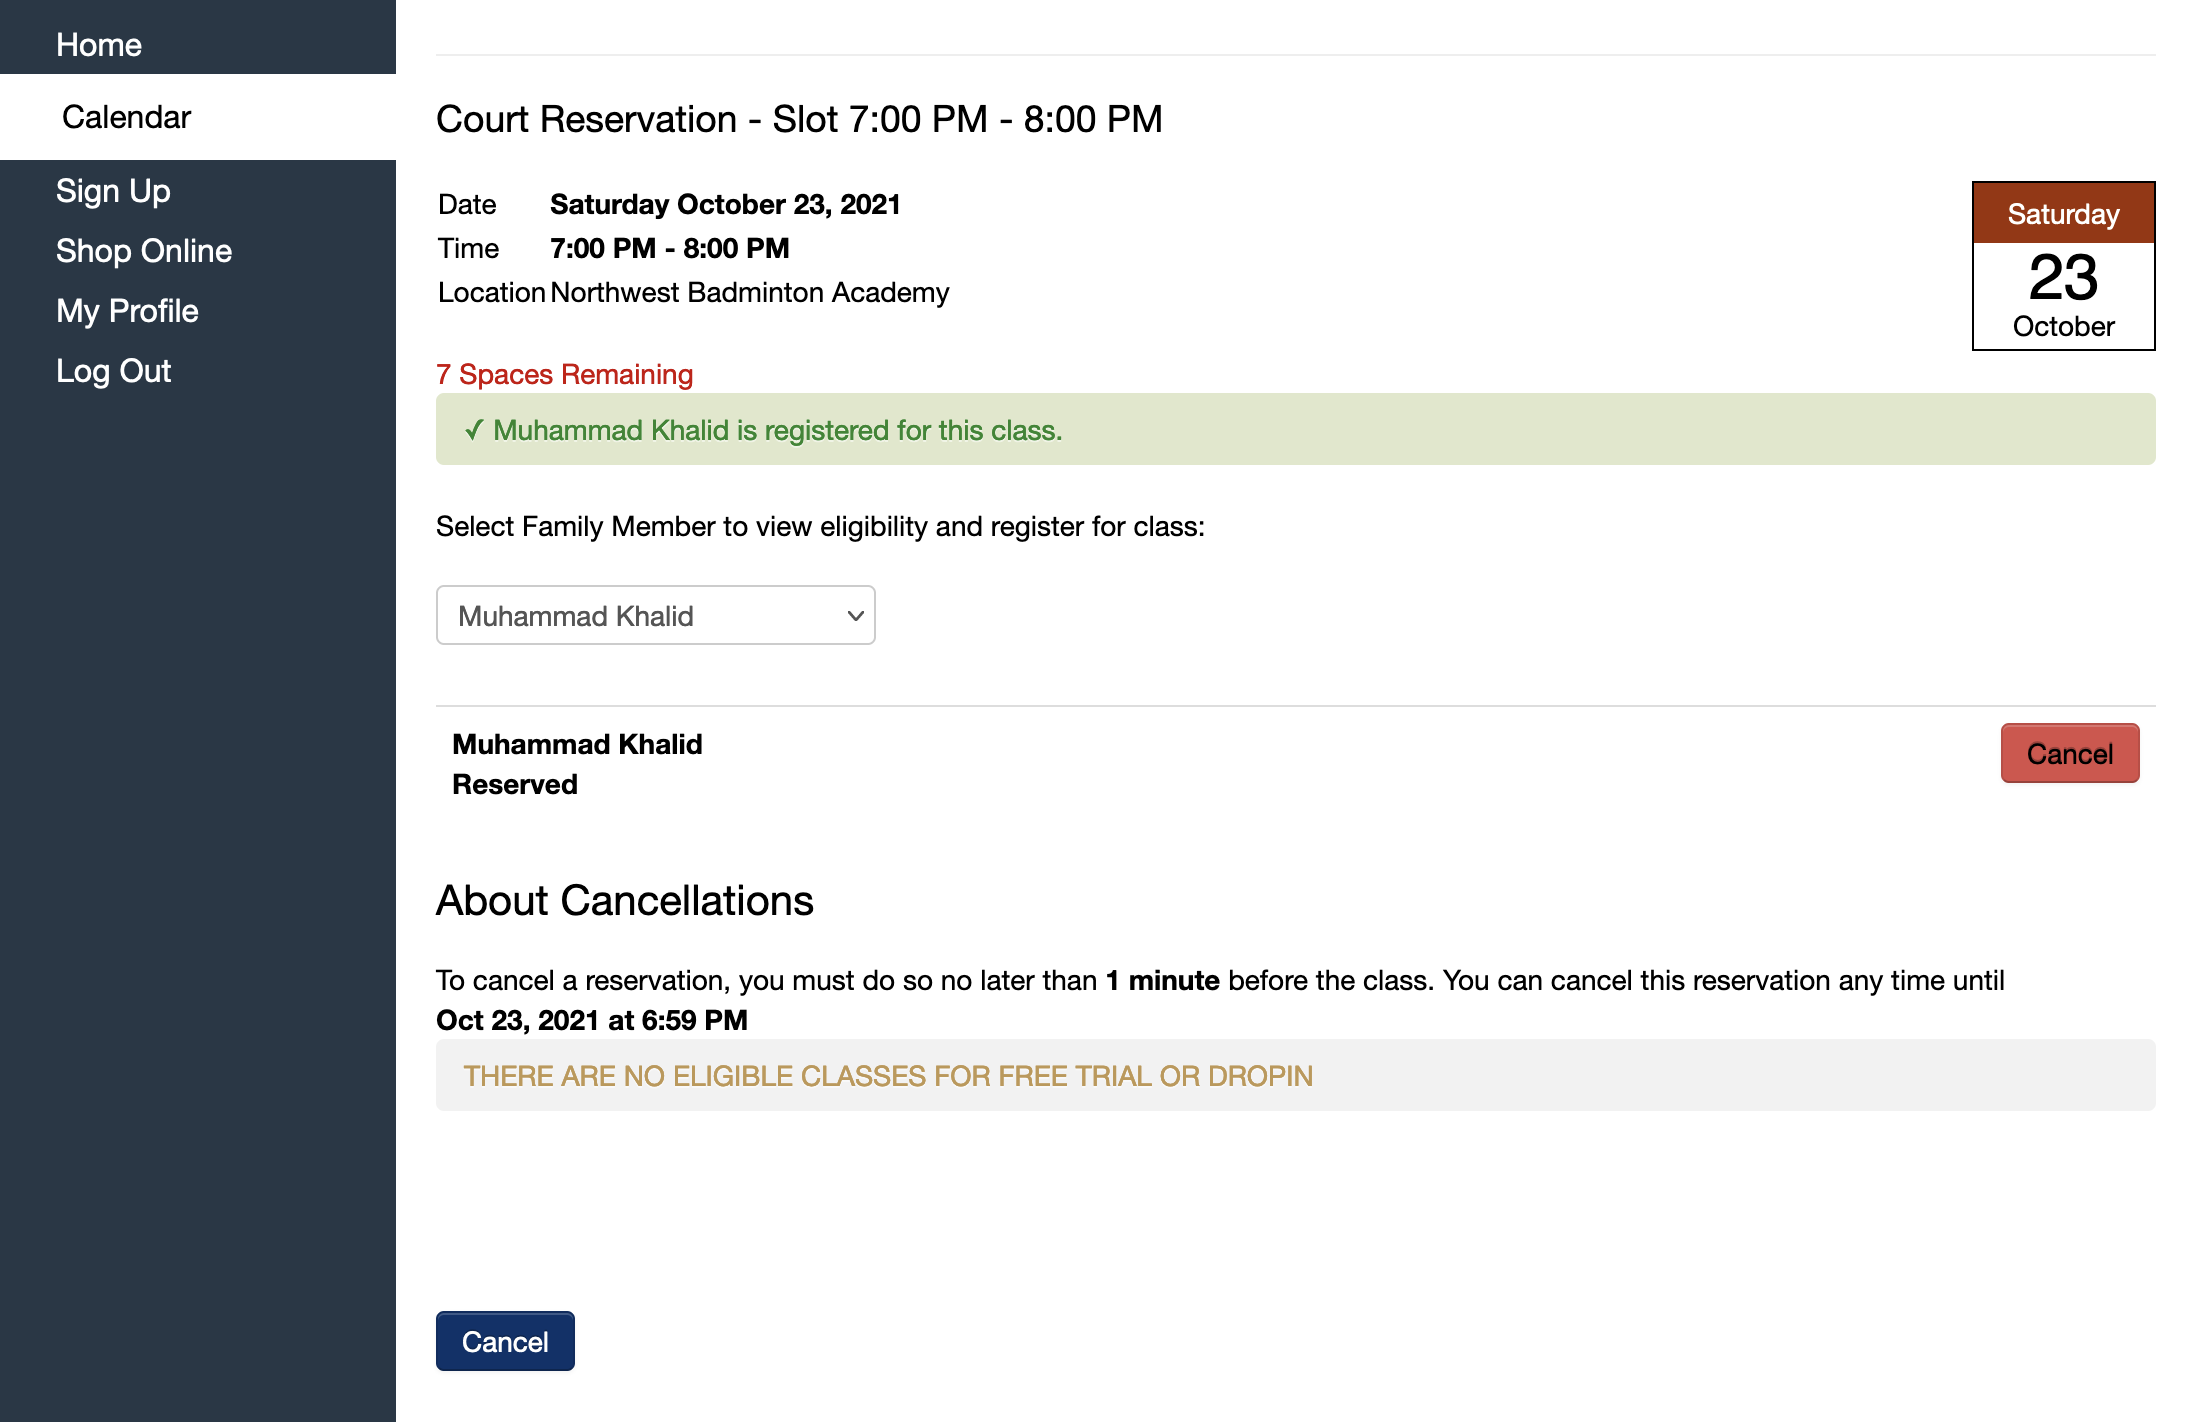
From here you can click on “Reserve” and the page should refresh and tell you that your reservation was successful.
And while following the booking rules, we can book a total of 5 slots each week. 3 of them during the week and 2 on weekends.
Now that we know the manual booking process, let’s figure out how to automate this.
Getting the tools ready
We will be using Python 3.9 for this project. We will be relying on Selenium for the automation. Let’s start by creating a brand new folder, creating a virtual environment in it, and installing selenium.
$ mkdir booking_bot
$ cd booking_bot
$ python -m venv venv
$ source venv/bin/activate
$ pip install selenium
Depending on which operating system you are using, you will have to download the respective Chrome webdriver as well. We will be using Chrome driver with selenium. You can go to the official Chrome driver website and download the latest stable release for your operating system. You will end up with a zip file and the zip file will contain a binary called “chromedriver”. Put this binary in the booking_bot folder.
Now we can go ahead and start with the actual coding.
Getting started with coding
I generally open up the Python REPL and also keep an app.py file open in the background. I test out new code in the REPL in an interactive fashion and then copy the code to the app.py file. This makes the iteration loop very quick and I don’t have to continuously re-run the app.py code with each small change. We will be doing the same here. Create an app.py file in the booking_bot folder and then run Python in a terminal.
Let’s start by importing selenium, firing up a Chrome instance, and opening the NWBA login page in it:
from selenium import webdriver

url = "https://northwestbadmintonacademy.sites.zenplanner.com/login.cfm"

browser = webdriver.Chrome(executable_path='./chromedriver')
browser.get(url)
The executable path might be different based on which folder you are running Python in the terminal from and where your chromedriver executable is saved. Modify the path accordingly.
If everything goes well, you should now have a Chrome window open that says “Chrome is being controlled by automated test software”.
Automating login
The way automation with selenium works is that we need to tell selenium which HTML tags we want to interact with and what do we want to do with them. Automating the login involves telling Selenium which fields on the page are the username and password fields and what value do we want to pass on to them and then which button is the submit button.
We can help Selenium find the relevant tags on the page in multiple ways. We can use any of the following methods:
- find_element_by_id
- find_element_by_name
- find_element_by_xpath
- find_element_by_link_text
- find_element_by_partial_link_text
- find_element_by_tag_name
- find_element_by_class_name
- find_element_by_css_selector
You can find complete documentation for each of these methods over here.
At this point, we can open up developer tools in Chrome and inspect the input field and see which method might suit our needs the best.
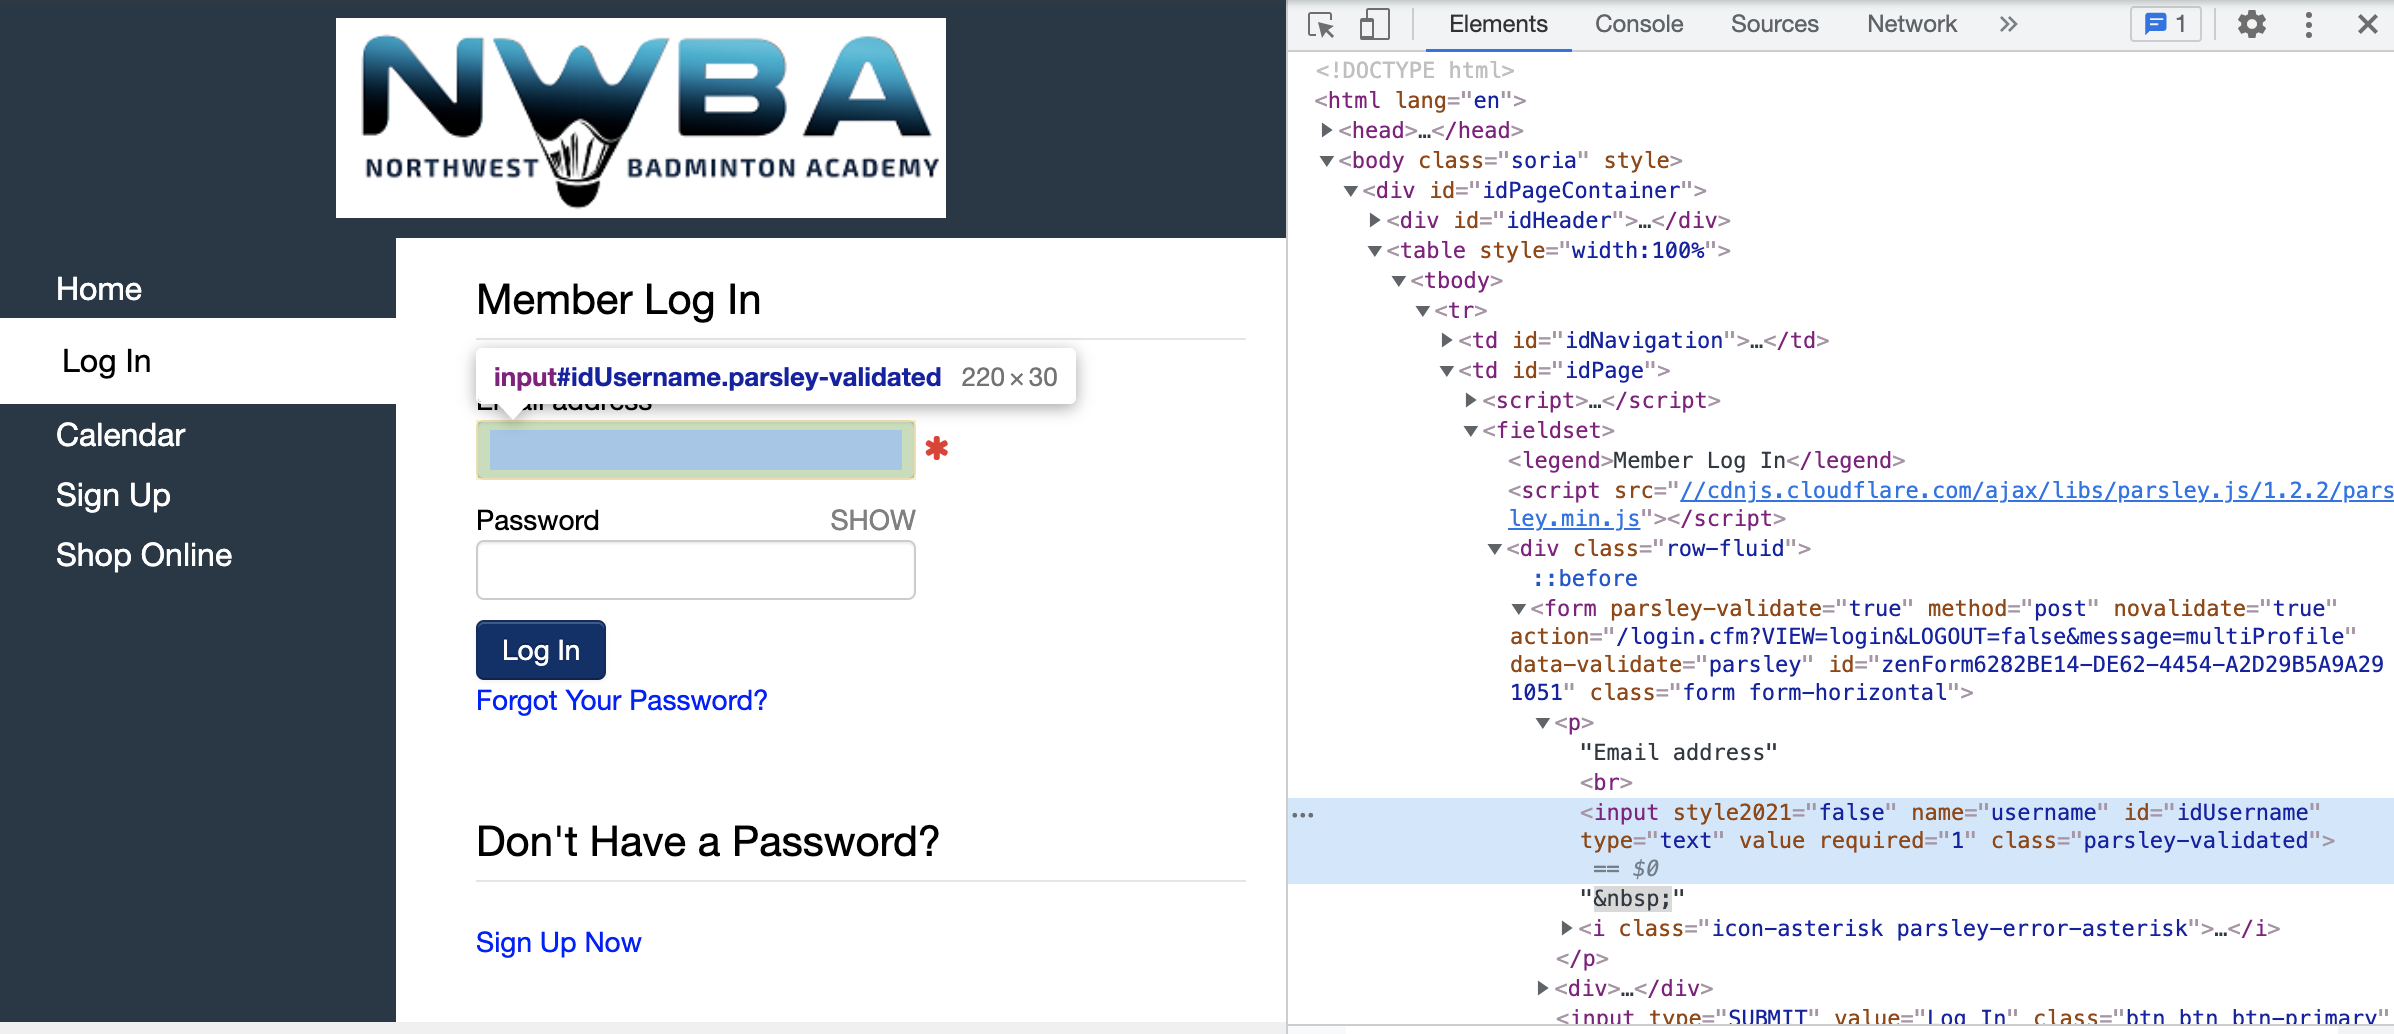
Based on the HTML code for the input fields, it seems like we can just use the name attribute of the input tag to uniquely identify it.
user_block = browser.find_element("name", "username")
pw_block = browser.find_element_by_name("password")
We can pass in values for these fields using the send_keys method:
user_block.send_keys("your_email")
pw_block.send_keys("your_password")
Now we need to uniquely identify the “Log In” button. I will show you how to use my favorite method to do that. We will be using XPath. They have never failed me and they are versatile enough to be used everywhere. XPath is a language used for locating nodes in an XML document and it works equally well in HTML as well. There is a little bit of syntax that you need to learn but most of the time a quick Google search for a particular use-case is enough.
The “Log In” button has the type SUBMIT and we will be locating it based on the type. The code for this is:
submit_button = browser.find_element_by_xpath("//input[@type='SUBMIT']")
We are using find_element_by_xpath method here as compared to find_elements_by_xpath. This only returns one element. As for the XPath, // tells selenium to find the input tag no matter how deeply nested it is in the document. The type tells it to find only those input tags that have a type of SUBMIT.
Clicking the submit button is now as easy as:
submit_button.click()
If everything goes well, this will redirect us to the Profile view.
Automating calendar interaction
We need to figure out how to get from the profile view to the Calendar page. Thankfully there is a handy Calendar button in the sidebar.
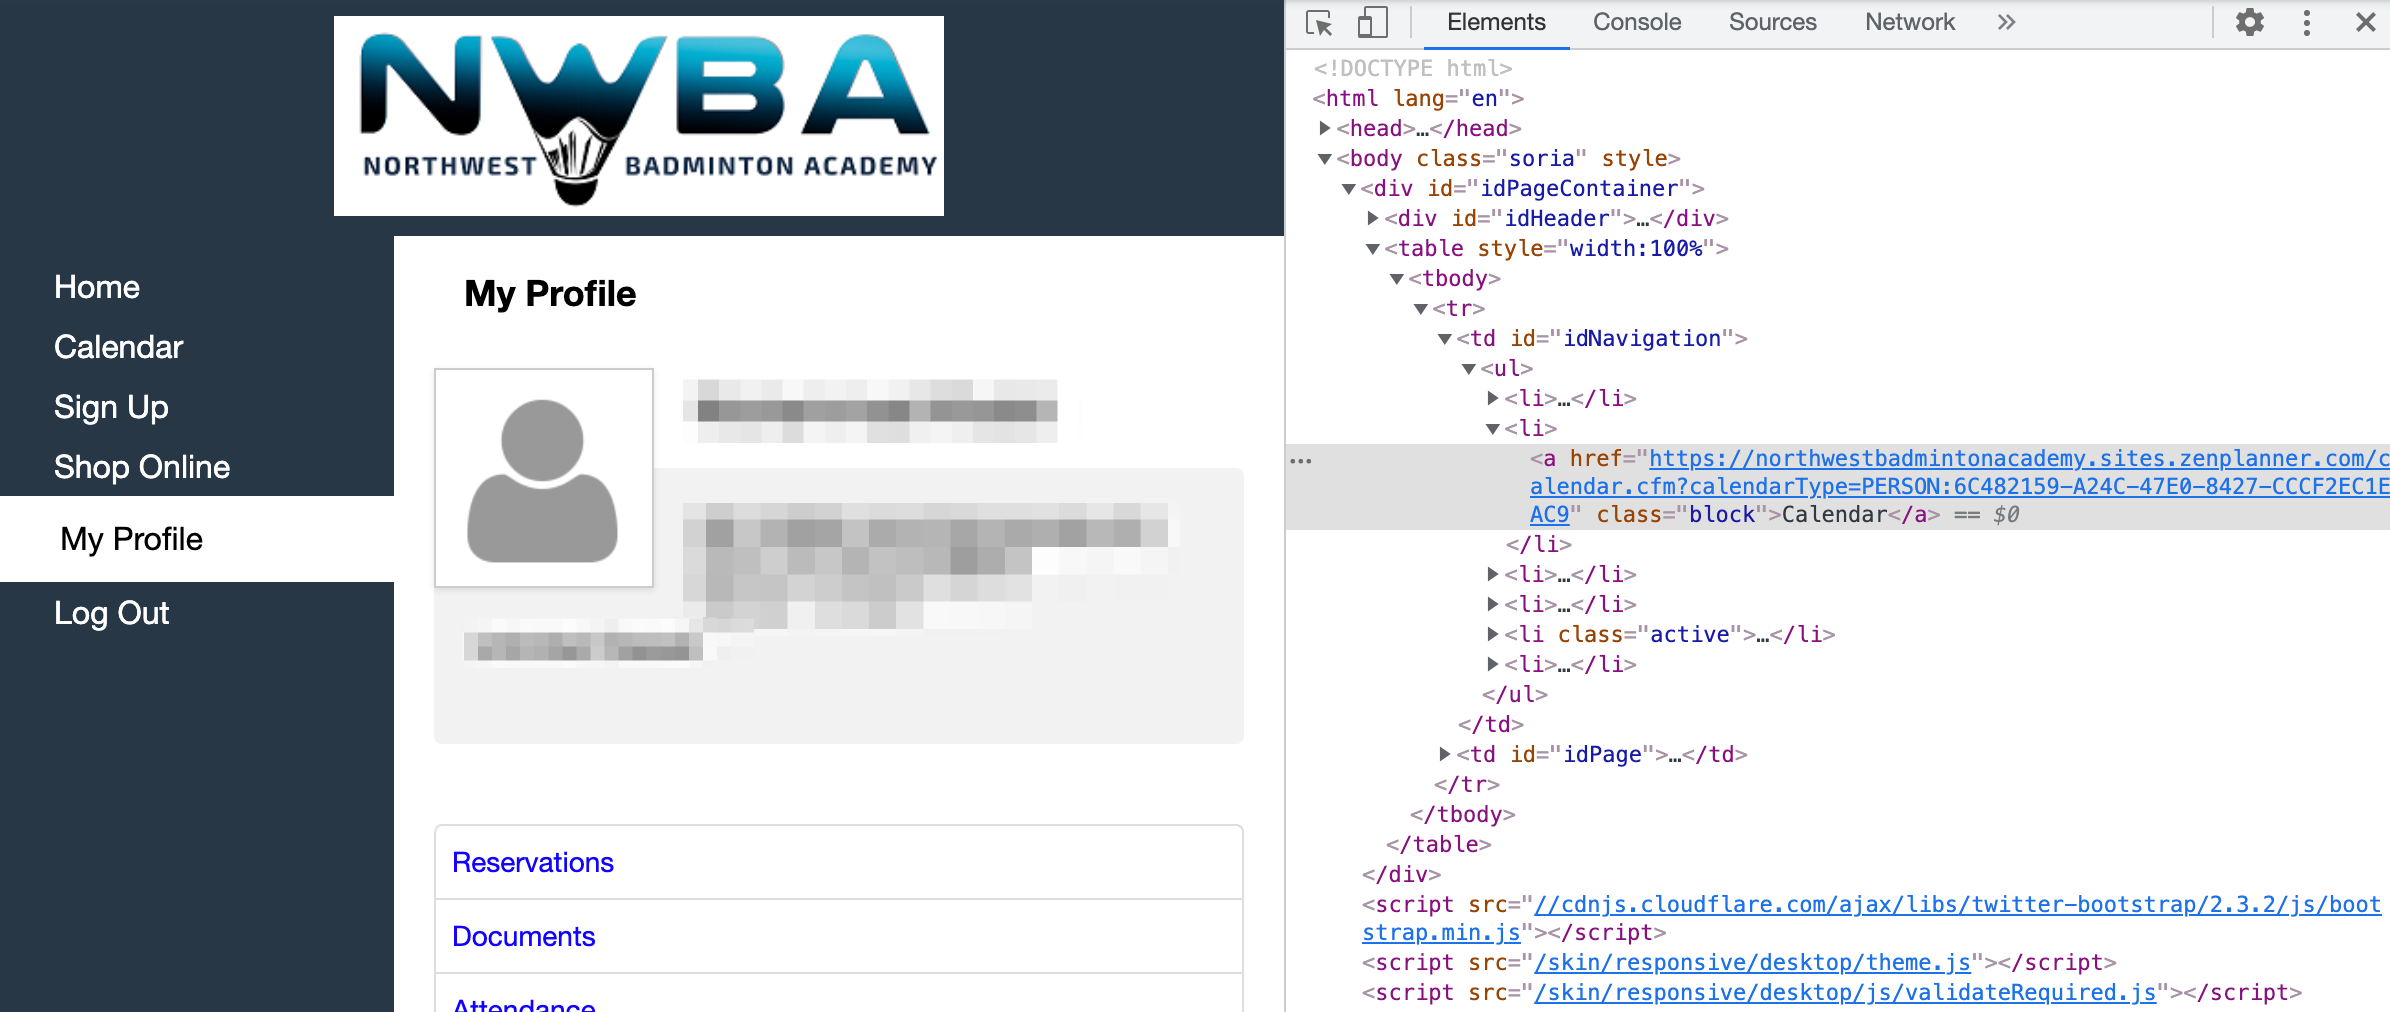
We can locate this button in multiple ways using XPath. I will demonstrate two of them here just to show you the power of XPath. The first one is:
calendar_btn = browser.find_element_by_xpath("//td[@id='idNavigation']//li[2]/a")
//td[@id='idNavigation']returns thetdtags with the id ofidNavigation//li[2]selects the secondlinested under thetdtag (counting starts from 1 in XPath)/aselects the directachild ofli
The second method is:
calendar_btn = browser.find_element_by_xpath("//a[text()='Calendar']")
This selects the a tag in the HTML document that has the text Calendar.
You can use whichever one you prefer and add the follow-up code for clicking the button:
calendar_btn.click()
This should take us to the Calendar page.
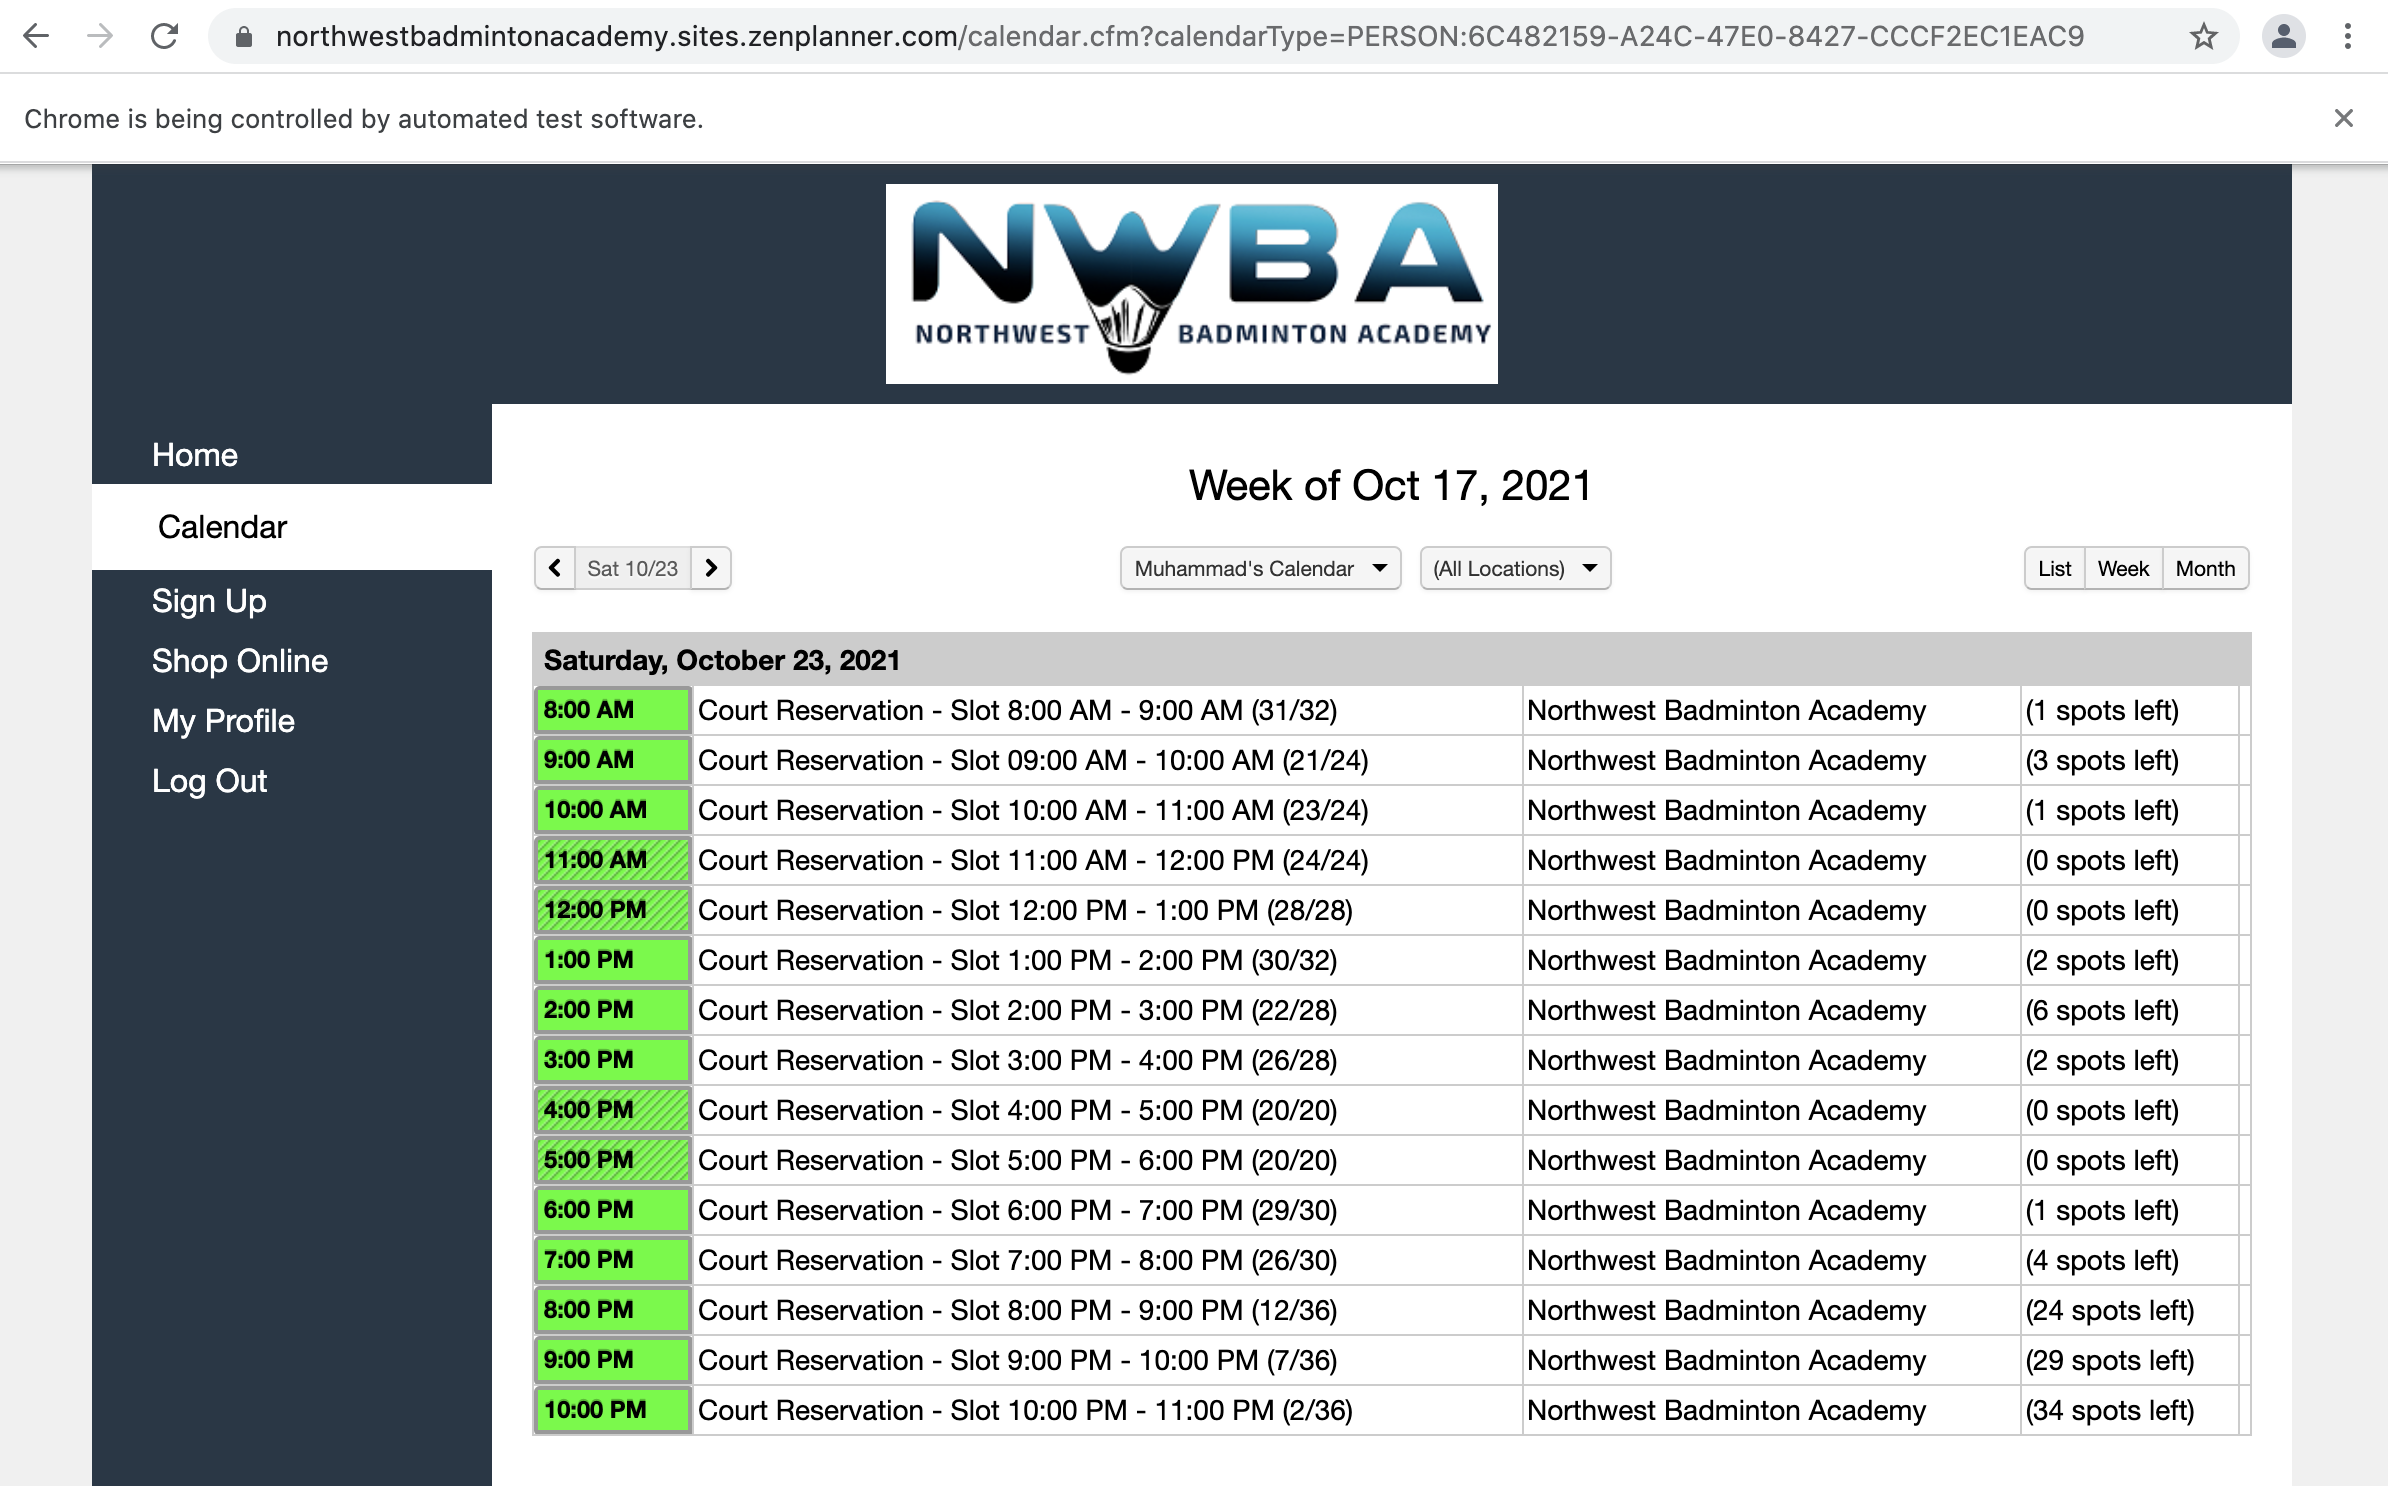
This only shows one date but we want to navigate to whichever date we want. There are again two ways to do it. We can either click the arrow icons right next to the date or we can figure out the URL pattern for dates and recreate that ourselves. Just for a little bit of challenge, I will go with the latter option.
Go ahead, copy the current URL, navigate to a different date and compare the two URLs and see what changed.
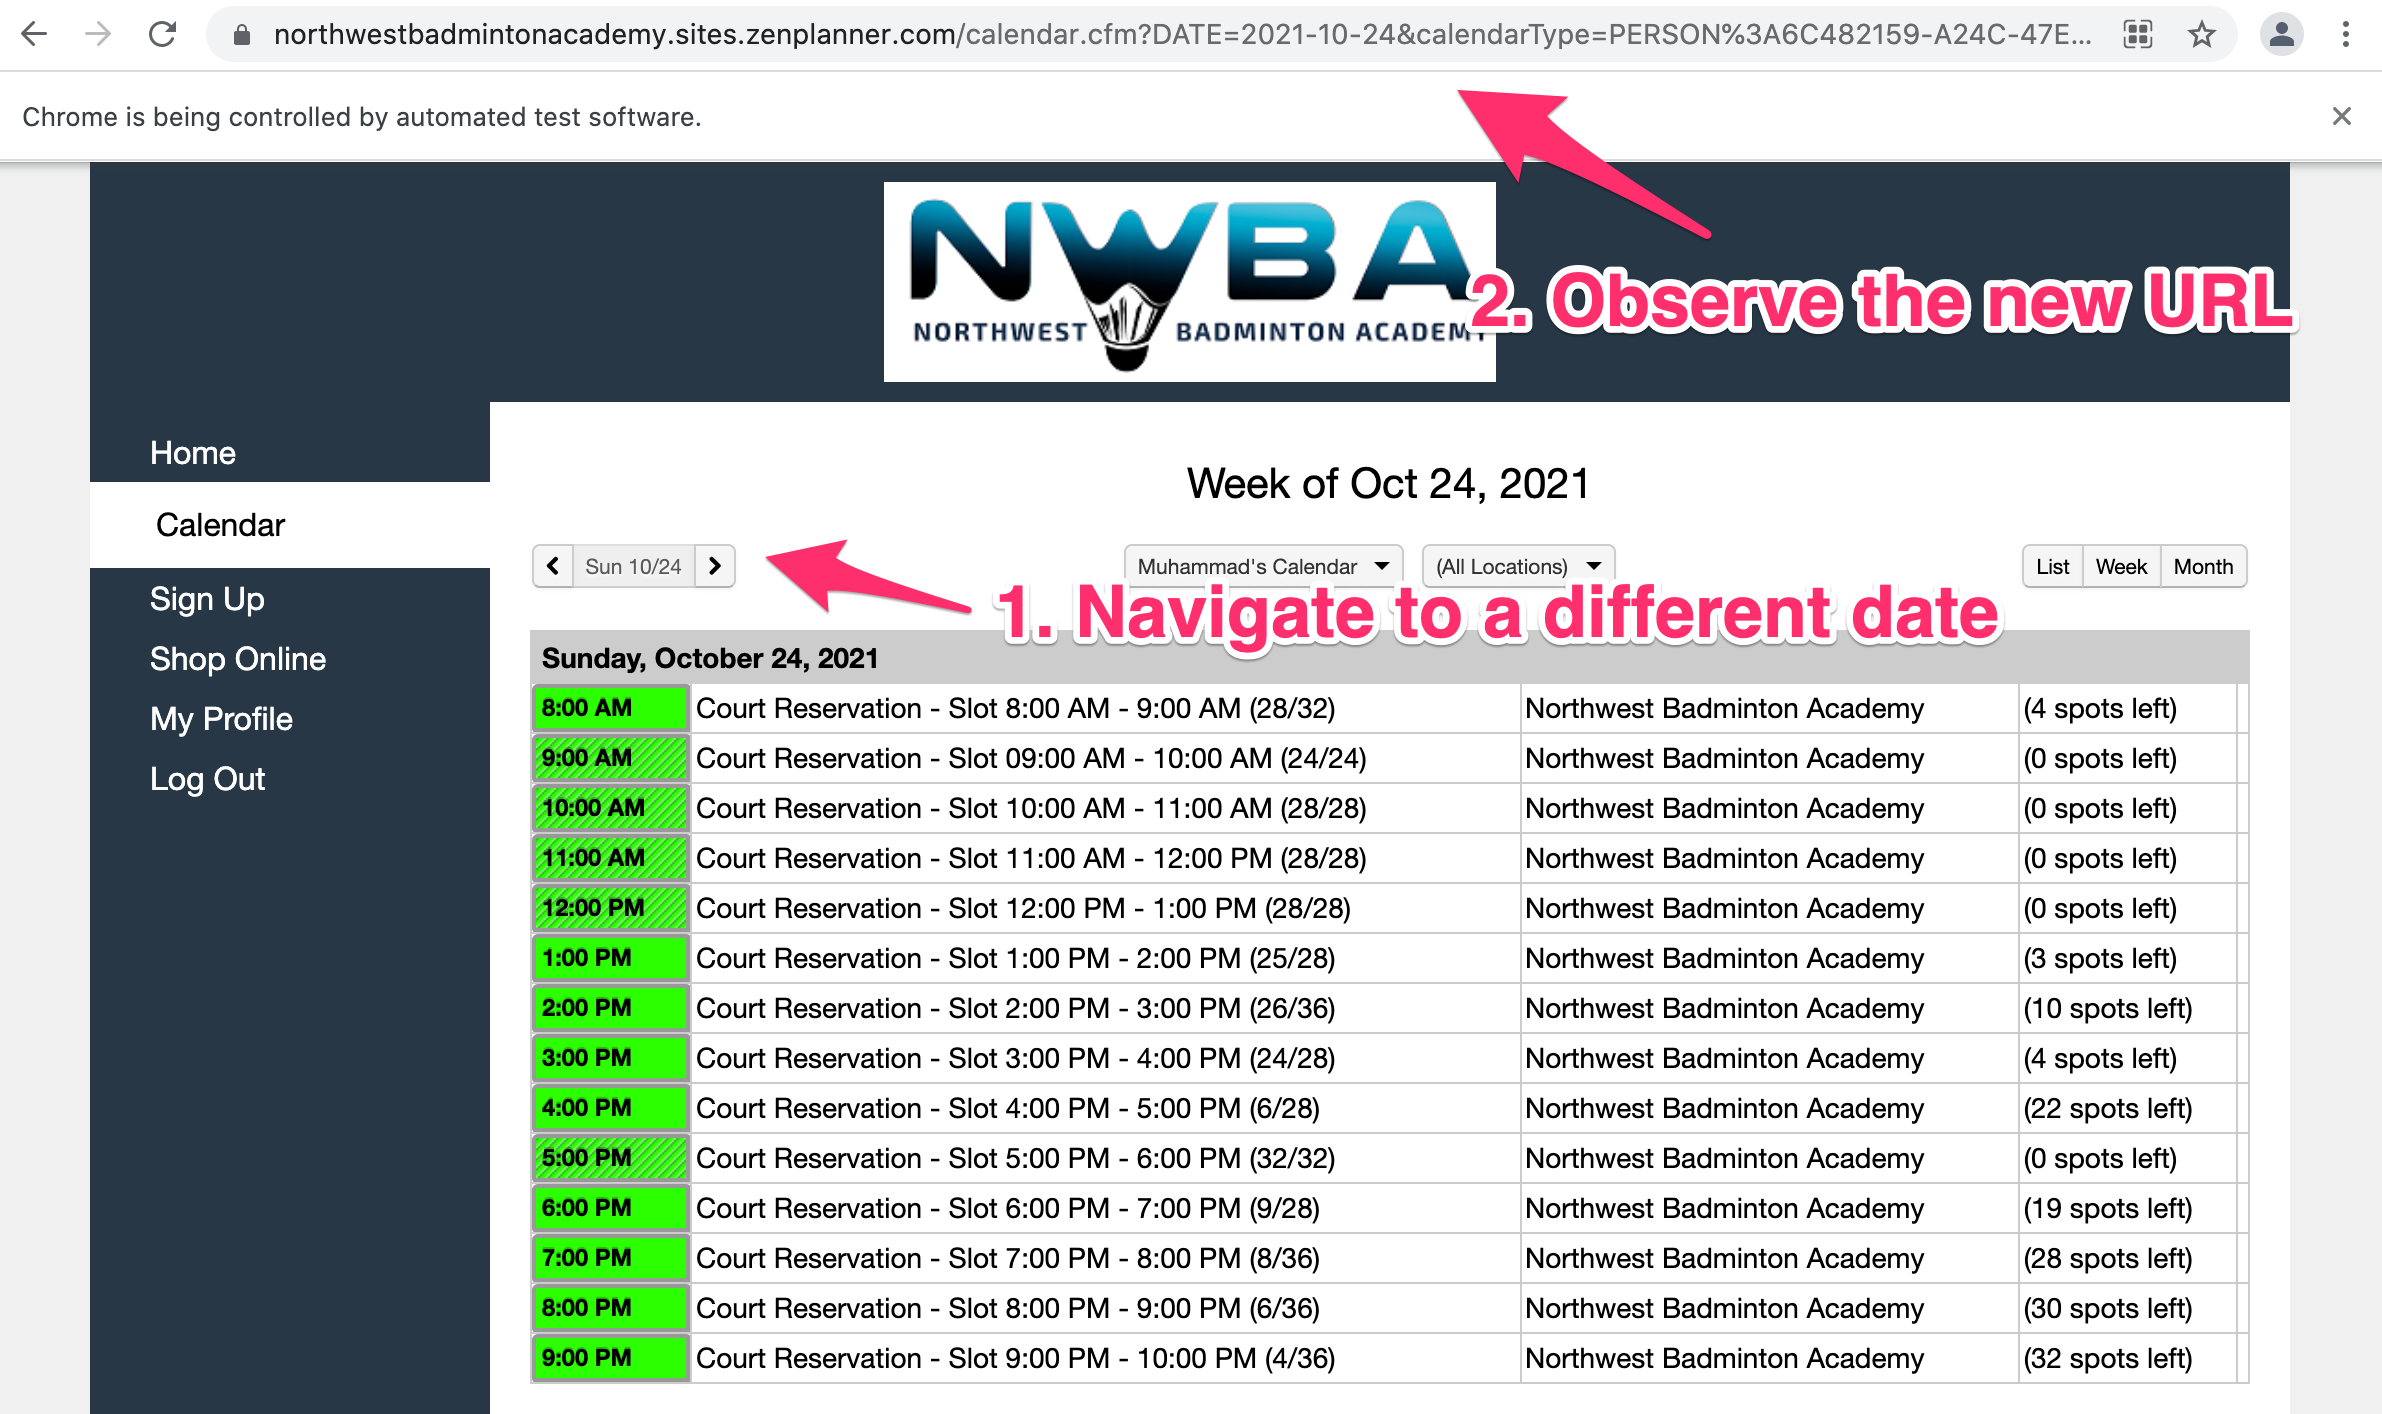
The initial URL was:
https://northwestbadmintonacademy.sites.zenplanner.com/calendar.cfm?calendarType=PERSON:6C482159-B1D5-47E0-8427-CCCF2EC1DAC9
The new URL is:
https://northwestbadmintonacademy.sites.zenplanner.com/calendar.cfm?DATE=2021-10-25&calendarType=PERSON:6C482159-B1D5-47E0-8427-CCCF2EC1DAC9&VIEW=LIST&PERSONID=6C482159-B1D5-47E0-8427-CCCF2EC1DAC9
Seems like there are two dynamic parts of the URL. The first one is the date and the second one is a PERSON identifier. I wonder if we can get the PERSON identifier from the HTML document. The identifier is a part of the initial URL as well so it seems like the Calendar button already has it. We can extract the identifier very easy:
user_id = calendar_btn.get_attribute('href').split('=')[-1].split(':')[-1]
We had already located the calendar button. We just needed the HREF attribute of that tag and Selenium makes it super easy to extract attributes from tags.
We don’t need the whole HREF so we split it at =:
['https://northwestbadmintonacademy.sites.zenplanner.com/calendar.cfm?calendarType', 'PERSON:6C482159-B1D5-47E0-8427-CCCF2EC1DAC9']
We then take the latter half and split it at : and take the last element from the returning list:
['PERSON', '6C482159-B1D5-47E0-8427-CCCF2EC1DAC9']
Now we can recreate the specific date URL ourselves:
query_date = "2021-10-24"
calendar_date_link = f"https://northwestbadmintonacademy.sites.zenplanner.com/calendar.cfm?DATE={query_date}&calendarType=PERSON:{user_id}&VIEW=LIST&PERSONID={user_id}"
While we are at it, let’s create a separate method to return the next 7 dates:
import datetime

def next_7_dates():
    today = datetime.datetime.today()
    date_list = []
    for x in range(0,7):
        new_date = today + datetime.timedelta(days=x)
        date_list.append(new_date.strftime('%Y-%m-%d'))
    return date_list
We use the datetime library to get today’s date and then use timedelta to add more days to it and finally use strftime to only extract the year (%Y), month (%m), and day (%d) from it.
Let’s look at the calendar itself now. We can click on any green date that has a few spots open and go to the final booking page:
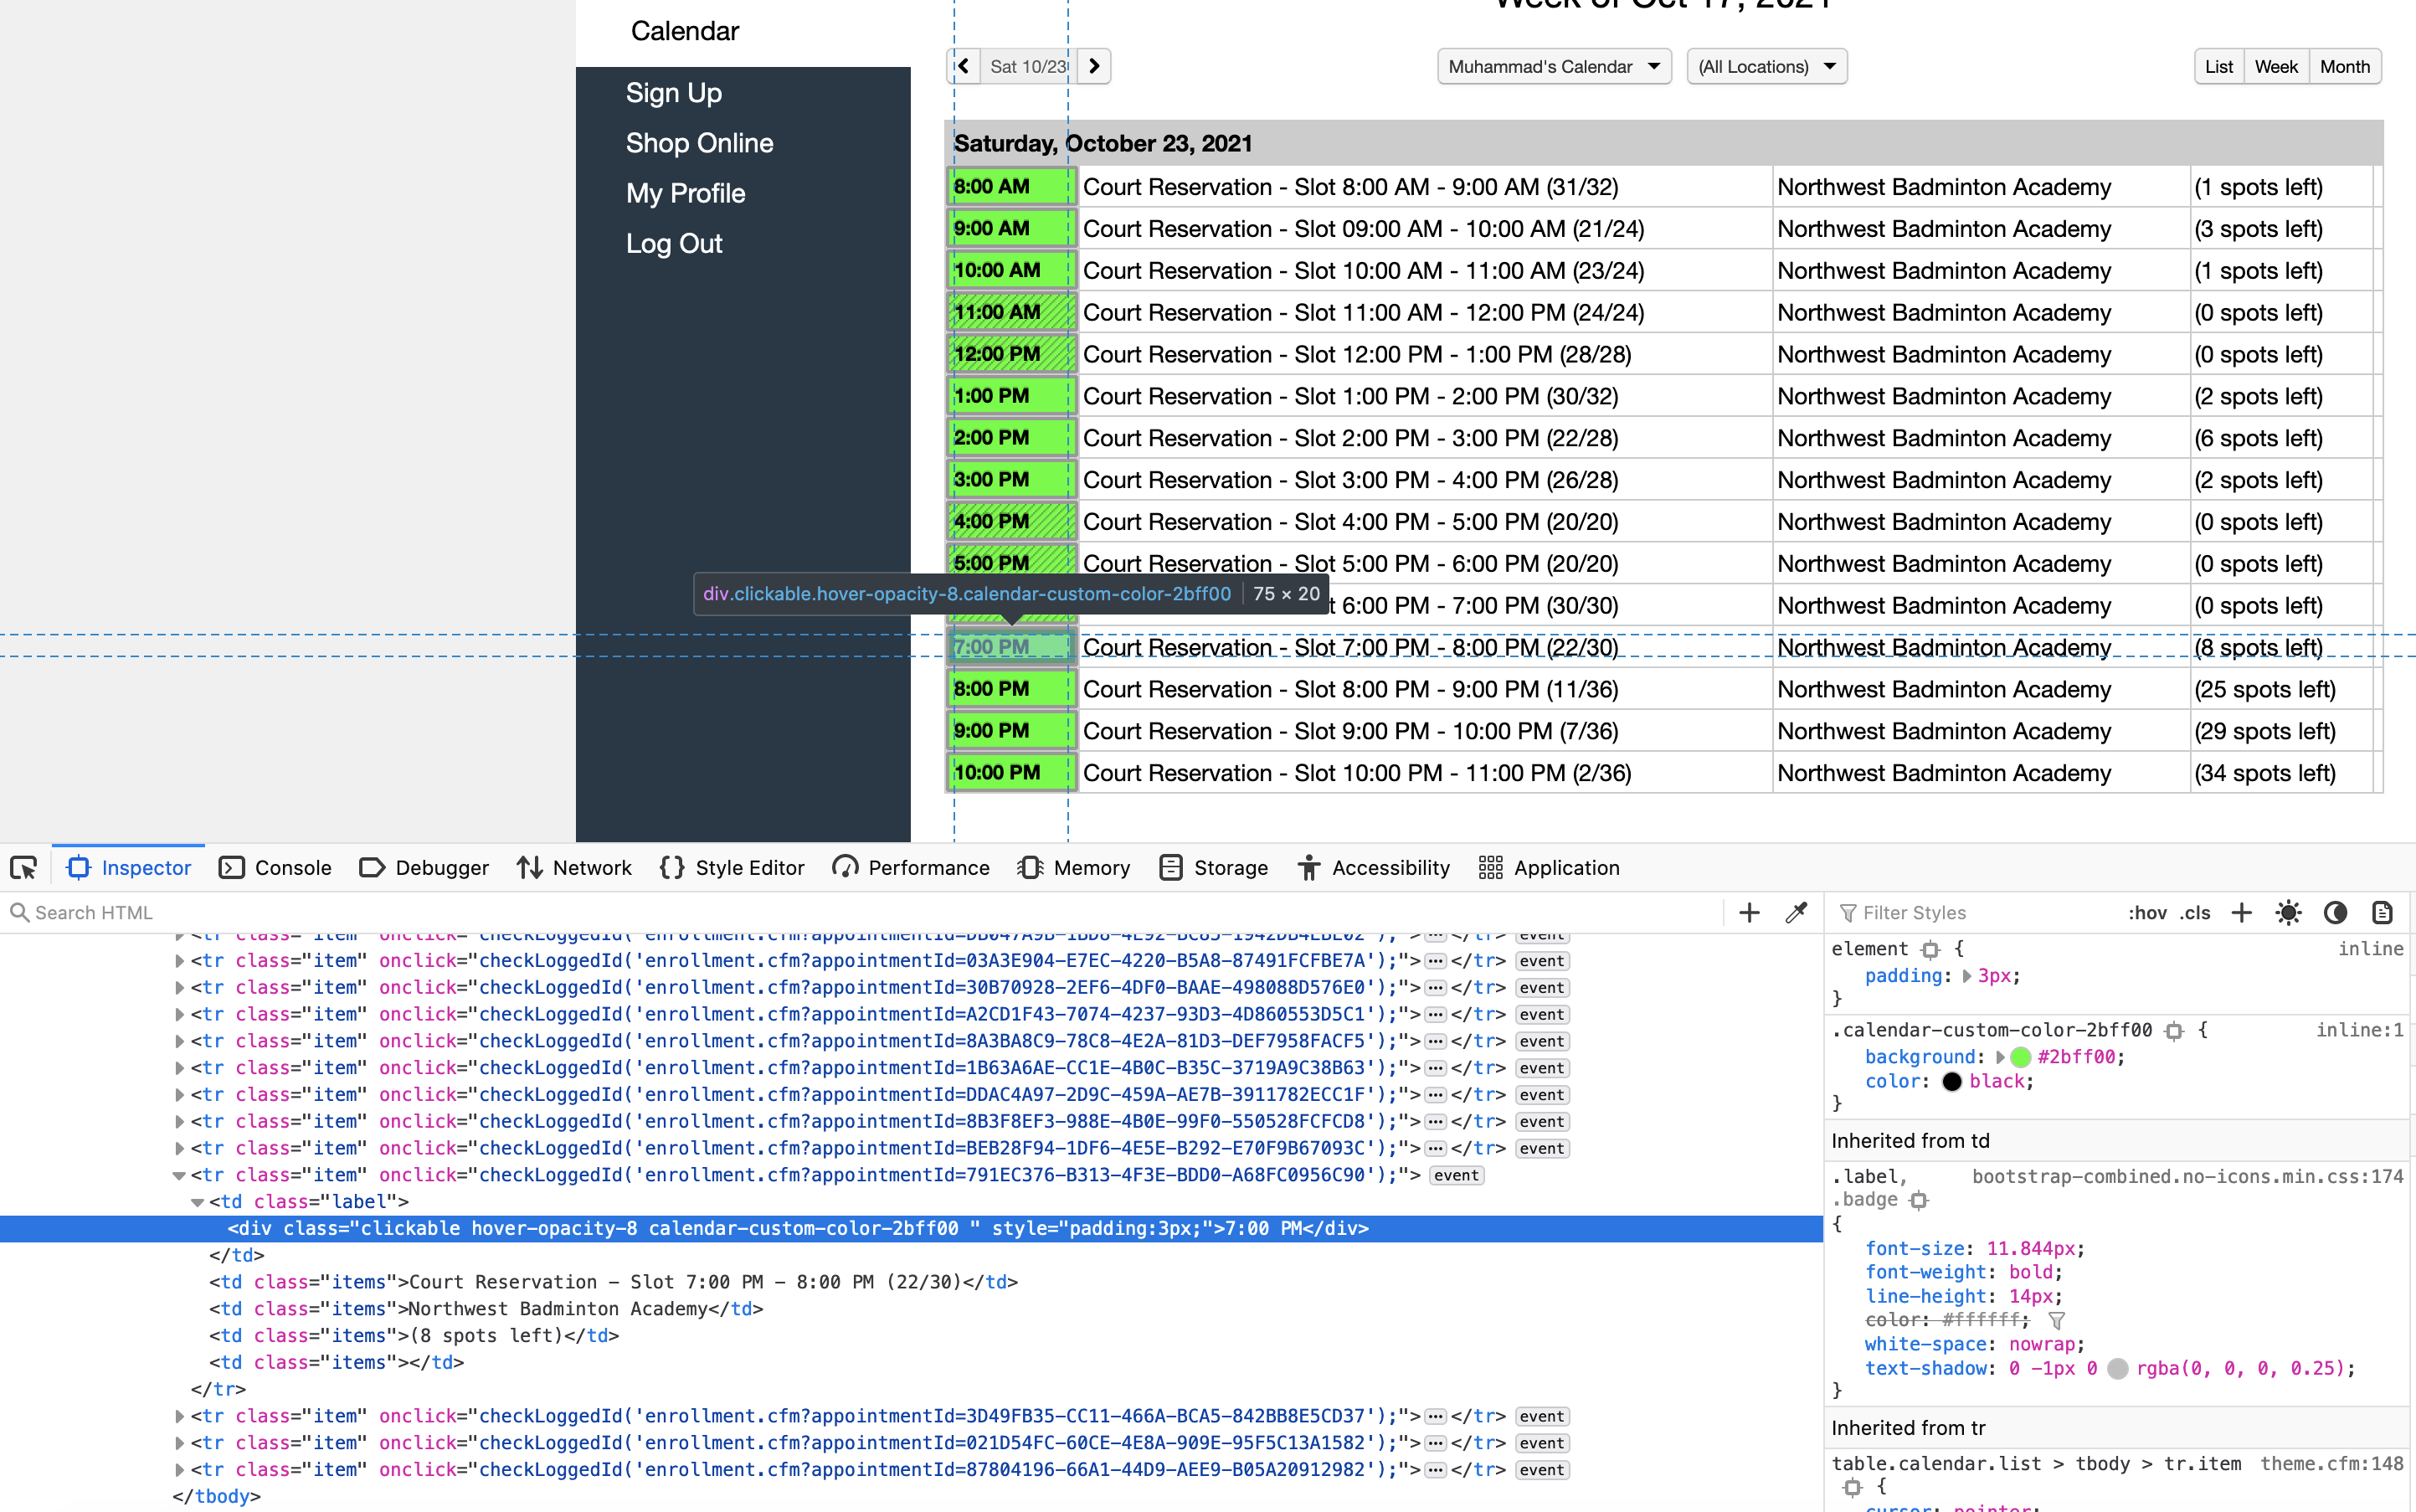
I generally prefer to play at 6 pm so we can add some logic where our automation bot looks at the available times and figures out if our favorite time is available or not. If it is not available it will then go to the next page. This is simple enough to code:
booking_link = browser.find_element_by_xpath("//div[text()='6:00 PM']")
full = 'sessionFull' in booking_link.get_attribute('class')
if not full:
    booking_link.click()
We are making use of the building blocks that we have already learned about. We locate the div tag that has our required time as text. We then check if there are any slots available via the existence of sessionFull class on the div tag. If the timeslot is not full, we click on the booking link.
Automating the final booking
After clicking on one of the timeslot links, we should now be redirected to the final booking page. From here we just need to click on the Reserve button and then verify that we got booked.
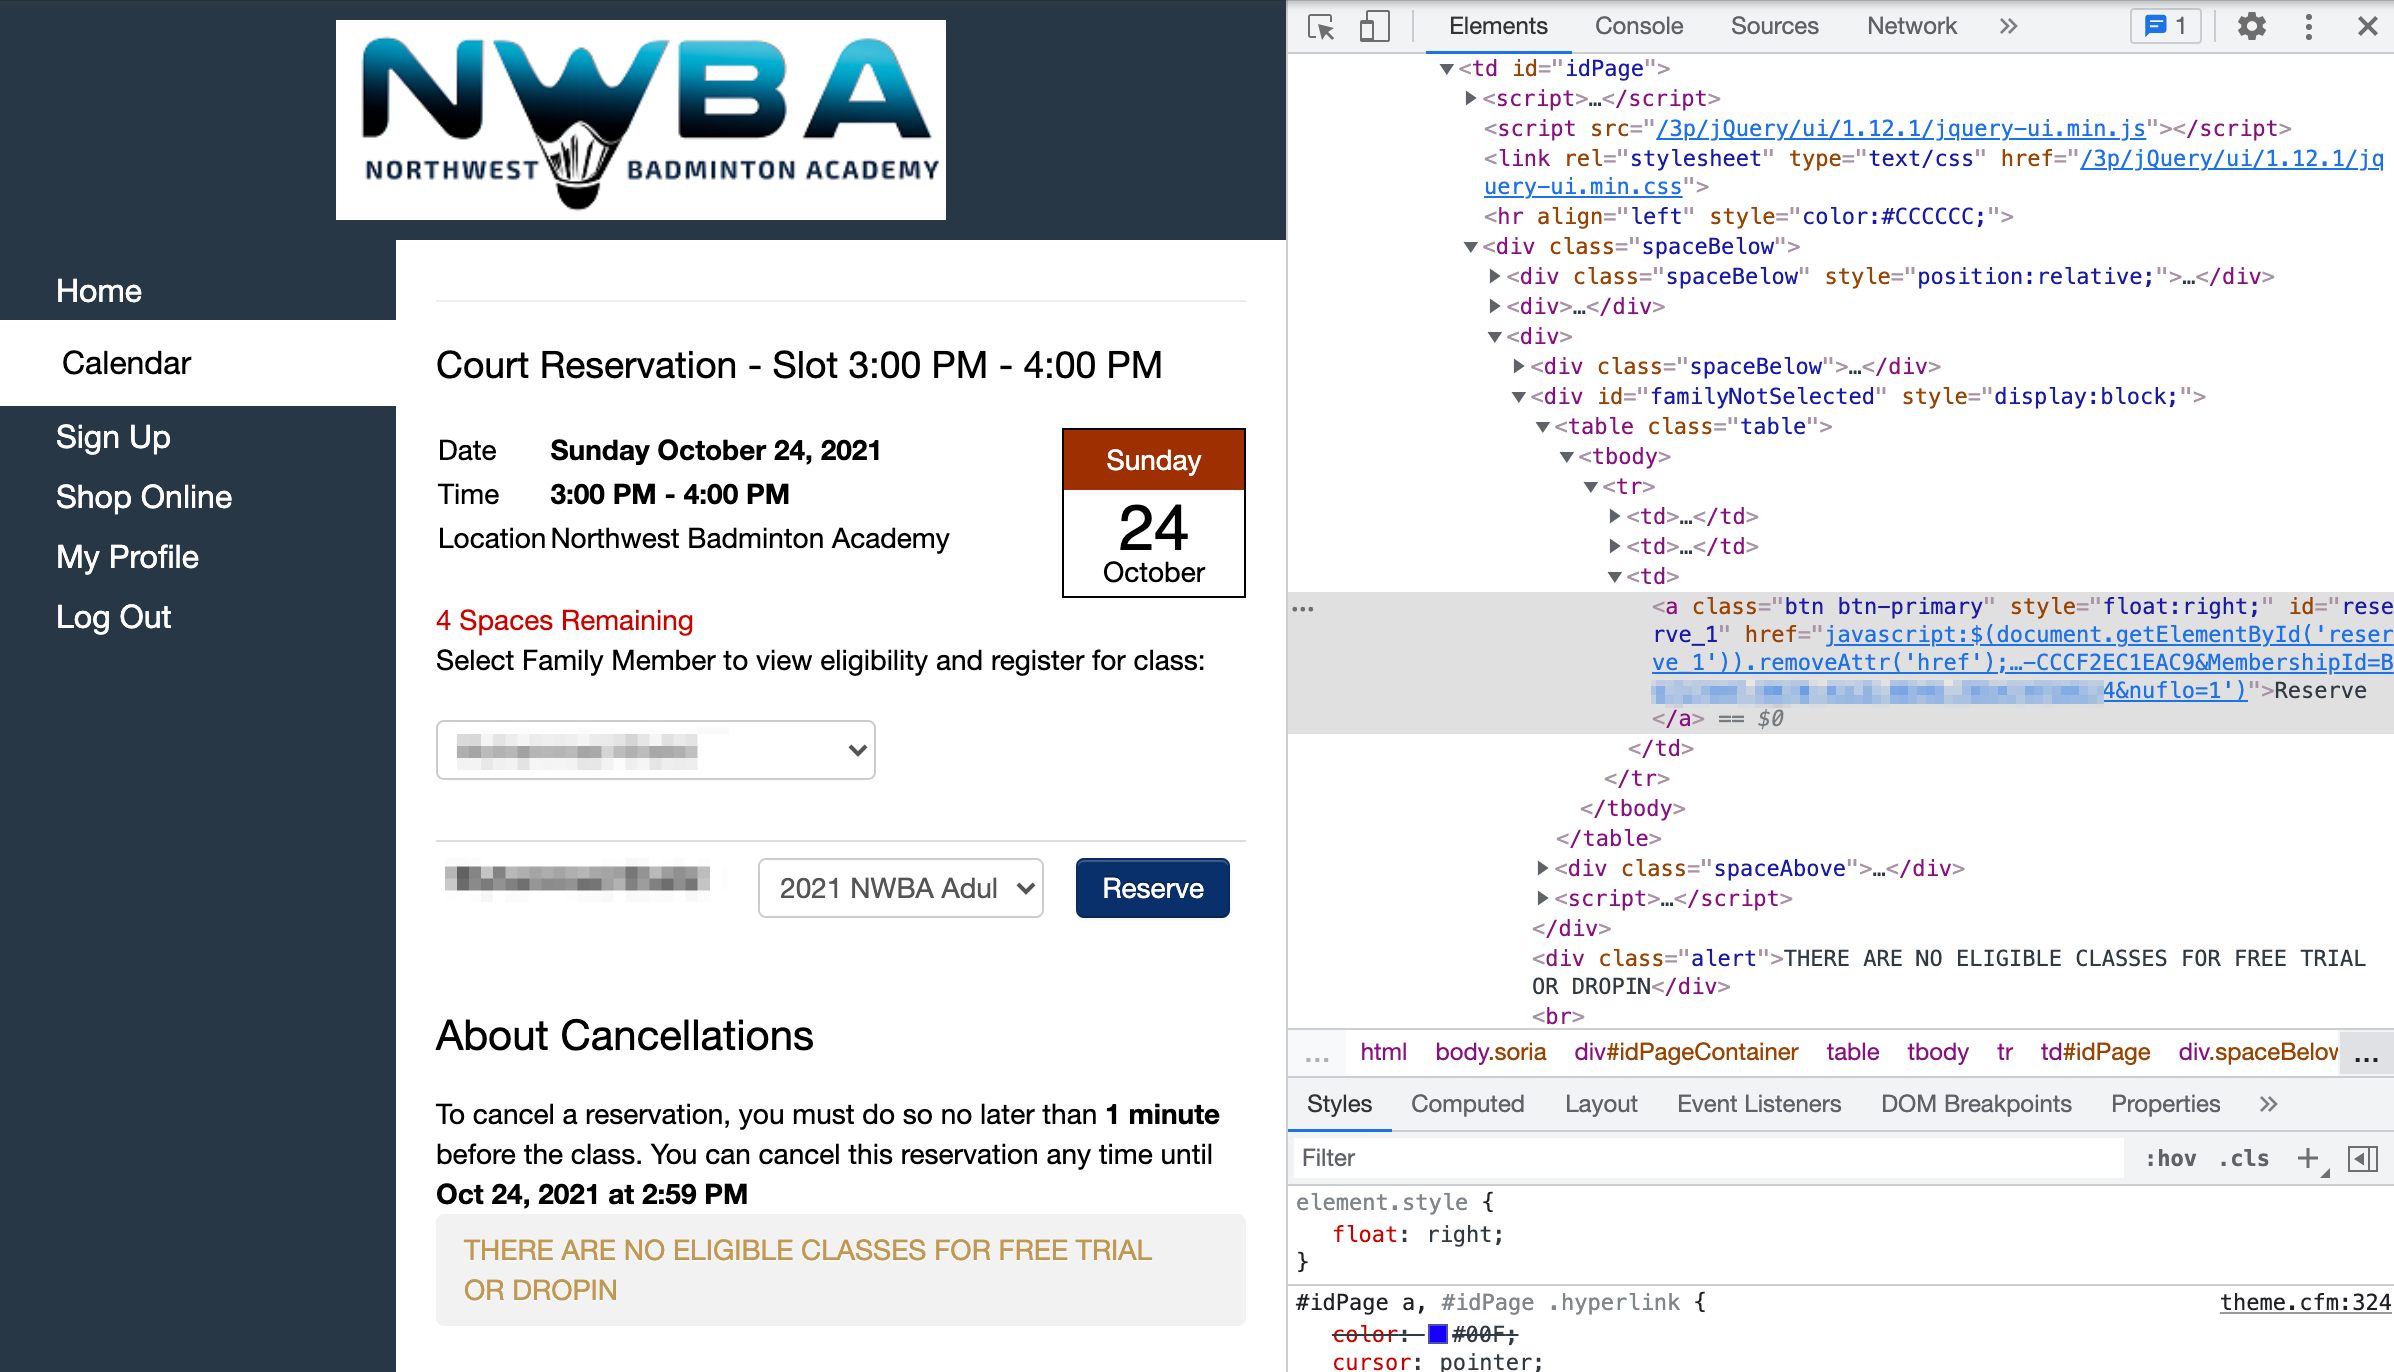
We can click on the Reservation button using the following code:
browser.find_element_by_xpath("//a[text()='Reserve']").click()
Afterward, the page should refresh and you should see the following confirmation screen:
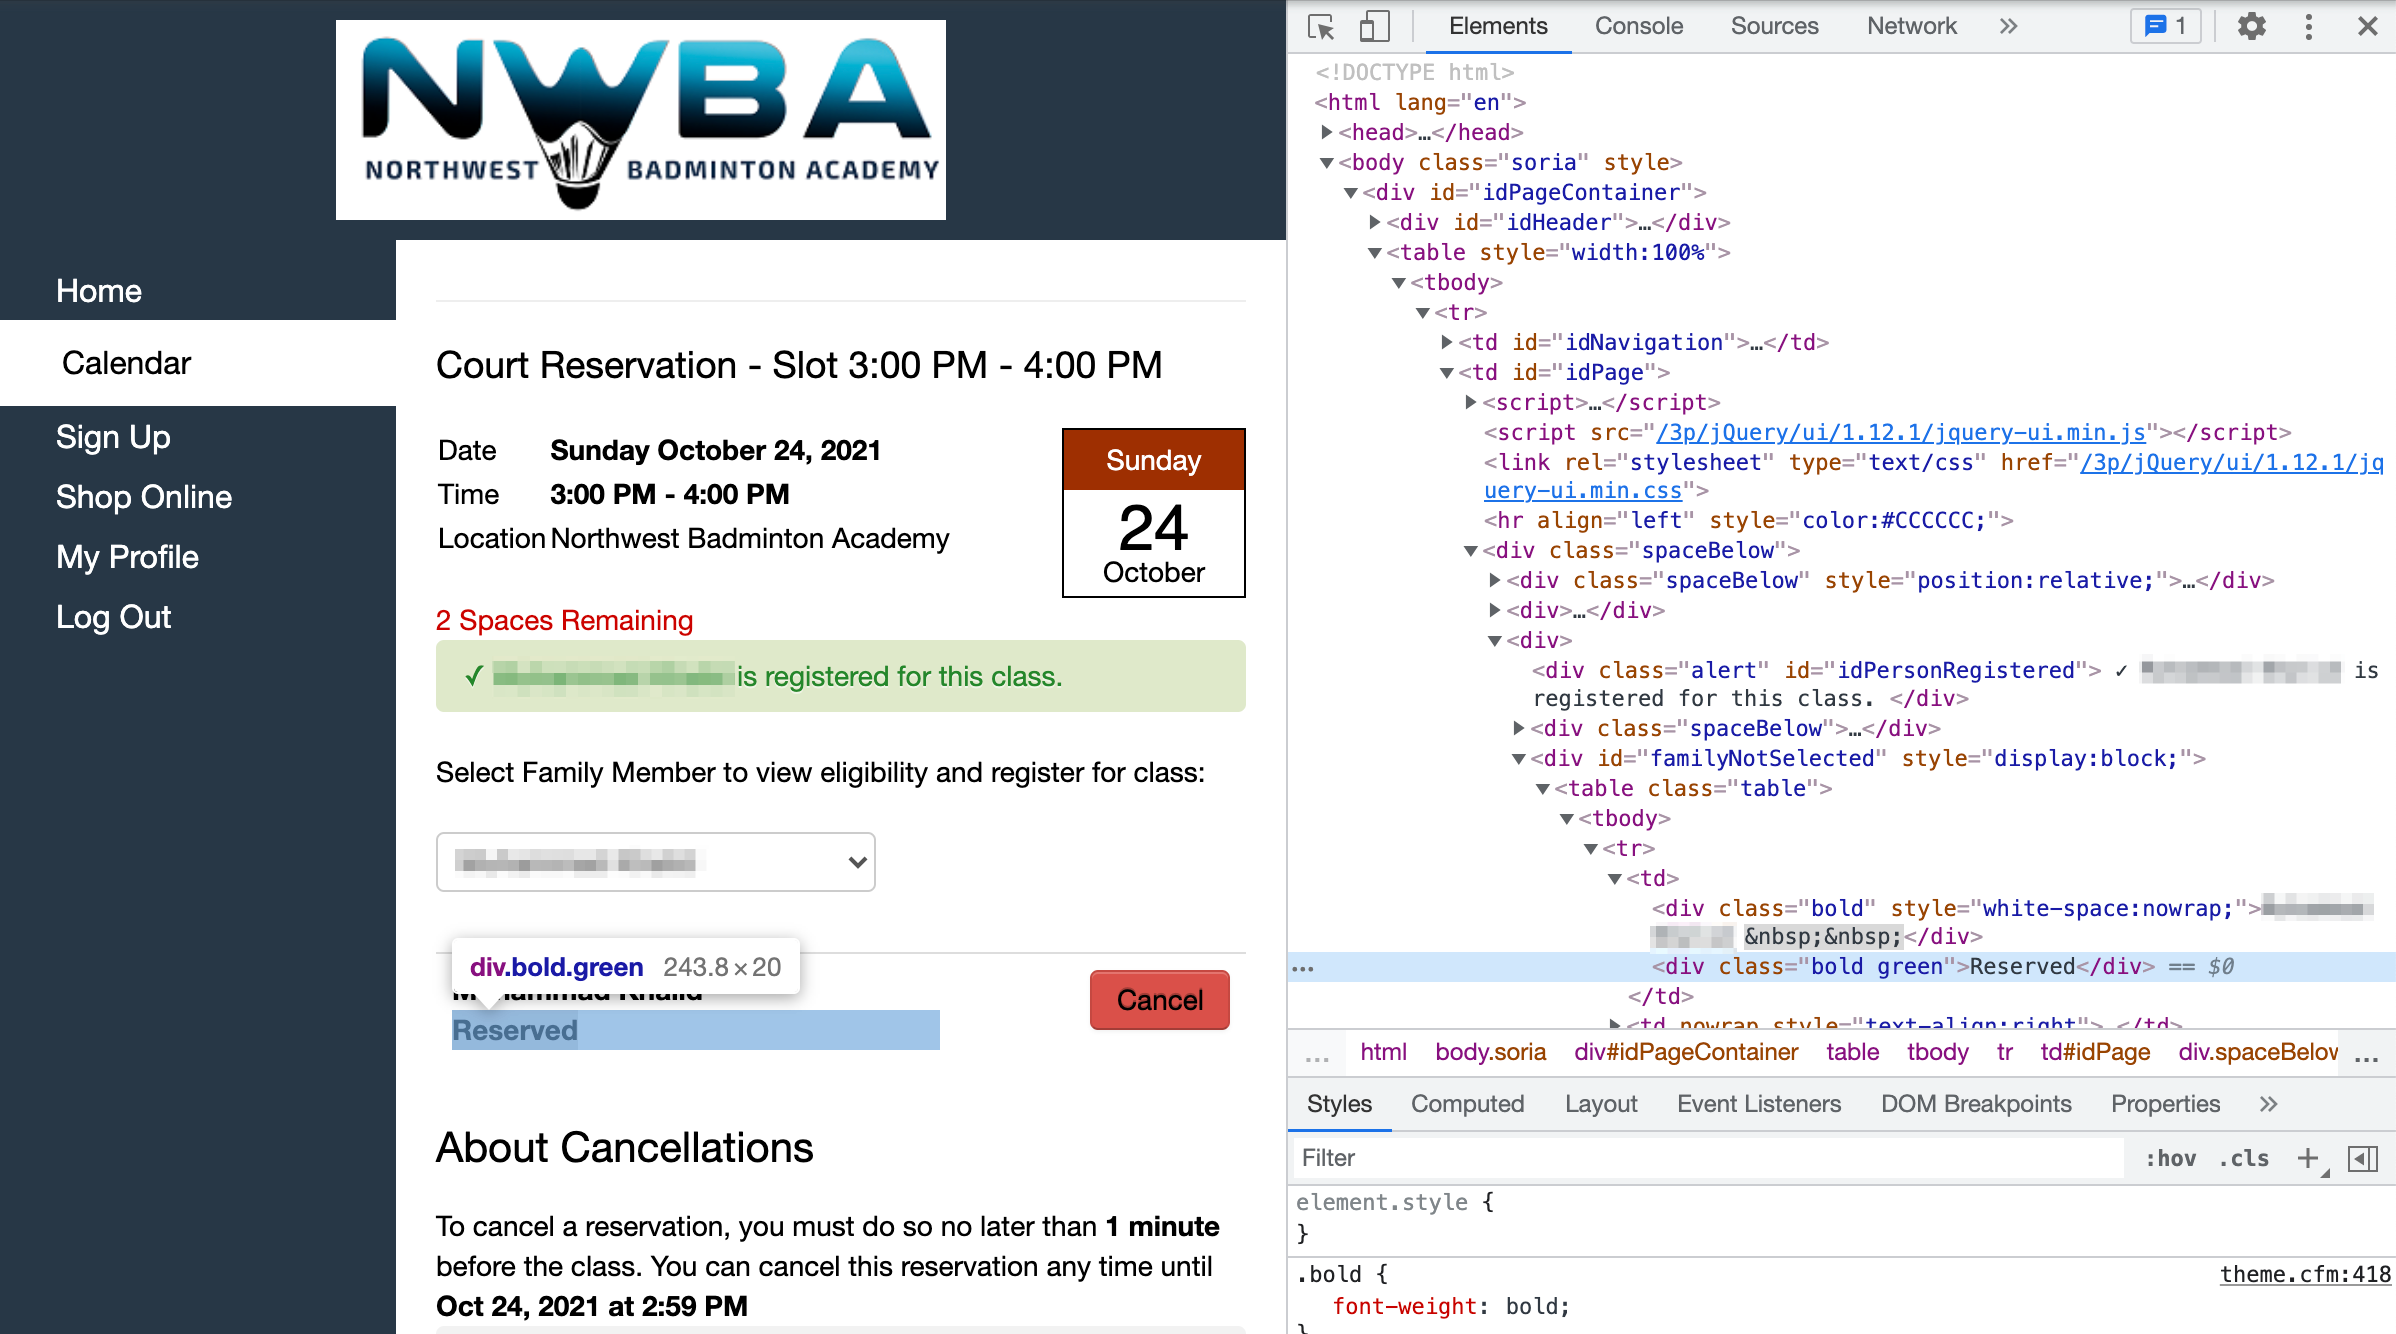
We can check for the existence of the Reserved div to confirm that our booking went through without a hitch:
reserved = "Reserved" in browser.find_element_by_xpath("//div[@class='bold green']").text
Now we have all the required pieces and we just need to put them in our app.py file and give them some structure.
Final code
The final code looks something like this:
import datetime
from selenium import webdriver
from selenium.webdriver.support import expected_conditions
from selenium.webdriver.support.ui import WebDriverWait
from selenium.webdriver.common.by import By

def next_7_dates():
    today = datetime.datetime.today()
    date_list = []
    for x in range(0,7):
        new_date = today + datetime.timedelta(days=x)
        date_list.append(new_date.strftime('%Y-%m-%d'))
    return date_list

def login(browser):
    print("[+] Logging in.")
    browser.find_element("name", "username").send_keys("your_email")
    browser.find_element("name", "password").send_keys("your_password")
    browser.find_element("xpath", "//input[@type='SUBMIT']").click()

def reserve_time(browser, favorite_times):
    for fav_time in favorite_times:
        booking_link = browser.find_element("xpath", f"//div[text()='{fav_time}']")
        full = 'sessionFull' in booking_link.get_attribute('class')
        if not full:
            booking_link.click()
        else:
            continue
        browser.find_element("xpath", "//a[text()='Reserve']").click()
        reserved = "Reserved" in browser.find_element("xpath", "//div[@class='bold green']").text
        if reserved:
            return True, fav_time
    return False, None

def main():
    browser = webdriver.Chrome(executable_path=r'/usr/local/bin/chromedriver')
    url = "https://northwestbadmintonacademy.sites.zenplanner.com/login.cfm"
    browser.get(url)

    login(browser)

    timeout_secs = 20
    calendar_btn = WebDriverWait(browser, timeout_secs)\
                        .until(expected_conditions.presence_of_element_located((By.XPATH, "//td[@id='idNavigation']//li[2]//a")))
    user_id = calendar_btn.get_attribute('href').split('=')[-1].split(':')[-1]
    calendar_btn.click()

    favorite_times = ["5:00 PM", "6:00 PM"]
    booked_details = []
    for count, date in enumerate(next_7_dates()):
        if len(booked_details) == 3 and count <= 5:
            print(f"[+] Already booked 3 weekdays. Skipping {date}")
            continue
        print(f"[+] Trying to look for timeslots on {date}")
        calendar_date_link = (f"https://northwestbadmintonacademy.sites.zenplanner.com/calendar.cfm?"
            f"DATE={date}&calendarType=PERSON:{user_id}&VIEW=LIST&PERSONID={user_id}")
        browser.get(calendar_date_link)
        reserved, reservation_time = reserve_time(browser, favorite_times)
        if reserved:
            booked_details.append((date, reservation_time))

    print("[+] I was able to successfully reserve the following date/times:")
    for date, reservation_time in booked_details:
        print(f"\t{date}: {reservation_time}")

if __name__ == "__main__":
    main()
The code is divided into 4 functions and most of them are self-explanatory. However, there are a few things in here that we did not discuss above. While running the final app.py, I found out that find_element_by_* methods are deprecated, and instead I should use the find_element method.
Moreover, I was encountering the StaleElementReferenceException while locating the calendar button in the HTML. This StackOverflow answer gives a very good explanation of this exception and also gives a solution. What was happening is that we were locating the calendar button while the browser was still finishing the logging in process and as soon as we tried to access the calendar button, it had become stale. In order to overcome this, we have to wait a bit for the calendar element to become present on the page after the logging-in process has already started. This way Selenium waits for the process to finish and makes sure the calendar button does not become stale before we try to access it.
The code for this is:
from selenium.webdriver.support import expected_conditions
from selenium.webdriver.support.ui import WebDriverWait
from selenium.webdriver.common.by import By

# ....

calendar_btn = WebDriverWait(browser, timeout_secs)\
                        .until(expected_conditions.presence_of_element_located((By.XPATH, "//td[@id='idNavigation']//li[2]//a")))
Selenium waits until the expected condition becomes true before it continues the execution of the rest of the code.
We could have overcome this issue by adding an explicit time.sleep(10) as well but the problem with that is the element might become available sooner than 10 seconds but we would not be able to do anything before the whole 10 seconds have elapsed.
As for the code flow, we start execution with the main method. It creates the browser window and logs us in. It then loops through the next seven days and for each day it tries to book our favorite time. After booking one timeslot for a day it moves on to the next day and skips any other timeslots available for the same day. Before moving on to the next day, it also verifies that we haven’t booked more than 3 weekdays before moving on to the next weekday. Finally, it prints the slots that it was able to book.
You might need to change two details in this code. One is the username and password values and the other is the favorite_times list.
Now you can run this script on Saturday morning as soon as the bookings open up and you should hopefully be able to snag a few good timeslots.
Conclusion
This was a fun project to explore a little bit about Selenium and I am hoping you learned something new from it. I like leaving people with some tips on how to further develop a tutorial project. There are so many ways you can improve this and a few things that come to mind are:
- Make Chrome run in headless mode so that no window opens up on the screen
- Make it run automatically on Saturday so that you don’t even have to wake up (look into crontab or scheduled GitHub Actions)
- Add better error handling and maybe spawn multiple Selenium processes so that you can check multiple days in parallel
The possibilities are endless! I hope you enjoyed this tutorial. You can download the complete source for the bot from GitHub. If you liked this article, you can read similar fun stuff over at my blog. See you later!
✍️ Comments
Thank you!
Your comment has been submitted and will be published once it has been approved. 😊
OK