


How to Deploy old Django project using NGINX, Docker and UWSGI
Hi everyone! 👋 I maintain an old website for a client that was originally developed in 2015. It hasn’t been updated for the last 5 years and uses Django 1.7 and some Django extensions which haven’t been updated for Django 3. I recently decided to move the website to a new server and had to repackage the Django code in a Docker container. It took me some time to get it working correctly so I hope this article can save you some time if you ever find yourself in a similar situation.
Here’s what you will be learning:
- How does a regular Django project structure look like for UWSGI
- How to package the Django app in a Docker container along with UWSGI
- How to run NGINX on the server and set up a reverse proxy for the Docker container
Note: I know there are security issues with the older Django versions. I am not promoting the use of the old versions but sometimes one has to do an emergency migration and updating a library or framework with breaking changes isn’t feasible. This was one of those scenarios.
Why Dockerize the app?
On the old server, I didn’t have any other Python projects that I was working on. This made it easy to keep an older Python version running. However, on the new server, I was already working on some other projects and I did not want to pollute my global bin folder with an old Python version. Moreover, I wanted to make sure that if I ever have to move the server again, I didn’t want to install the required Python version myself. This made it pretty obvious that Docker was the way to go.
Another question I asked myself was why not put NGINX in Docker as well? This way my setup would have contained two Docker containers controlled via docker-compose. One container would have run NGINX and the other one would have run UWSGI.
The answer is I tried but it didn’t work out. I had another app running on the new server in a Docker container and I had already set up NGINX for that. Proxying requests from an NGINX instance running on the host server to an NGINX instance running in a container didn’t sound right initially. But I still went ahead. I don’t deserve to call myself a hacker at heart if I can’t go against my own better judgment 😛
I spent a whole day trying to figure out all sorts of issues this double NGINX setup was causing me. I finally gave up and decided to only containerize UWSGI and Django app and proxy requests to UWSGI via the NGINX instance running on the host machine.
Old directory structure
You need to know what my directory structure looked like when I began. This will give you a clearer idea of how each command works in relation to the layout.
This is what I had before I started porting this project to Docker:
$ cd project
$ tree

├── db.sqlite3
├── project_app
│   ├── admin.py
│   ├── __init__.py
│   ├── models.py
│   ├── sitemap.py
│   ├── static
│   │   ├── css
│   │   │   └── style.css
│   │   ├── img
│   │   │   └── logo.png
│   │   ├── js
│   │       └── app.js
│   ├── templates
│   │   ├── about.html
│   │   ├── ...
│   │   └── index.html
│   ├── tests.py
│   ├── urls.py
│   └── views.py
├── project
│   ├── __init__.py
│   ├── settings.py
│   ├── urls.py
│   └── wsgi.py
├── static
├── manage.py
├── readme.md
├── requirements.txt
└── uwsgi.ini
The old request cycle looked like this:
the web client <-> NGINX <-> socket <-> uwsgi <-> Django
Django sits behind a UWSGI server which runs 4 workers. UWSGI creates a socket that is used to communicate with NGINX. NGINX acts as a reverse proxy and passes all new requests down to UWSGI through the socket. All of this was running on the host server.
Old wsgi.py & uwsgi.ini
The contents of the default wsgi.py file created by Django were:
"""
WSGI config for ______ project.
It exposes the WSGI callable as a module-level variable named ``application``.
For more information on this file, see
https://docs.djangoproject.com/en/1.7/howto/deployment/wsgi/
"""

import os
os.environ.setdefault("DJANGO_SETTINGS_MODULE", "fci_django.settings")

from django.core.wsgi import get_wsgi_application
application = get_wsgi_application()
And my uwsgi.ini file looked like this:
[uwsgi]
project = project
base = /project
socket_dir = %(base)

chdir = %(base)
module = %(project).wsgi:application

master = true
processes = 5

socket = %(socket_dir)/%(project).sock
vacuum = true
daemonize = /var/log/uwsgi/project.log
I was running UWSGI using the following command:
uwsgi --ini ~/app/uwsgi.ini
This created a socket called project.sock which was used by NGINX to send traffic to it. This socket was made inside the /project folder.
Old NGINX server configuration
My NGINX configuration contained the following content:
server {
    server_name mydomain.com www.mydomain.com;

    access_log /var/log/nginx/project.access.log;
    error_log /var/log/nginx/project.error.log;

    location = /favicon.ico { access_log off; log_not_found off; }

    location /static/ {
        root /home/yasoob/project;
    }

    location /media/ {
        alias /home/yasoob/project/static/;
    }

    location / {
        include         uwsgi_params;
        uwsgi_pass      unix:/home/yasoob/project/project.sock;
    }
}
If you don’t know about NGINX server configuration files, they usually reside in /etc/nginx/sites-available/ folder and then symlinked to /etc/nginx/sites-enabled/ folder. Let me break down this configuration file:
server_namemakes sure that if we are serving multiple domains/sub-domains from the same server, NGINX knows which domain this particular config deals with. You can have multiple server blocks in one file. That is actually how SSL redirection works. I will talk about that later once we have the basic setup working.access_loganderror_logtell NGINX where to save the log files for this particular website/app. If you don’t specify this then the logs are stored in/var/log/nginx/access.logand/var/log/nginx/error.logaccess_log off;andlog_not_found off;tell NGINX not to log access and error logs for this particular endpointlocation /static/mapping tells NGINX to find the static files in theproject_namedir. It’s the same withlocation /media/. NGINX does caching pretty well and is better suited for serving static files.include uwsgi_paramstells NGINX to load theuwsgi_paramsfile. It is distributed with the NGINX distribution and looks something like this.uwsgi_passtells NGINX to pass the incoming connection request to theproject.socksocket. UWSGI will be listening to this socket at the other end.
PostgreSQL vs SQLite
Another important detail is that I was using a sqlite DB for this project. It was very low traffic and a small website. This decision made it slightly easier for me to port this project to docker. It is not hard to port Postgresql or some other DB but it requires a little extra configuration which I didn’t have to do.
Putting Django in a Container
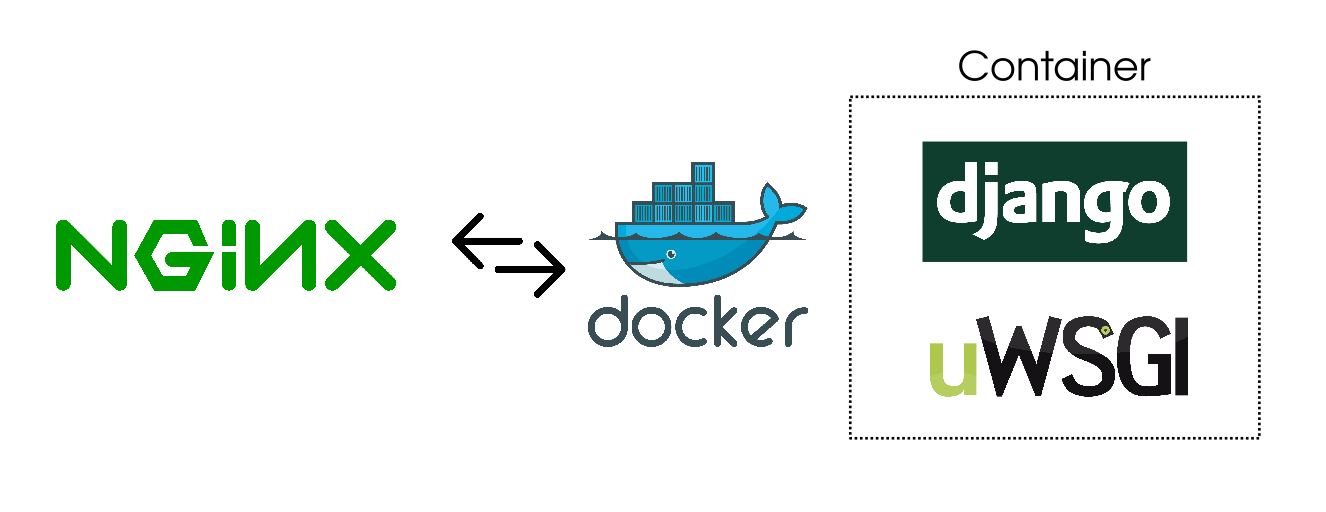
In the new setup, the whole request cycle looked the same with just one minor difference. UWSGI and Django will now be running in a container and UWSGI will create a socket file in a volume shared with the host.
For this new request cycle, I only had to make one major change. I had to make sure that UWSGI was making the socket in a shared folder. The uwsgi.ini file ended up being exactly the same as the old one but with two important changes:
[uwsgi]
...
socket_dir = /shared
chmod-socket = 666
This /shared directory will be mounted from the host machine and I will show you how to do that in just a second. We also change the permissions of the socket to 666 so that everyone can read and write to it. This was important because I was getting the following error without it:
2014/02/27 14:20:48 [crit] 29947#0: *20 connect() to unix:///tmp/uwsgi.sock failed (13: Permission denied) while connecting to upstream, client: 173.131.12.44, server: project.com, request: "GET / HTTP/1.1", upstream: "uwsgi://unix:///tmp/project.sock:", host: "www.project.com"
I got the chmod 666 solution from this StackOverflow answer.
The NGINX conf changed slightly as well. I had to update the uwsgi_pass property and point it to the folder which was going to be shared with the Docker container. I just set it to:
uwsgi_pass unix:/home/yasoob/shared/project.sock;
The very next step was to write a Dockerfile. This is what I came up with:
FROM python:2

RUN apt-get update && \
    apt-get install -y build-essential python vim net-tools && \
    pip install uwsgi

WORKDIR /
COPY . /app/
RUN pip install --no-cache-dir -r /app/requirements.txt

CMD [ "uwsgi", "--ini", "/app/uwsgi.ini" ]
This Dockerfile is based on the Python 2 image. The steps in this docker file are:
- Install the required Python packages, uwsgi and helpful tools for debugging
Workdir /specifies that we will be working in the/dir- Copy everything from the current directory on the host to the
/appdirectory in the container - Install all the required dependencies using
pipand therequirements.txtfile - Run
uwsgiuntil the container terminates for some reason
After creating the Dockerfile it was just a matter of building the Docker image before I could use it to run a container:
docker build -t project .
The docker run command is a little involved. This is what I used:
docker run --rm -d --name project \
        -v ~/shared:/shared \
        -v ~/project/static:/app/static \
        --network='host' --restart unless-stopped project
There are a couple of things happening here:
--rmtells Docker to clean up the container on termination-dmakes the container run in daemon mode-v ~/shared:/sharedmounts the~/sharedfolder from my host machine to the/sharedfolder in the container-v ~/project/static:/app/staticmounts thestaticdir from the host to container. This is where all the static assets of the website (including uploads) are stored. NGINX serves the static files from this directory--network='host'just makes sure that Docker runs this on the host network and doesn’t create a separate network for this container. I think I could have gotten away without this option honestly--restart unless-stoppedmakes sure that Docker restarts this container unless the user explicitly terminated it
Turning on SSL
I used certbot for setting up SSL for the website. The installation is super simple on Ubuntu (and I guess all other Linux distros). I just had to add the certbot/certbot ppa to my sources and do a simple install:
sudo add-apt-repository ppa:certbot/certbot
sudo apt install python-certbot-nginx
Then I just ran certbot and followed on-screen instructions:
sudo certbot --nginx -d project.com
When certbot asked me if it should set up a redirect from HTTP to HTTPS I said yes:
Please choose whether or not to redirect HTTP traffic to HTTPS, removing HTTP access.
-------------------------------------------------------------------------------
1: No redirect - Make no further changes to the webserver configuration.
2: Redirect - Make all requests redirect to secure HTTPS access. Choose this for
new sites, or if you're confident your site works on HTTPS. You can undo this
change by editing your web server's configuration.
-------------------------------------------------------------------------------
Select the appropriate number [1-2] then [enter] (press 'c' to cancel):
This updated my project file in /etc/nginx/sites-available directory and added a 301 redirect server block.
Now I just went to project.com to test whether everything was working or not and to my surprise it was! It only took me a day full of debugging to get it to work but at the end of the day it did work and that is all that matters 😅
You can read more detailed instructions for how to set up certbot on Digital Ocean.
I am sure I must have made a couple of mistakes during this port but the website was working and NGINX wasn’t complaining and that is all that mattered. If you have any comments or questions feel free to ask them in the comments below. I will see you in the next post! 👋 ❤️
Danilo