


🌿 Greenhouse Part 3: Connecting LCD With Arduino
Hi lovely people! 👋 In the last two posts, we learned how to use the temperature, light intensity, and soil moisture sensors. So far we have covered all of the sensors my greenhouse is going to have in the alpha version. I know I am missing out on the integral humidity sensor but I didn’t have that one lying around 😅. Well, 3 sensors are more than enough for our learning purposes.
In the last posts, we were only sending values to the laptop over a serial port. In this post, I will teach you how to connect an LCD with Arduino so that we can get the readings on a pretty display.
Step 1: Wiring up the Circuit
We will be using the following items:
- Arduino UNO
- Breadboard
- 10KΩ Potentiometer
- 220Ω Resistor
- 16x2 LCD display
I am not gonna lie, the wiring is a bit tedious. However, if you follow it step by step it won’t take you long to wire everything up. It is going to be wired like this picture:
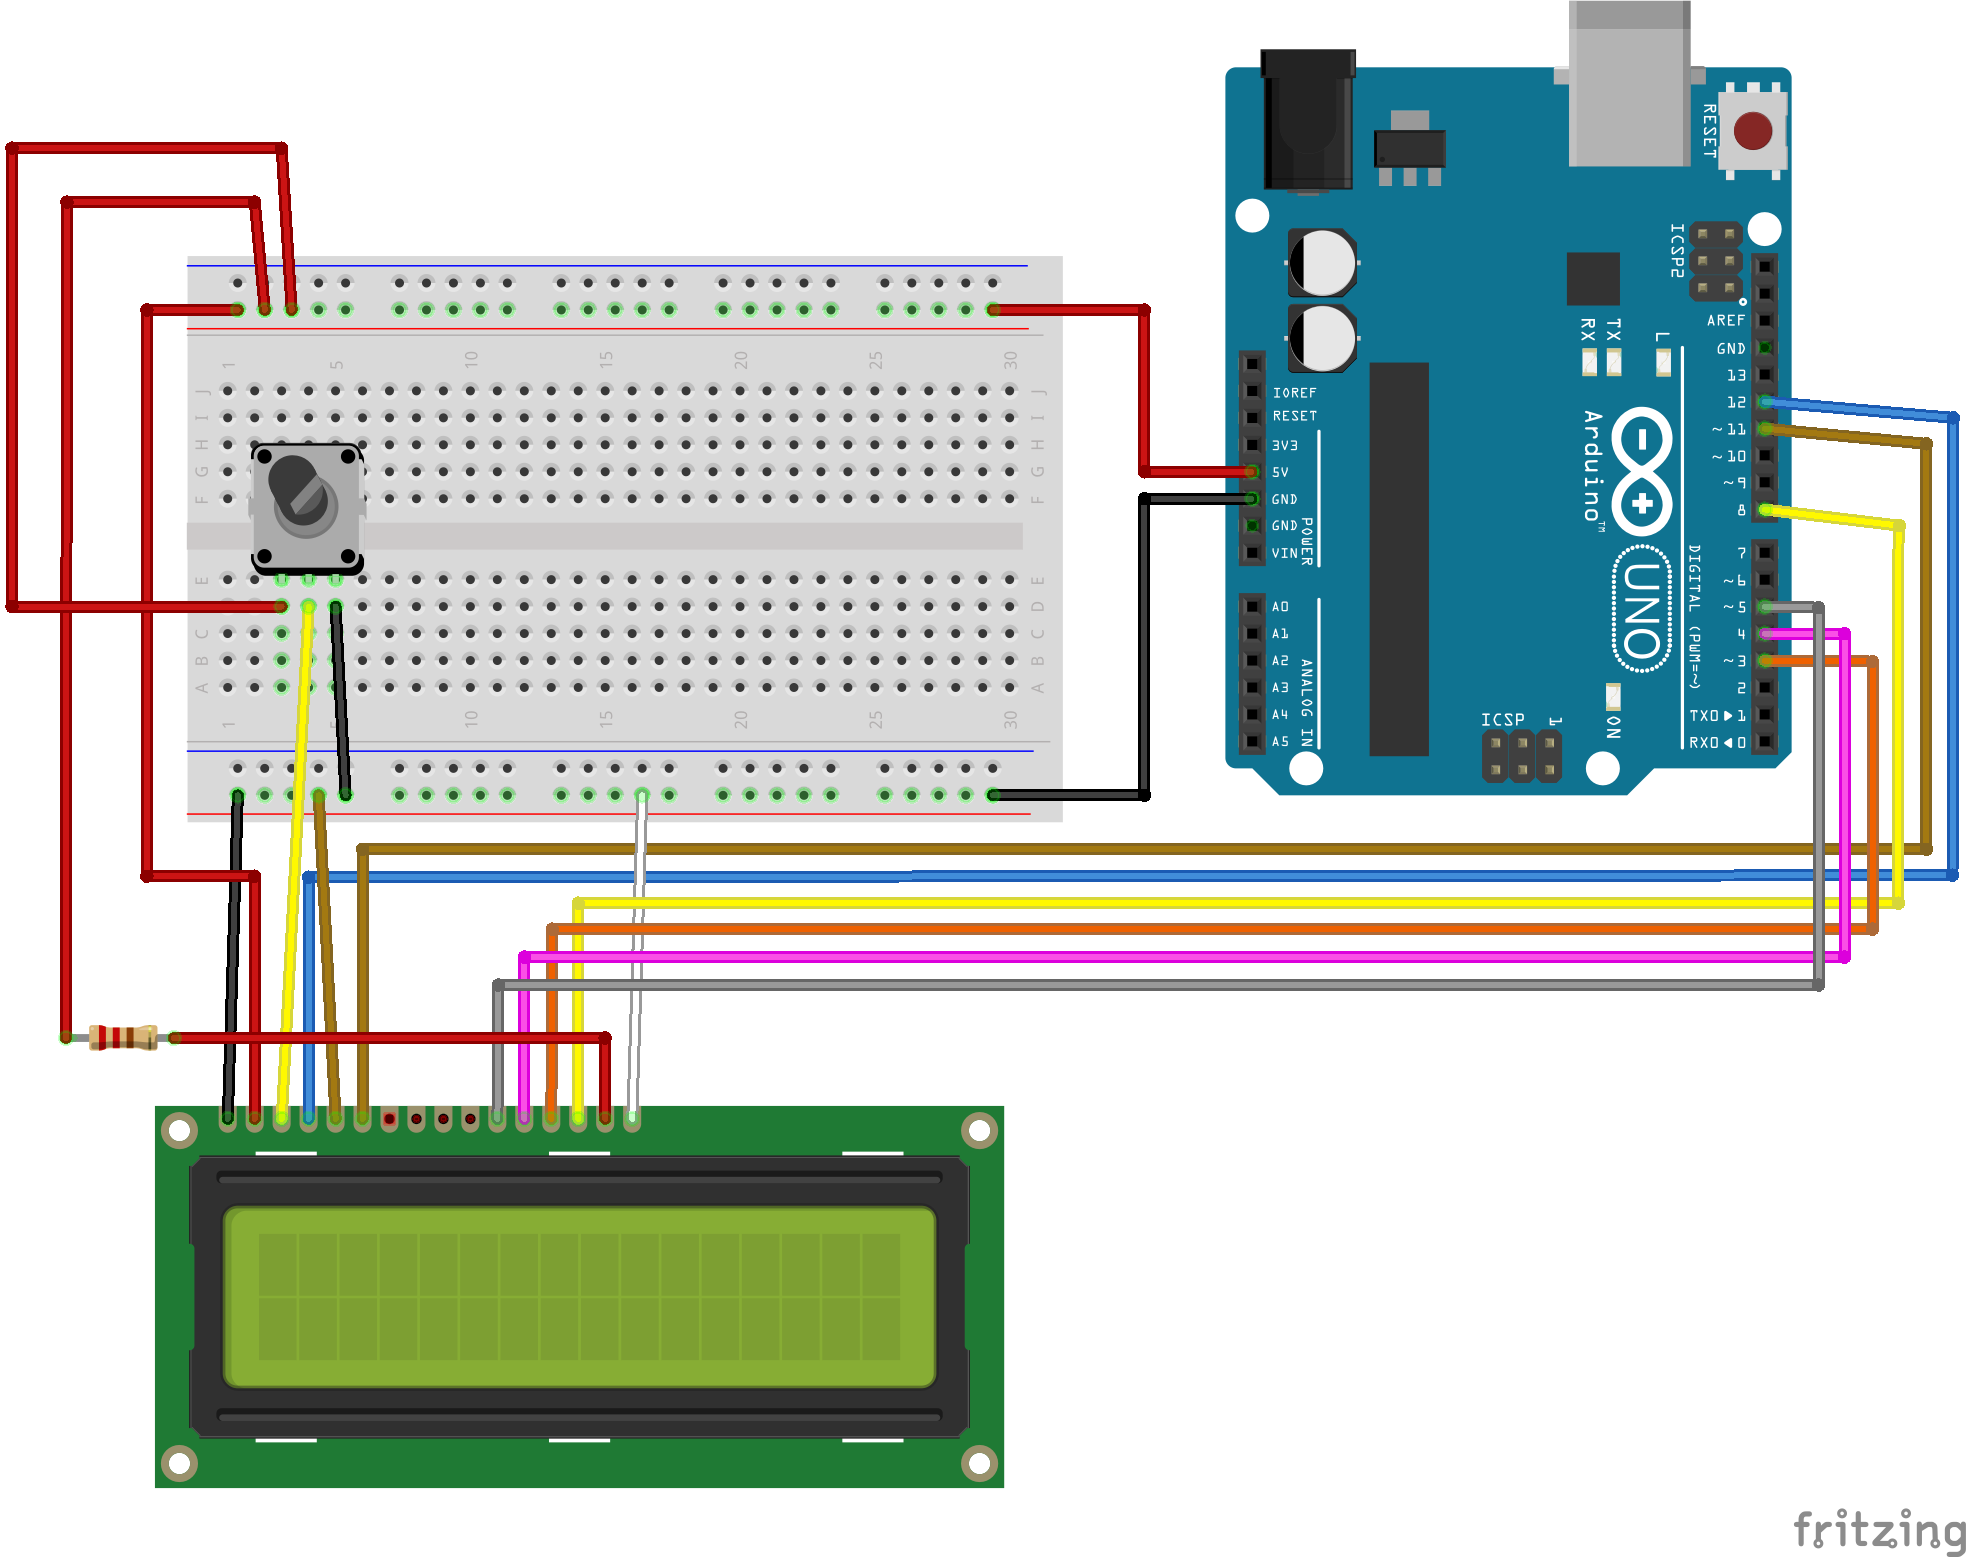
The connections are:
pin1  -> ground
pin2  -> positive
pin3  -> middle pin of 10kΩ potentiometer
pin4  -> 12
pin5  -> gnd
pin6  -> 11
pin11 -> 5
pin12 -> 4
pin13 -> 3
pin14 -> 8
pin15 -> 220Ω -> positive
pin16 -> ground
Step 2: Coding the Arduino
We will be using the LiquidCrystal library to interface with the LCD screen. It makes everything super easy. Here is some sample code:
#include <LiquidCrystal.h>

LiquidCrystal lcd(12, 11, 5, 4, 3, 8);

void setup(){
    lcd.begin(16, 2);
    lcd.print('Hello World!');
}

void loop(){
}
This code will set up the LCD. On line 3 the numbers need to be exact. They correspond to the physical wire connections we have made on the Arduino. If you change any connection make sure to update this line as well.
There are a couple of fun things you should know which you can do with an LCD. You can create custom characters to display on the screen. Let’s say we want to display a thermometer. We can use this website to get the binary code for a thermometer and use it like this:
#include <LiquidCrystal.h>

LiquidCrystal lcd(12, 11, 5, 4, 3, 8);

byte thermometer[8] = //icon for thermometer
{
    B00100,
    B01010,
    B01010,
    B01110,
    B01110,
    B11111,
    B11111,
    B01110
};

void setup(){
    // Set cursor to character 0 line 0
    lcd.begin(16, 2);
    lcd.setCursor(0,0) ;
    lcd.createChar(1,thermometer);
    lcd.write(1);
}

void loop(){
}
Now upload the code to the Arduino and test it out! The LCD should light up. You can use the Potentiometer to control the contrast of the display.
I hope you guys enjoyed this quick tutorial on how to set up an LCD with Arduino. In the next article we will merge the three sensors we have learned to use, and the display, in one final project. This final project will be our greenhouse monitoring system and will give us real-time updates about the situation of our greenhouse
See you in the next post! ❤️
✍️ Comments
Thank you!
Your comment has been submitted and will be published once it has been approved. 😊
OK