


🌿 Greenhouse Part 1: Using Yl-69 Soil Sensor With Arduino
Hi lovely people! 👋 If you have read any of my other articles you might be aware that I am working with electronics right now. After learning the basics of Arduino, I decided to work on a relatively ambitious project. I decided to make a greenhouse monitoring system. I am going to write a series of posts introducing you to all of the sensors one by one and by the end of this series, we will have a fully functional, super basic, greenhouse monitoring system.
In this post, I will introduce you to the YL-69 Soil Moisture Sensor. This is a very basic and cheap soil moisture sensor and can be bought from oddwires.
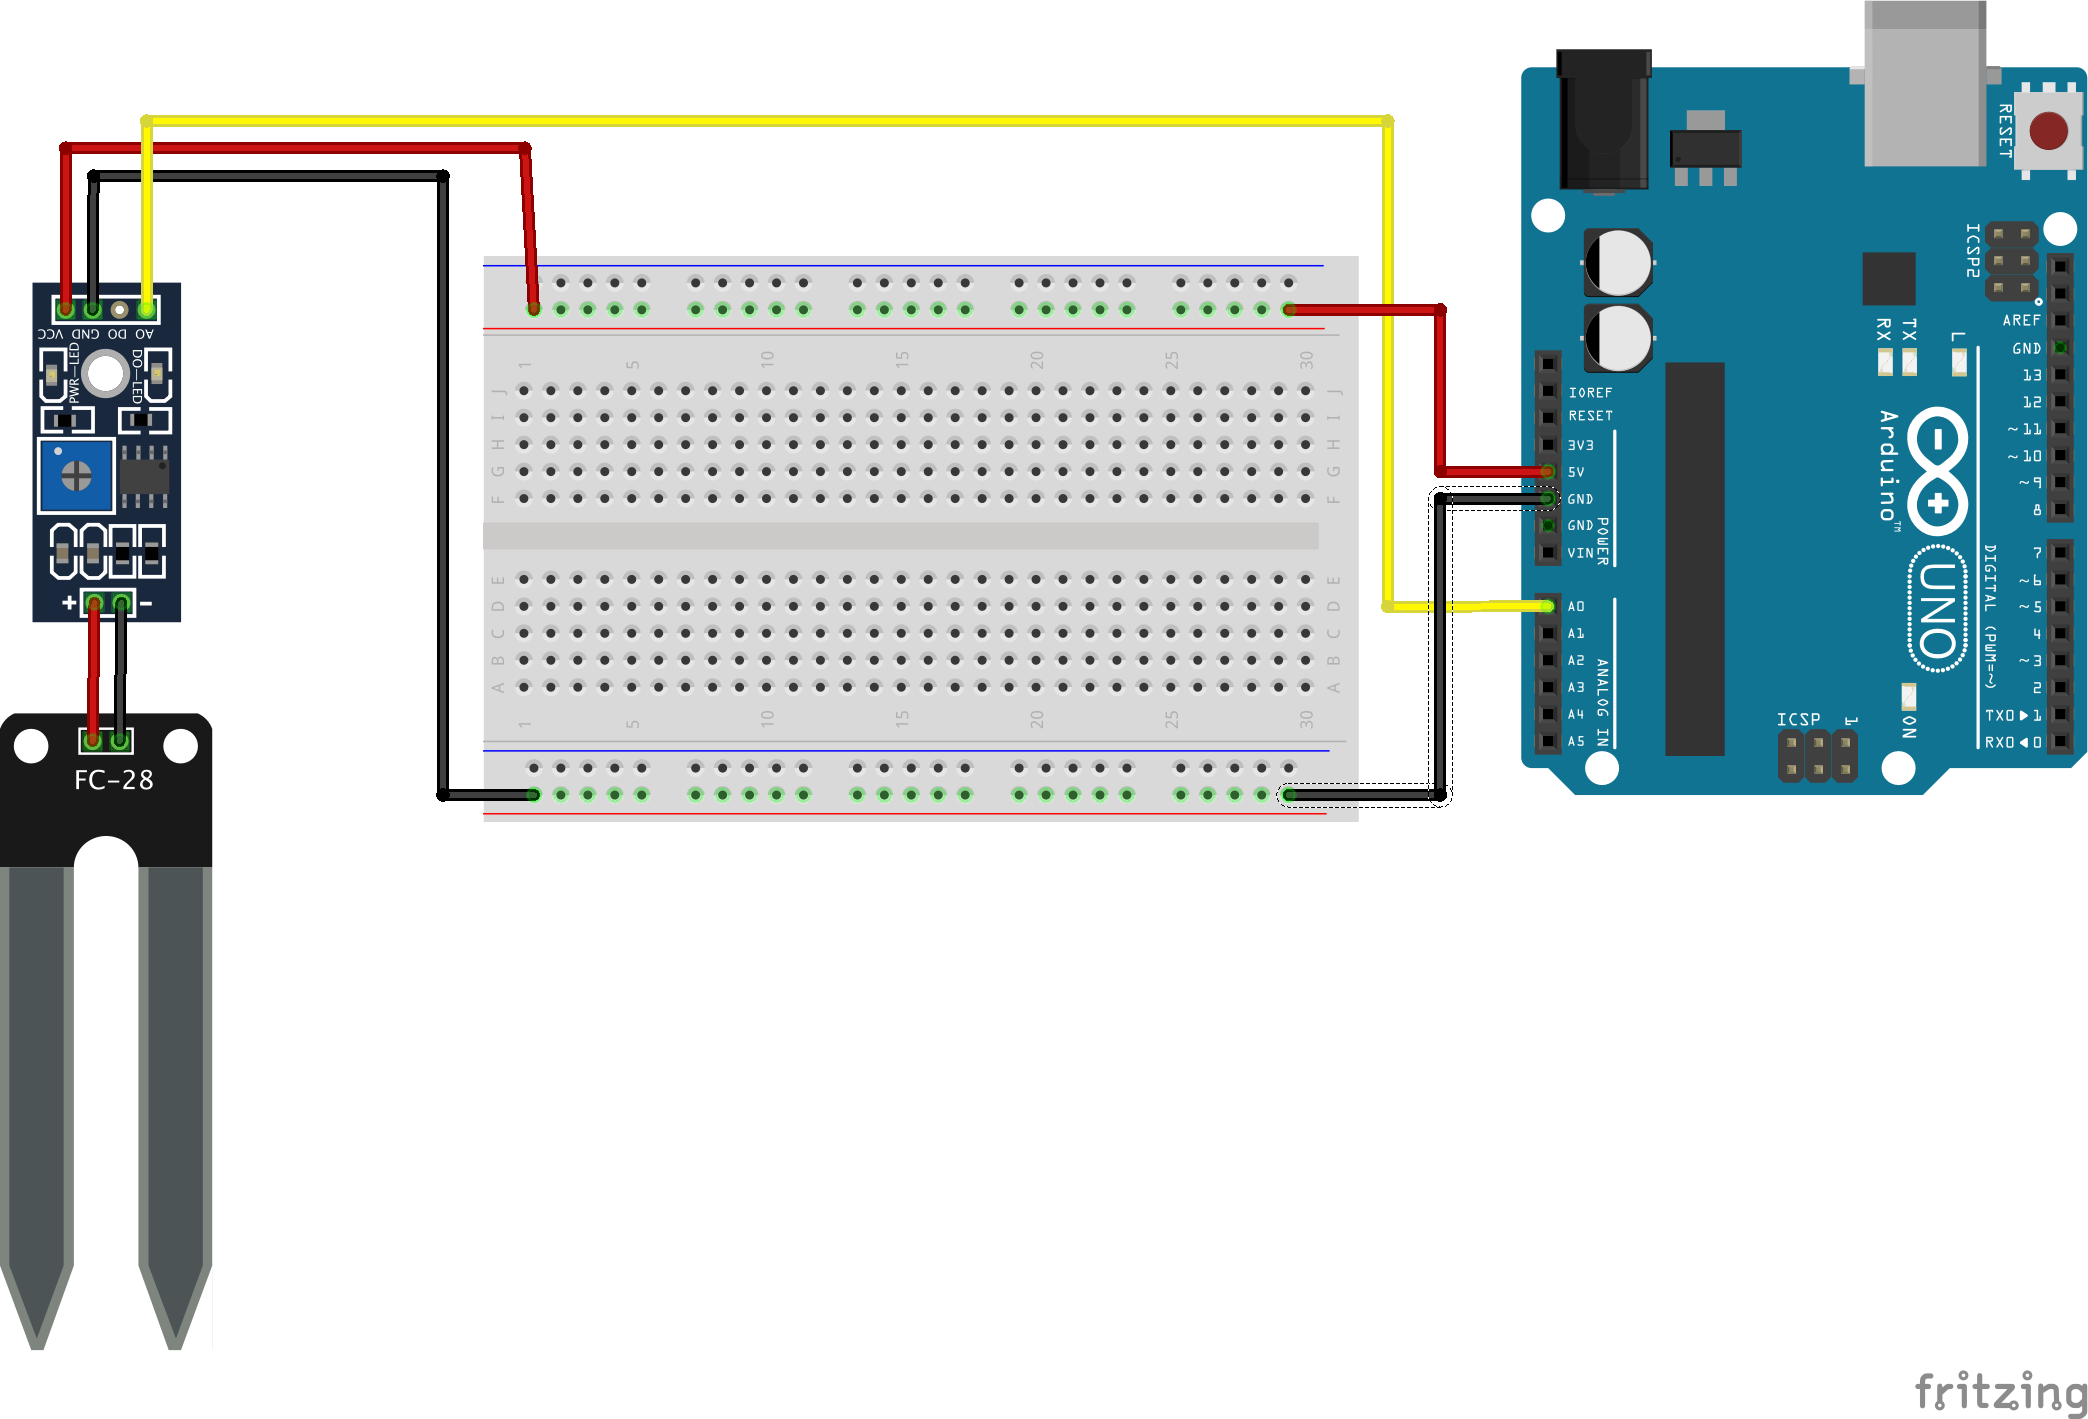
Step 1: Wiring up the circuit
Let’s start off by setting up the circuit. I am using:
- Arduino UNO
- Breadboard
- YL-69 Soil Moisture Sensor
- Jumper Wires
Wire up the circuit like this:
 Note: Click on the image to view a larger version
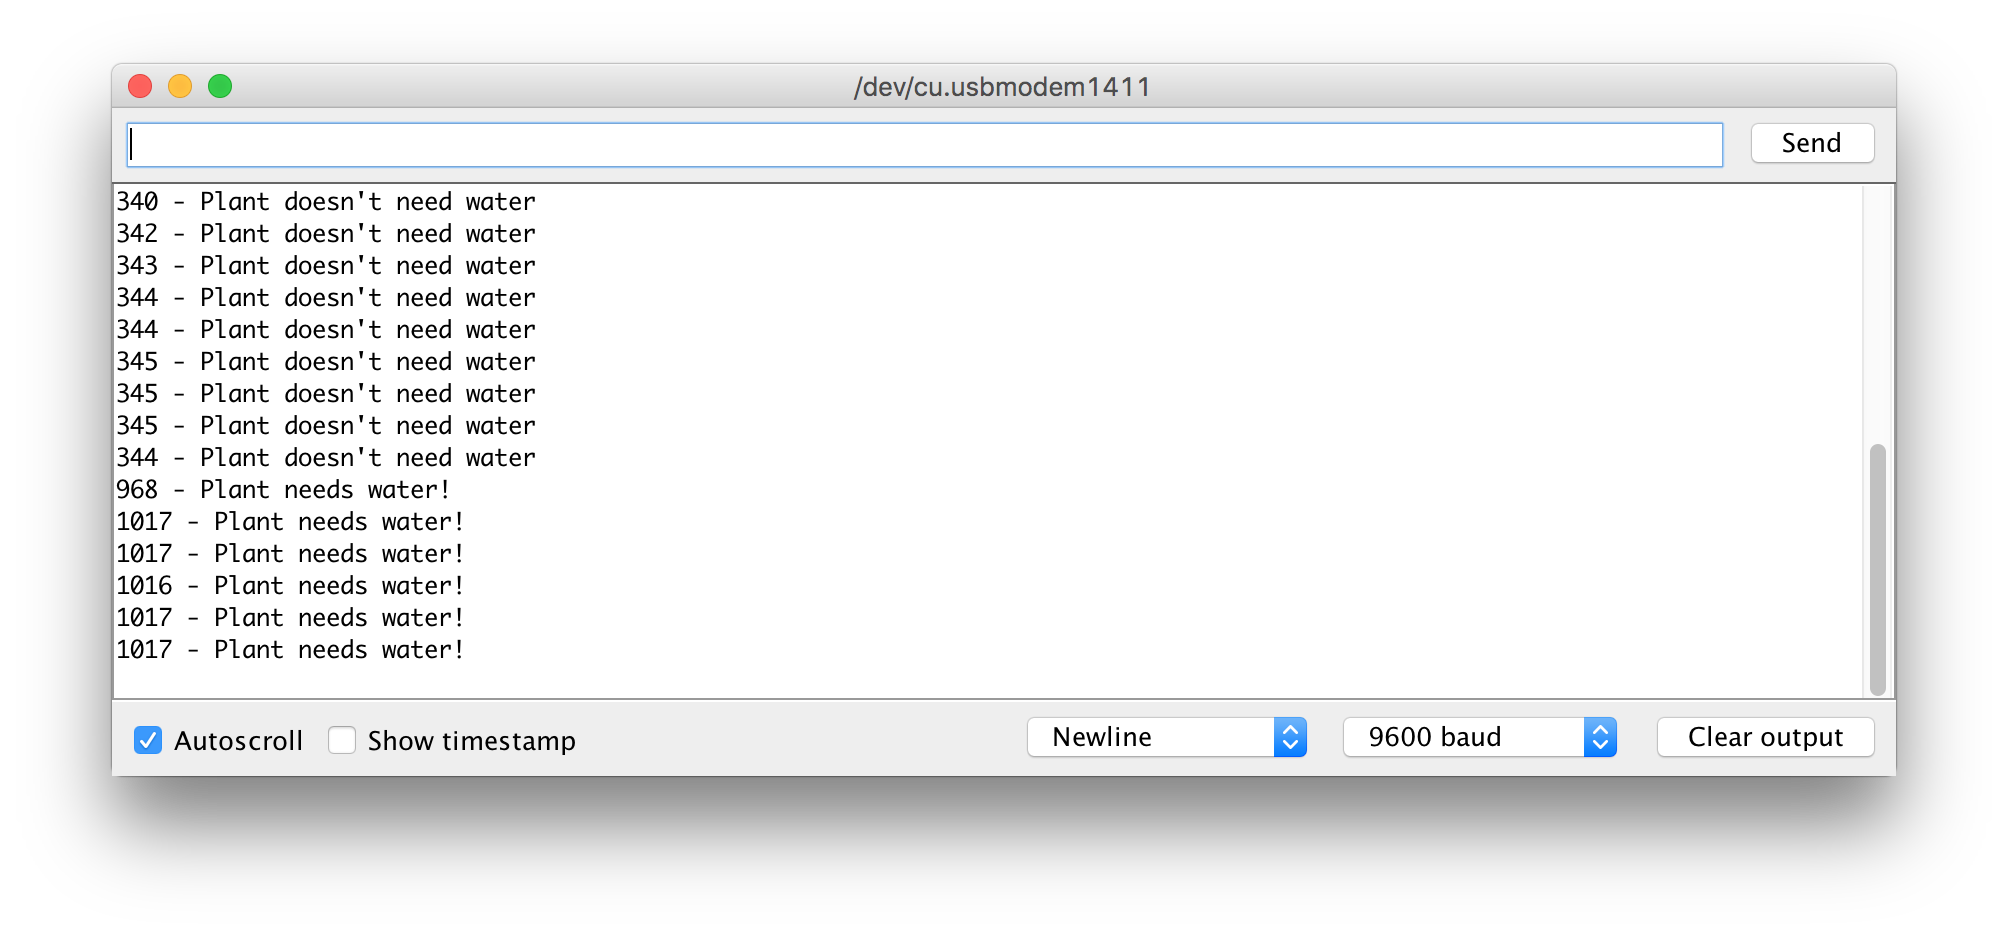
The output from the moisture sensor changes based on how much water is in the soil. It ranges from 0 to 1023. 1023 means that there is no water and 0 means there is perfect conductivity and hence plenty of water.
Step 2: Coding the Arduino
int moisturePin = A0;
int threshold = 750;

void setup(){
    pinMode(moisturePin, INPUT);
    Serial.begin(9600);
}

void loop(){
    int sensorValue = analogRead(moisturePin);
    Serial.print(sensorValue);
    if (sensorValue < threshold){
        Serial.println(" - Plant doesn't need water");
    } else {
        Serial.println(" - Plant needs water!");
    }
    delay(1000);
}
The code is straightforward. We first define the moisturePin as A0. This is where the input from our moisture sensor is coming in. Then we set the threshold value to 750. This value dictates what we assume to be the best soil moisture level. You might want to change it to something else based on personal testing. After that, we use the analogRead function to read the value from pin A0 and based on the reading we send some information to the serial monitor.
Lastly, we add a delay for one second so that we can get reliable and paced readings. There is no use in taking a reading every millisecond.
And that is it! Connect the Arduino to your laptop, upload the code and try putting the sensor in soil! It should give you an output like this in the serial monitor:
In the next article, we will learn how to measure temperature and light intensity using the Arduino. See you then! ❤️
✍️ Comments
Thank you!
Your comment has been submitted and will be published once it has been approved. 😊
OK