
Staticman Comment Notifications Setup Using Mailgun
Hi people! 👋 This post is about how to set up email notifications for new comments on your blog using staticman. This way if someone posts a comment on an article can automatically get updated in case someone else makes a new comment on the same article.
It took me a while to figure out how to do it properly. I will take you through each step so that you don’t have to bang your head against a wall.
Step 1: Set up a Mailgun Account
Staticman uses Mailgun to actually send out notifications so you need to set up a Mailgun account. It is super simple. Go to https://www.mailgun.com/ and sign up using your email/password and set up a custom domain.
Follow the instructions in the images below for easier guidance 😊
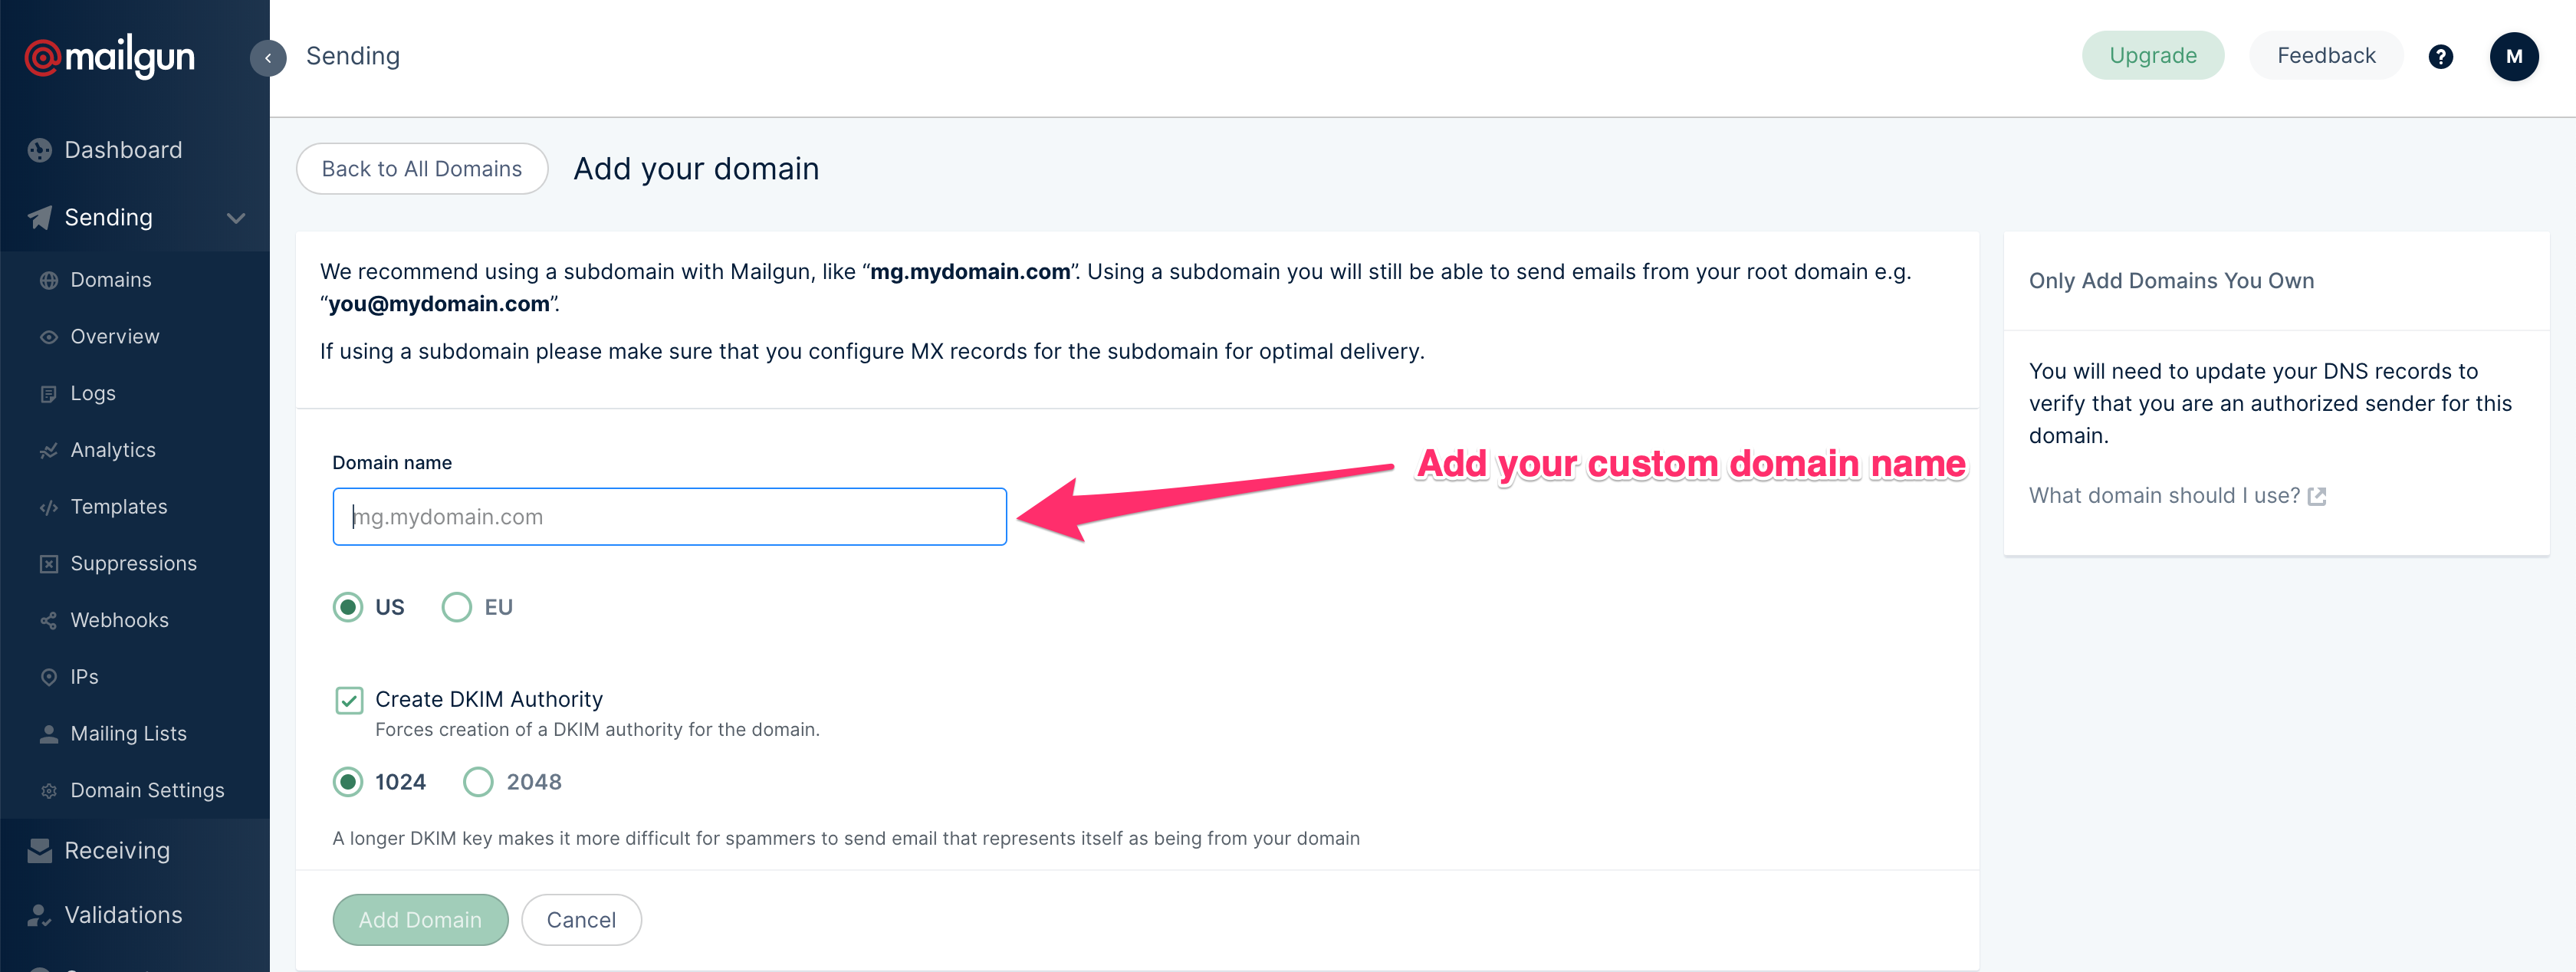
Go to Mailgun homepage after signing up and click on domains in the sidebar on the left side. After the page opens click on “Add New Domain” in the top right corner.

Next, add your custom domain name in the “Domain Name” text input. Mailgun suggests using a sub-domain like mg.mydomain.com. You can use whatever you want. For the purposes of this post, I used “holi.yasoob.me”.
Now Mailgun will provide you with some config which you have to add to the DNS config of your custom domain. Copy these for the next step.
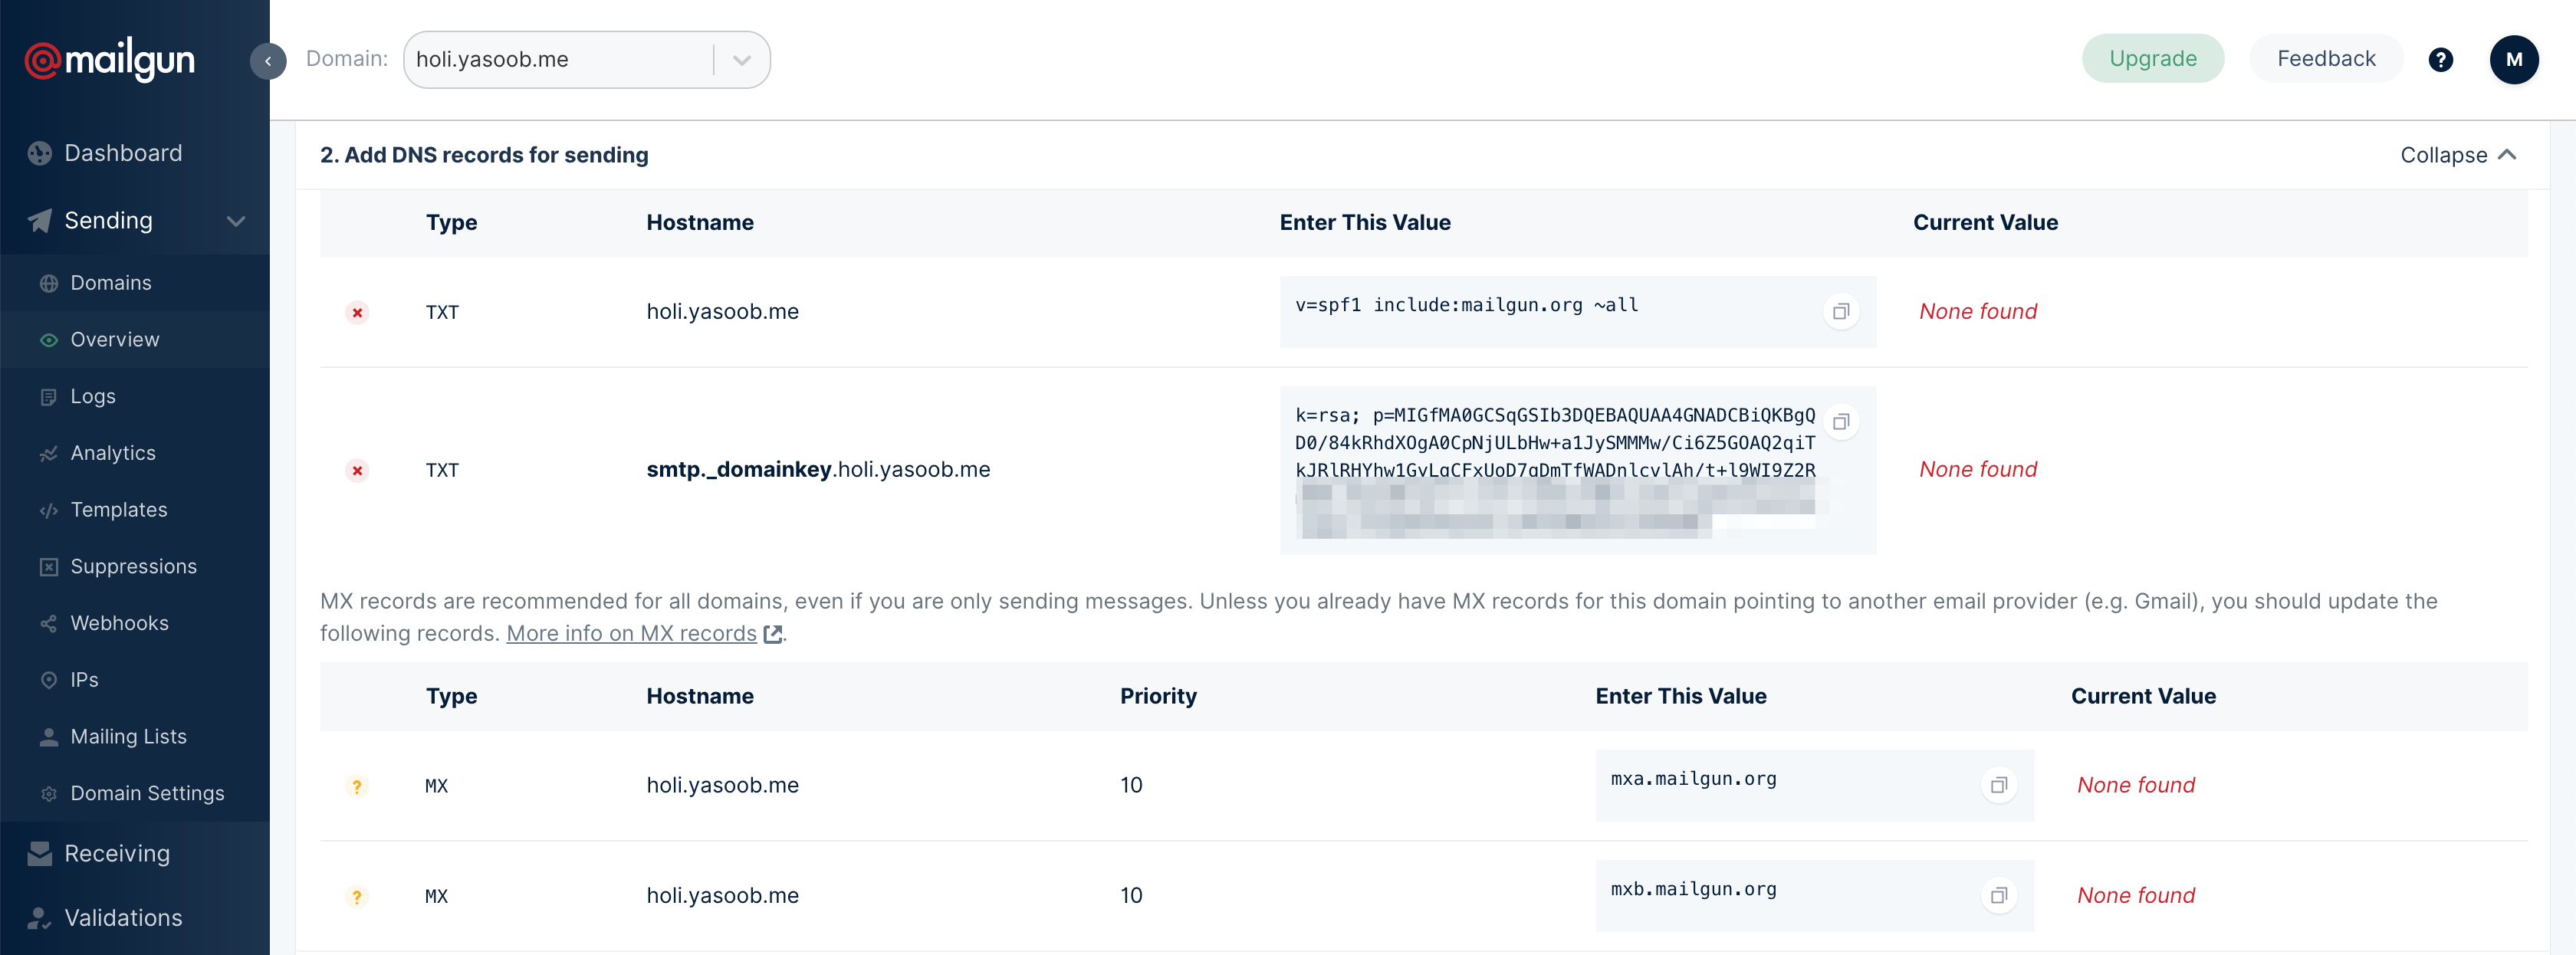
Step 2: Making DNS Changes to Namecheap
So my domain registrar is Namecheap and I will tailor these details to that. Yours might be different but the steps should be the same.
I opened up Namecheap and went to the “Advanced DNS” tab and added the details like this:
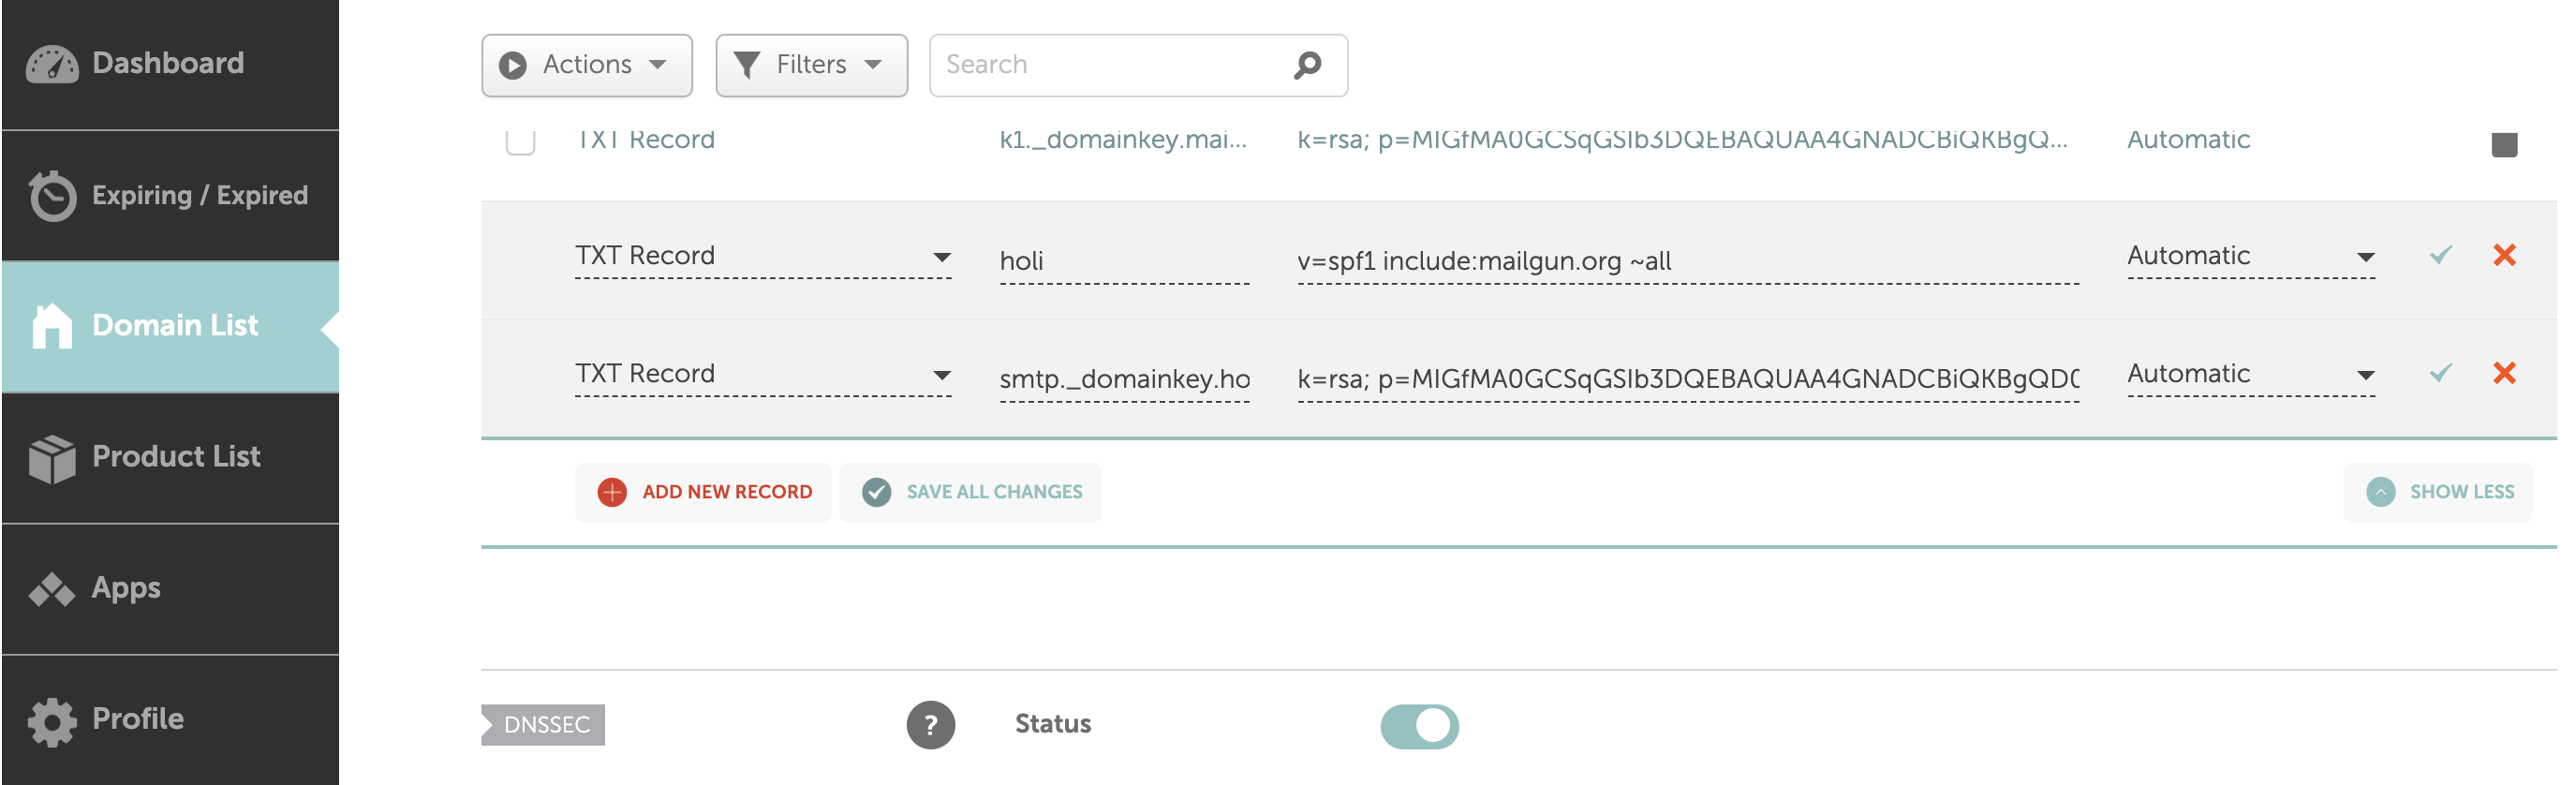
When I started out I made a huge mistake on this page. Instead of typing in only “holi” in the host field, I was typing in “holi.yasoob.me”. That was wrong and I had to get in touch with support to figure that out. In hindsight, it should have been obvious because I have some other custom DNS config as well and they all follow that pattern.
The DNS propagation should take a couple of minutes and then you can go back to Mailgun and click on the “Verify DNS Settings” button and the domain should be verified. We can set up the rest of the code during this time.
Step 3: Changing the Comments.html Partial
In your comments.html partial which you use to render the comment box, you need to add a new field:
<input type="checkbox" name="options[subscribe]" value="email">
Send me an email when someone comments on this post.
If someone wants to receive email updates for new comments, they can check this box. You can style this in any way you want. You only need to make sure that the name remains the same. Commit these changes but don’t push them online just now. We will do that after the next step.
Step 4: Updating staticman.yml
The last part involves updating staticman.yml. We need to add four keys. The first one is “name”. The value of this field will be reflected in the email which staticman sends to people on new comment. I will show you what it looks like in an actual email later.
Next, we need to add a key called “enabled” under notifications to actually tell Staticman to send notifications. And lastly, we need to add our Mailgun API key and domain name in this config. We will not add a plaintext version of these two configs but rather an encrypted version.
In order to encrypt something using the RSA key you uploaded to Staticman while setting it up, you need to append the data at the end of this URL and open it. This will give you an encrypted version of the text you pass it. Use this endpoint to encrypt your Mailgun API key and domain and add them to your staticman.yml file. My staticman.yml looks somewhat like this:
---
comments:
  name: "Yasoob Khalid"
  # ...
  notifications:
    enabled: true
    apiKey: "Kf3+7eqt0zog+RadxaAD=="
    domain: "BL4Dq9fXgfsg+YWMqHsQ=="
Now you can commit these changes to Git and push them online. From now on if anyone makes a comment and checks the “subscribe” box, they will get email notifications of each subsequent comment.
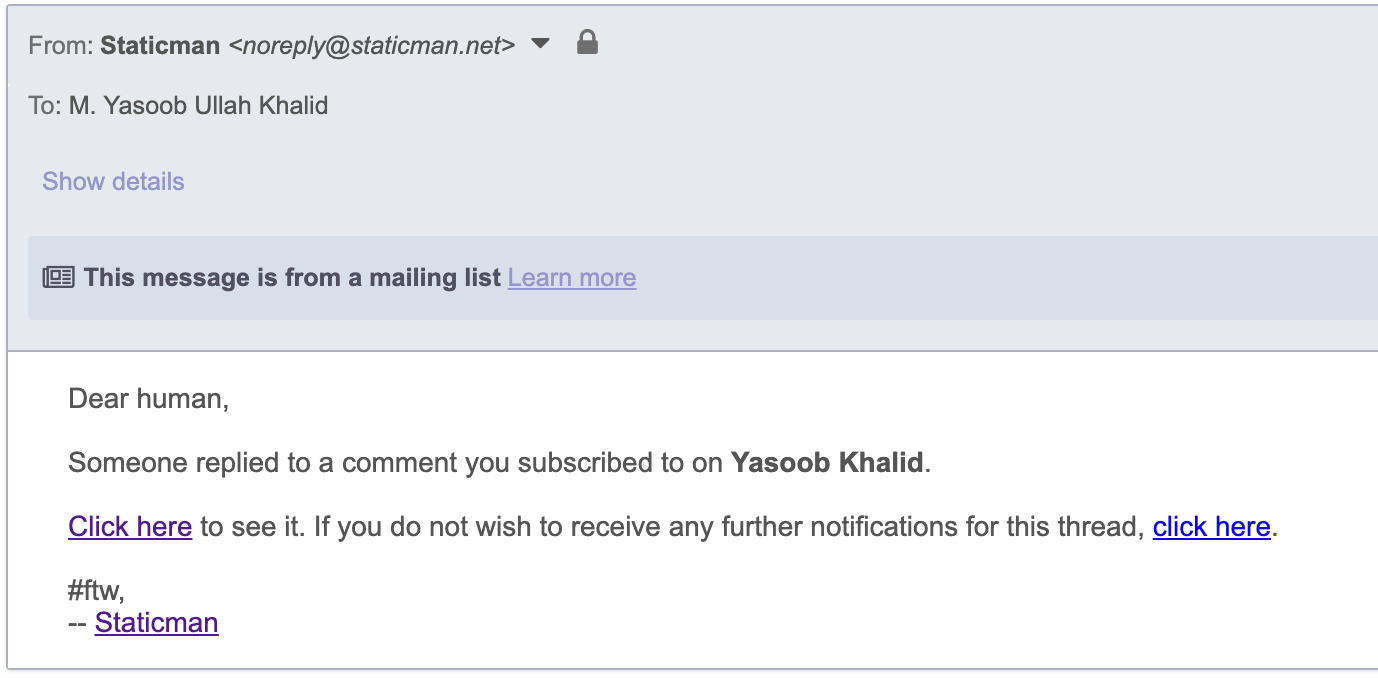
The email will look something like this:
And that’s it! I hope you learned something new in this post. I had to stumble to get this to work. Hopefully, your journey will be much smoother now. ❤️
If you have any comments/suggestions/concerns, please mention them in the comments below! Till next time. 👋
✍️ Comments
Thank you!
Your comment has been submitted and will be published once it has been approved. 😊
OK