


Creating Offline Custom Style Maps With tileserver-gl
Hi lovely people! 👋 Last year, I saw a project on Product Hunt which allowed people to generate posters from maps. The website has since closed down and the company has been acquired by Airbnb. This is what the output looked like:
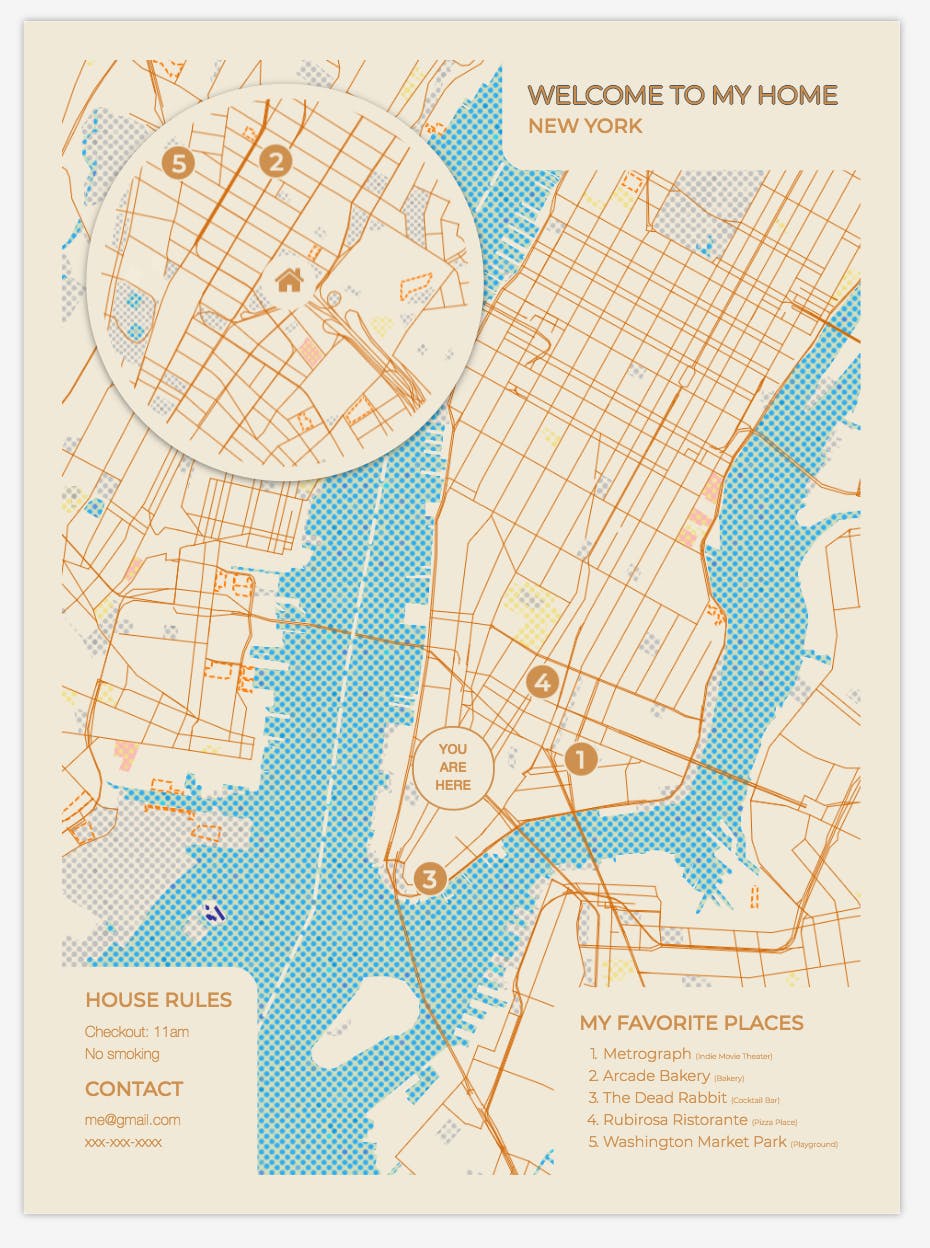
Now, I was interested in figuring out how they were able to render this map. My experience with maps was limited to Google Maps only so I was excited to explore the world of custom map generation. I thought about this project for a while, tried working on it but quickly gave up because of how difficult it was to grasp the basics and get a map rendering pipeline running locally.
It wasn’t until recently that I came across an article where the author used Mapbox Studio to create a blueprint style map. That post rekindled my interest in custom map generation and I knew that with the availability of Open Street Maps there is definitely an Open Source software which I can use.
Offline rendering options:
I could use tileserver-gl or openmaptiles. Both are developed by the same company. The difference is summed up by one of their sales people like this:
OpenMapTiles Map Server is better suited for a production environment. It’s a complete package with caching and integrated map services (WMTS/WMS). It is also much easier to set up than TileServerGL. This is especially useful when working with vector map data (such as OpenMapTiles) and dynamically creating raster tiles from such data.
If you have raster tiles (already prepared in advance) and you only need to serve them, the TileServerGL is perfectly sufficient. There are also alternatives like tileserver-gl-light (without rasterization) or tileserver-php.
I decided to go with tileserver-gl.
Let me tell you right now that I am by no means an expert in mapping. I did this project out of personal curiosity and can not guarantee the correctness of the information on this page. I tried my best to make sure everything I wrote is correct but errors can still creep in. If you find any error just email me and I will fix it. Thanks!
Installing the Docker version
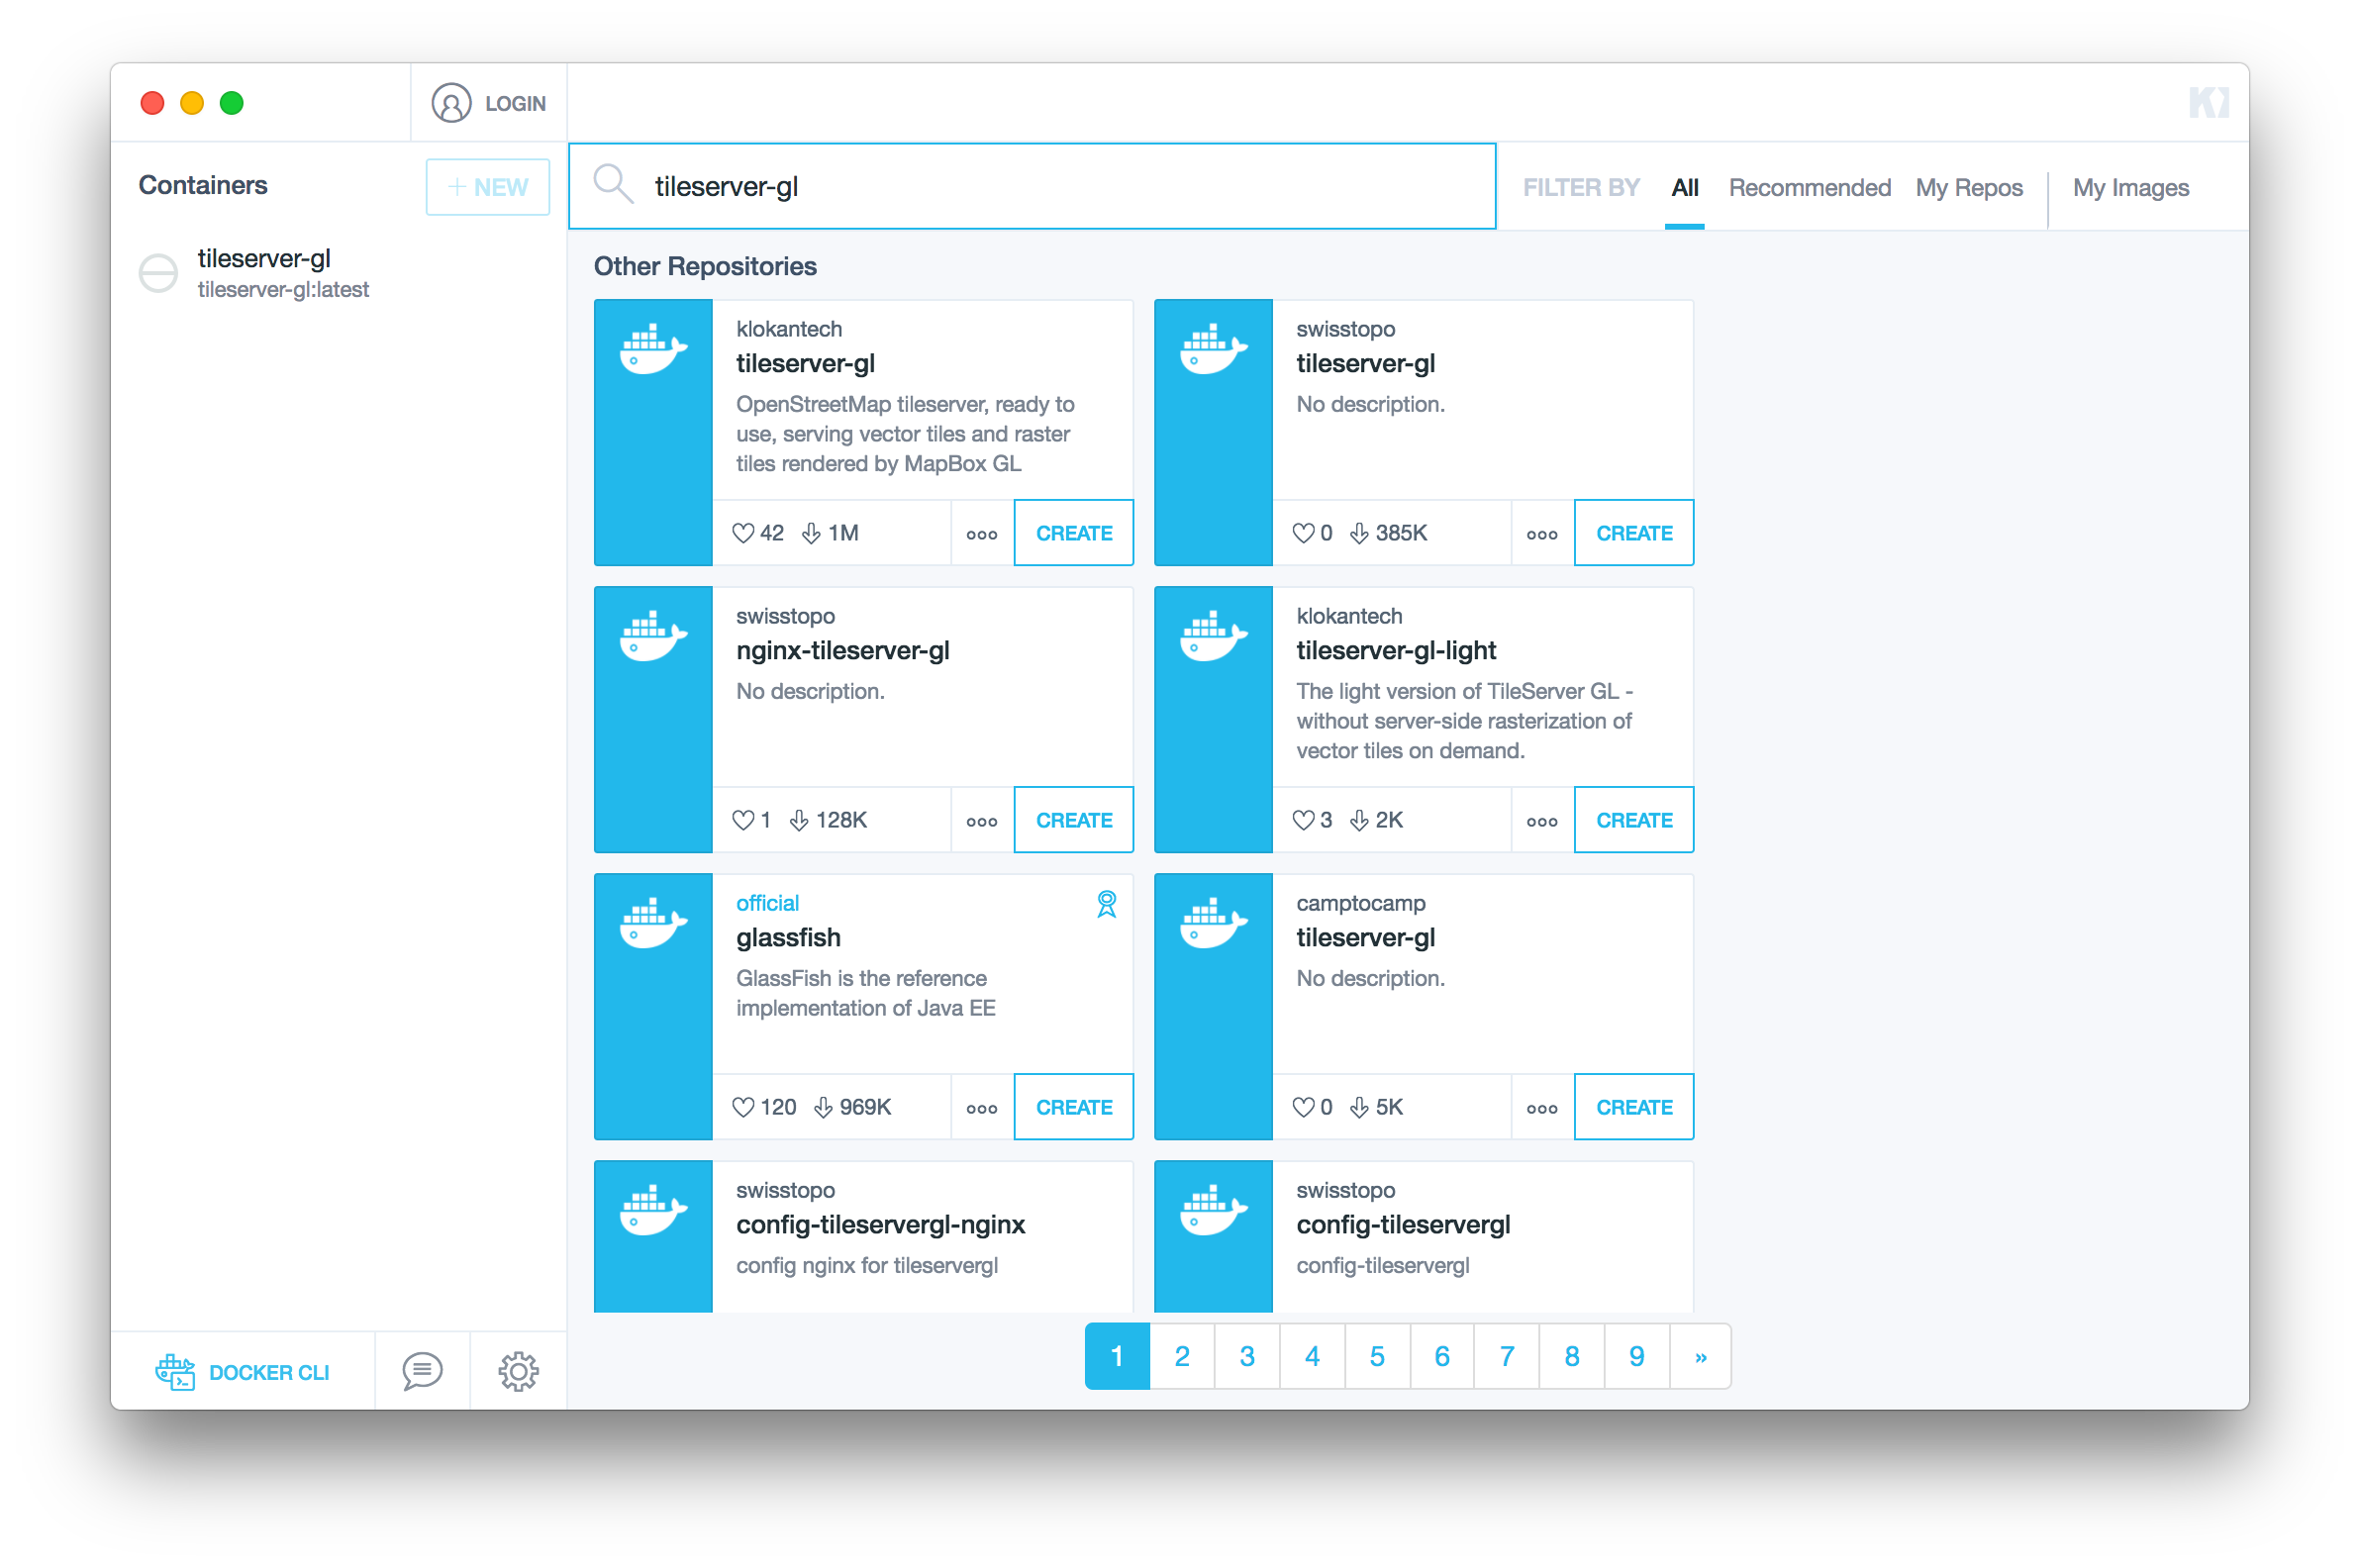
Install Docker and Kitematic if you don’t have it already. Open Kitematic and create a container using the tileserver-gl repo by Klokantech:
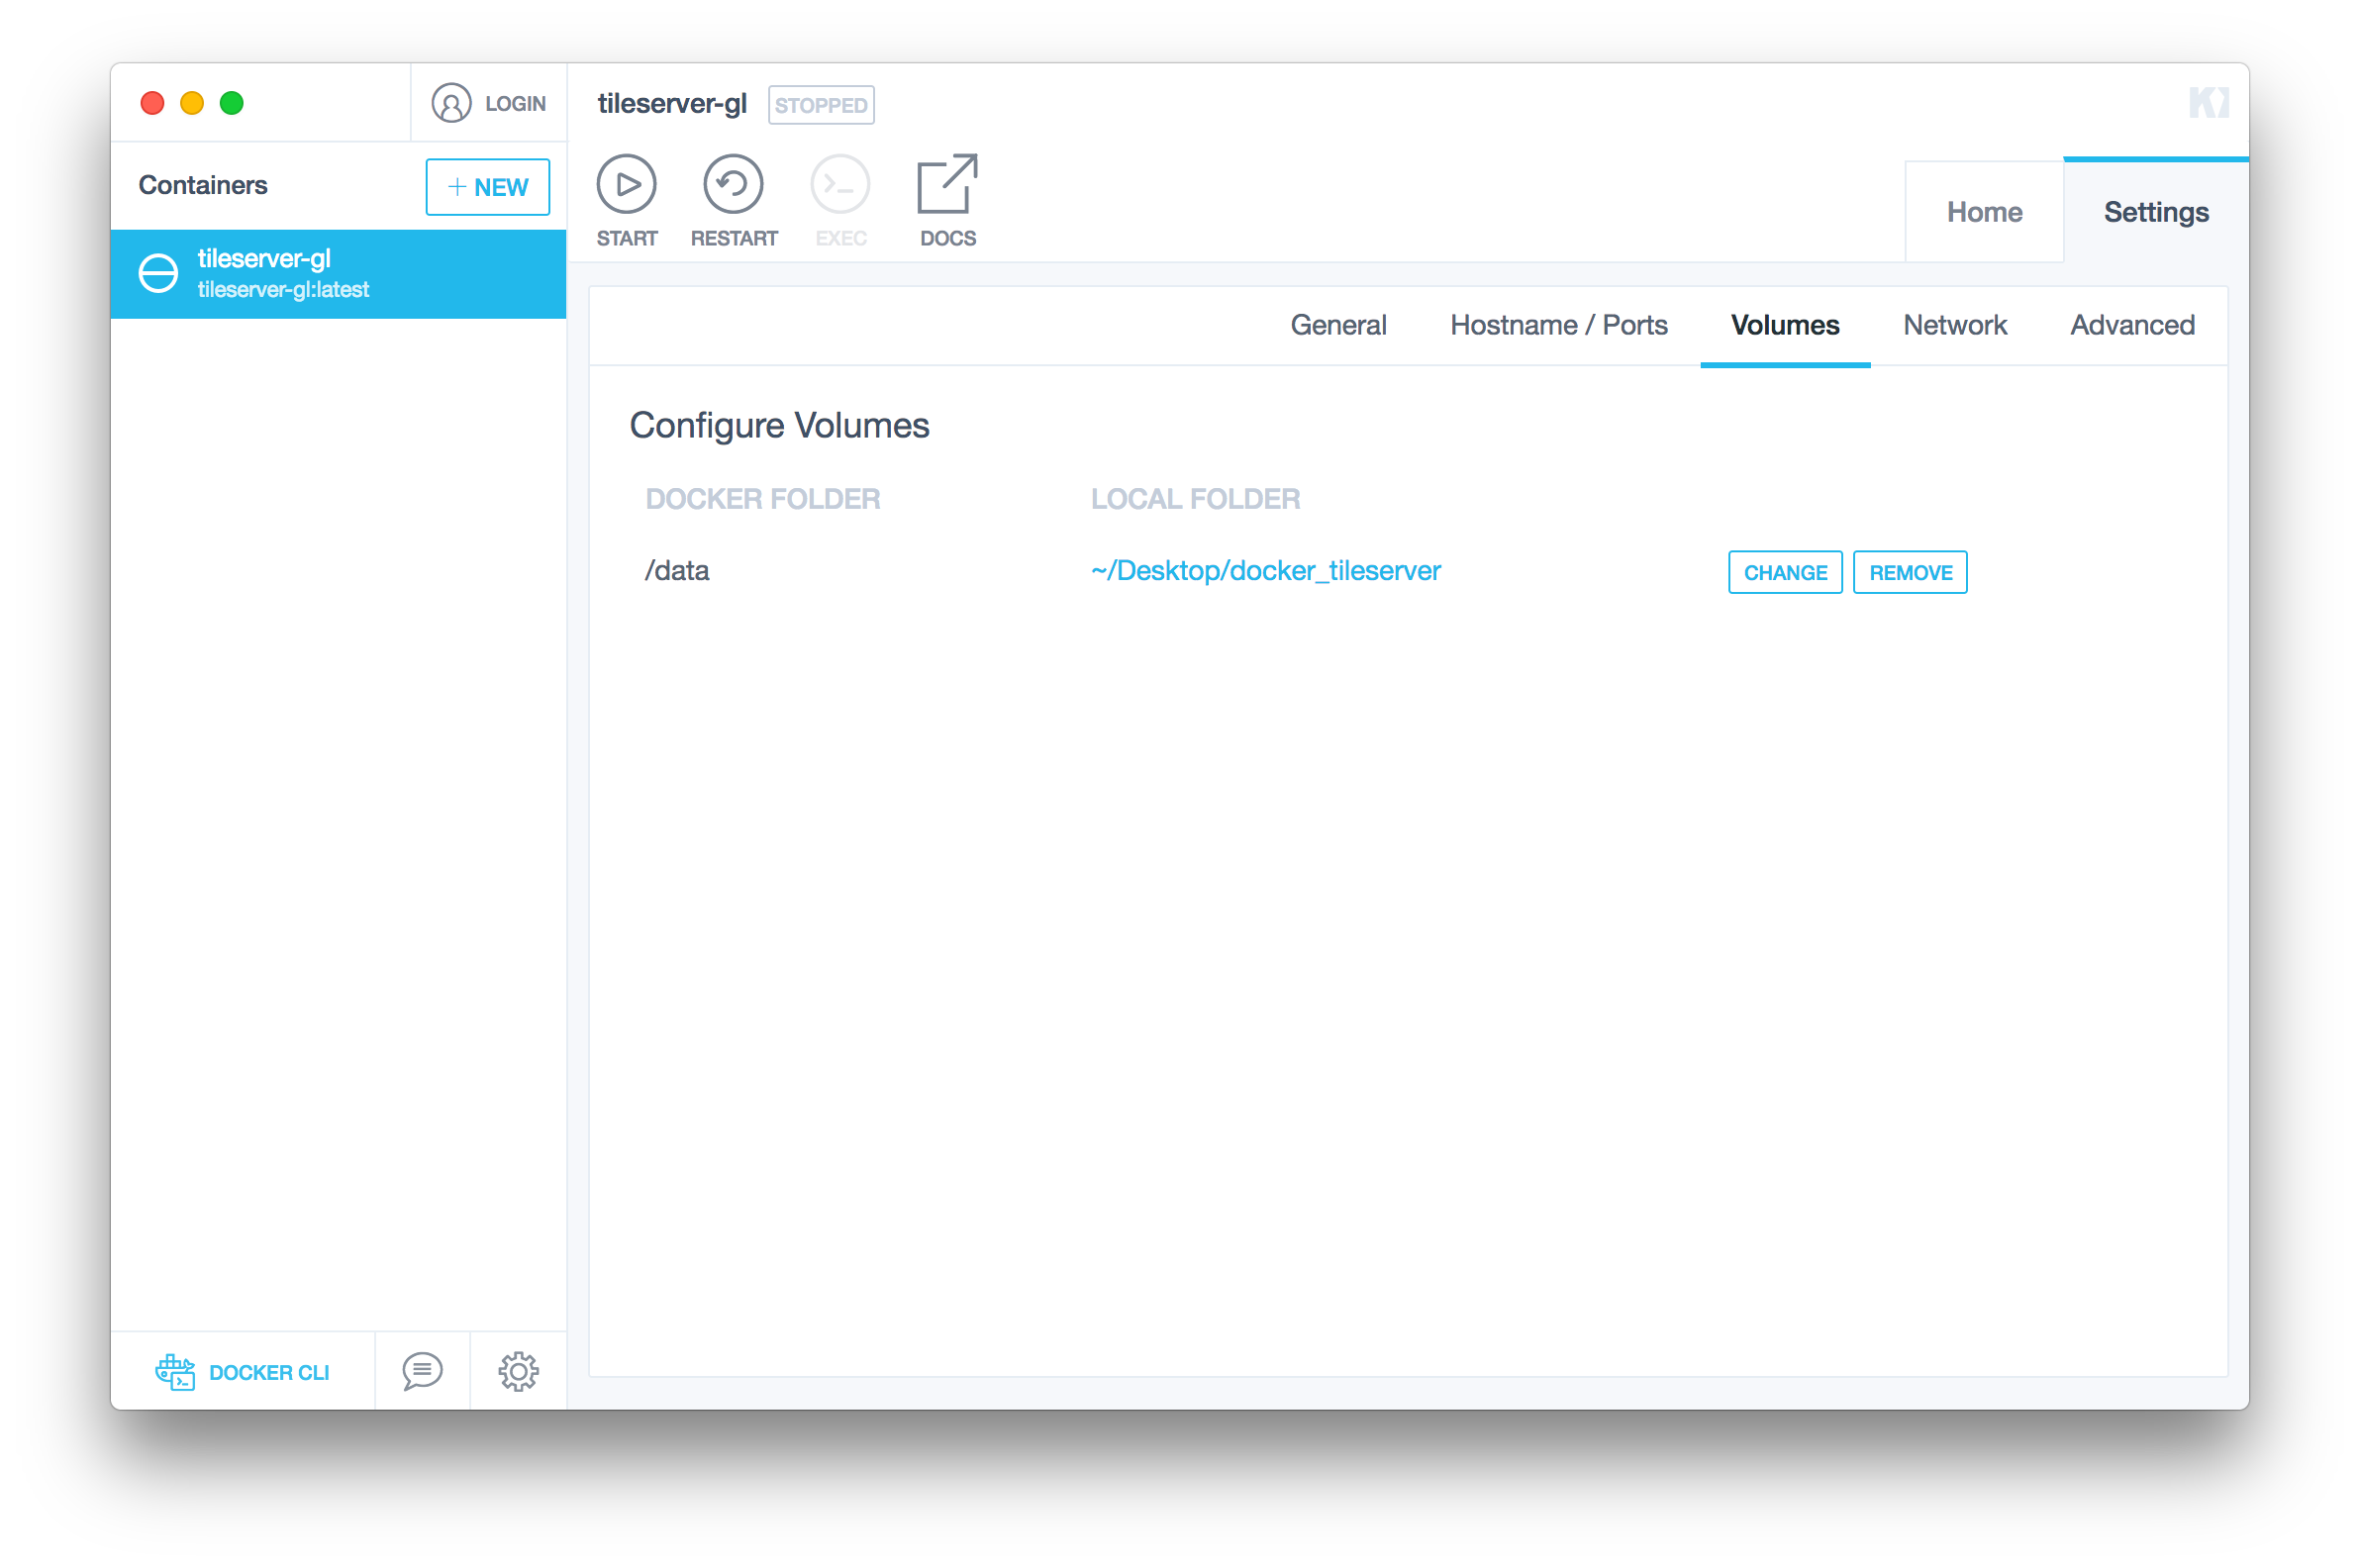
Now we need to map a local folder to the data folder for the tileserver-gl container. You can do that in Kitematic by clicking on the container name in the left column, clicking on “settings” at the top right and then choosing the “Volumes” tab.
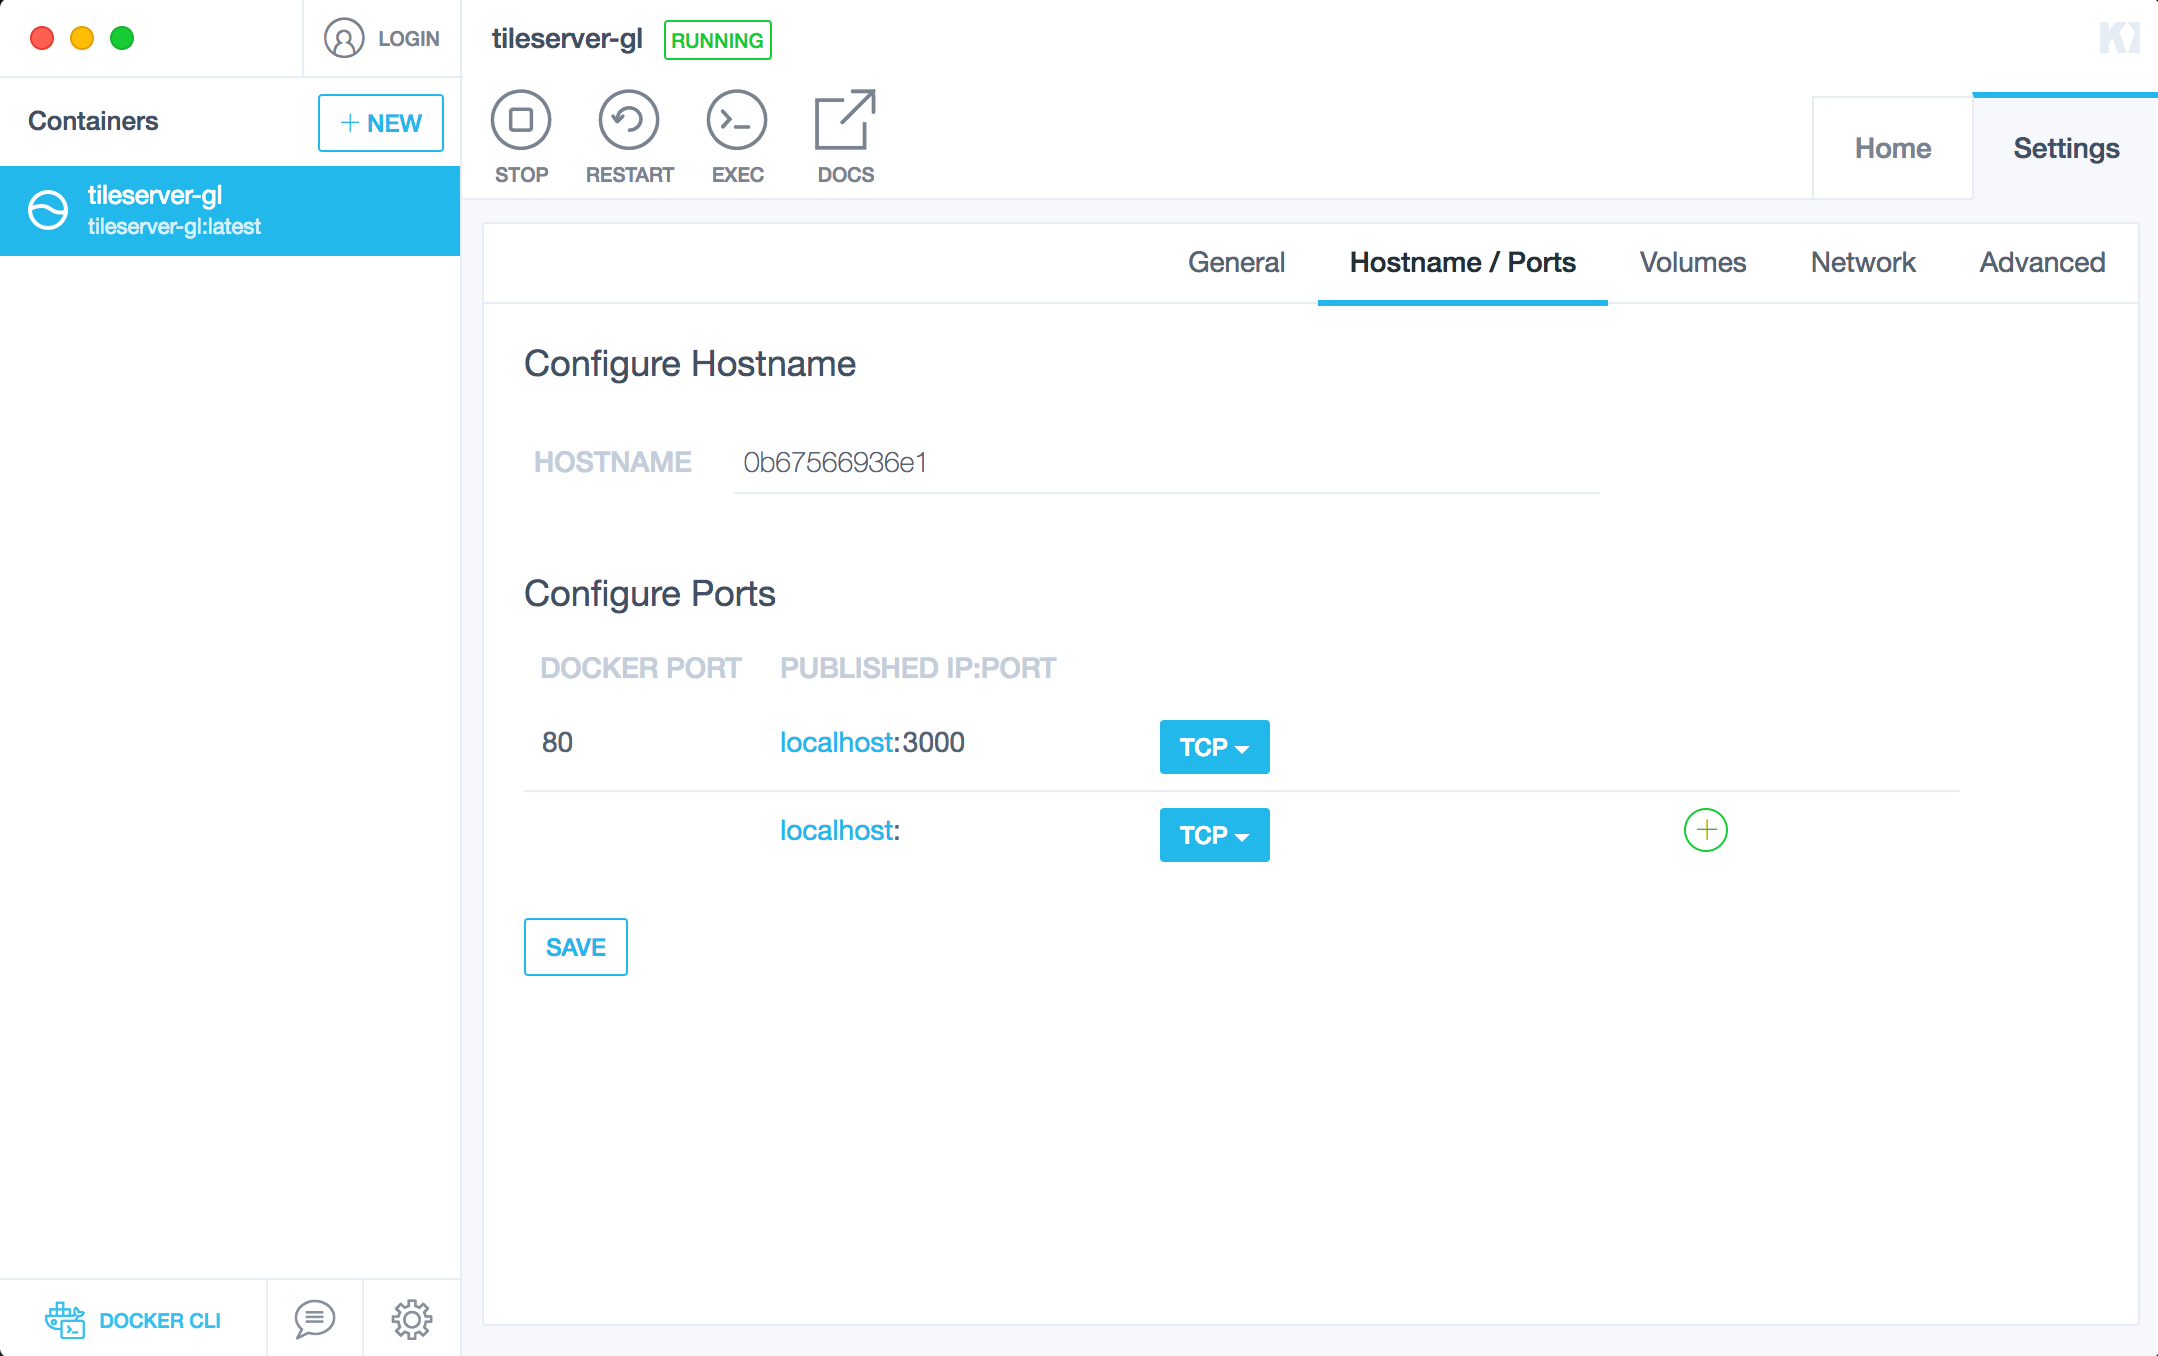
Another thing I like doing is mapping the container port to a known host port so that every time the container is run I can access tileserver-gl at the same port in the browser. You can do that by going to the Hostname / Ports tab.
Next step is to download some tile data. We will be downloading a mbtiles file for Pakistan. This mbtiles file is a compressed file which contains all the information you see in a normal map. We will be downloading the OpenStreetMap vector tiles.
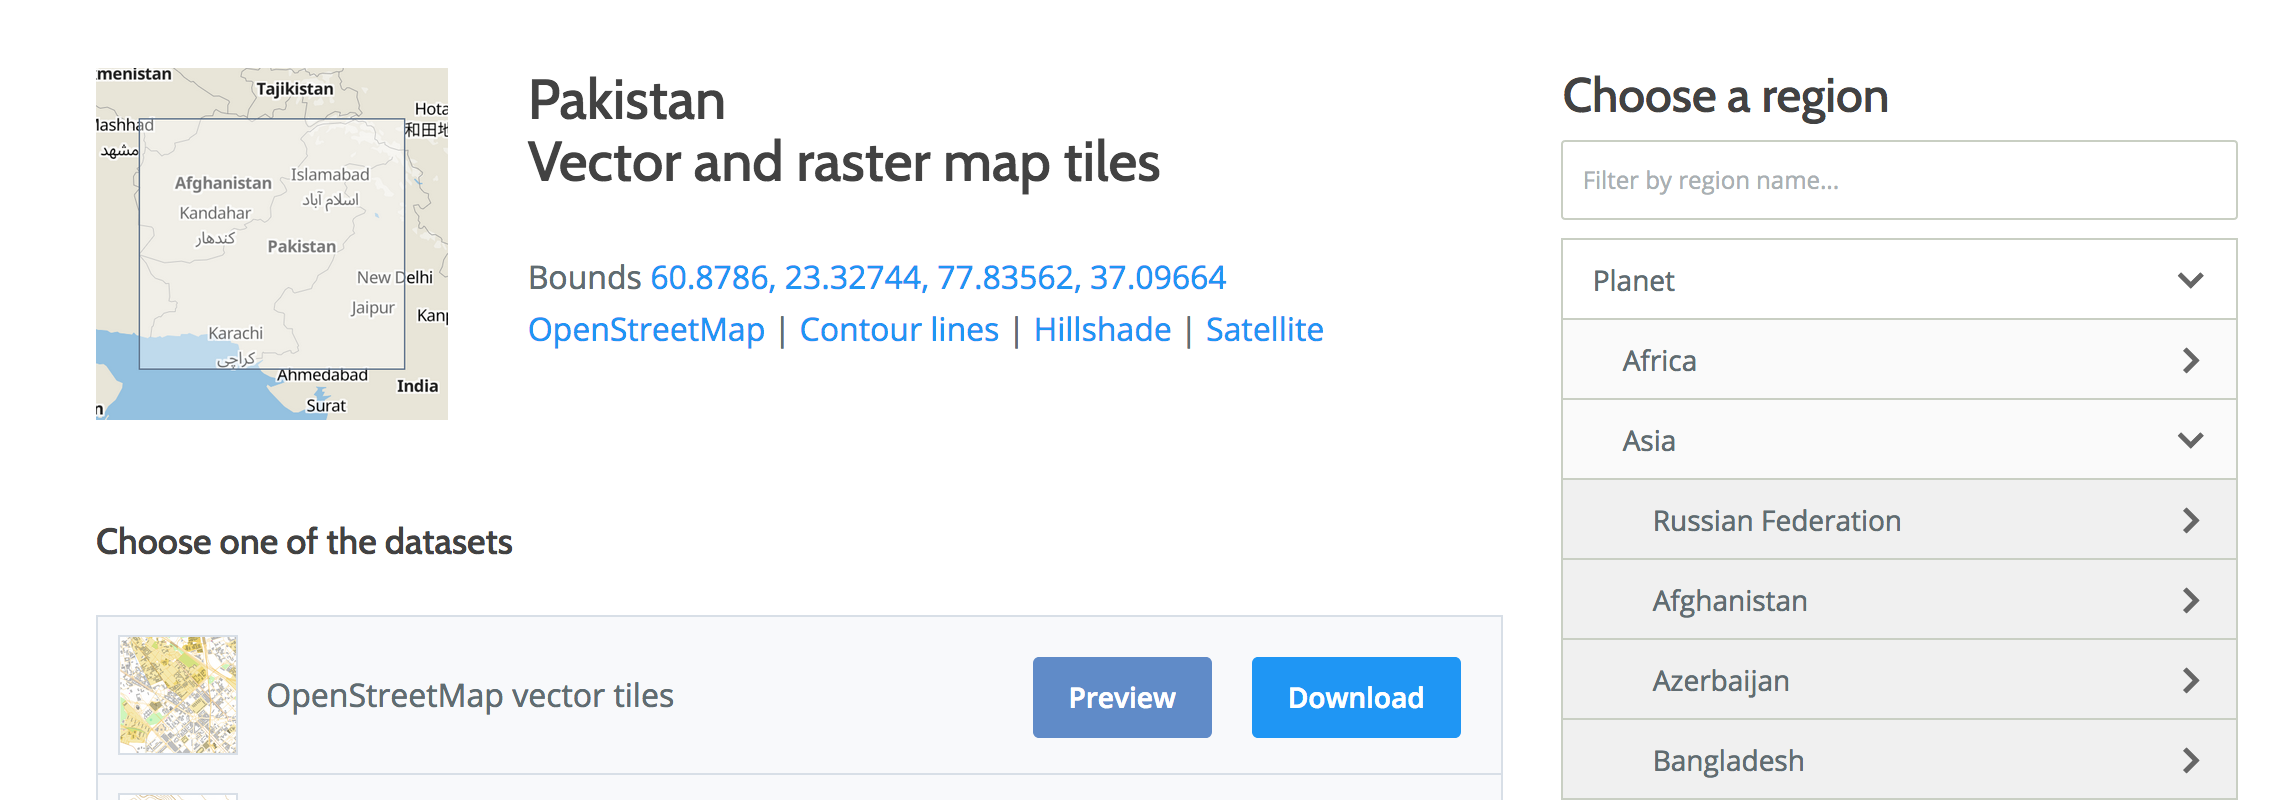
Now put the downloaded file in the local folder you mapped above to the /data folder for the container. In my case, I mapped a docker_tileserver folder on my Desktop as the /data folder on the container.
Creating a configuration file
By default tileserver-gl already has a configuration file but now that we want to use custom mbtiles we need to create a config file. Start by creating a config.json file in the mapped /data folder. Next, populate it with the following content:
{
  "options": {
    "paths": {
      "root": "/usr/src/app/node_modules/tileserver-gl-styles",
      "fonts": "fonts",
      "styles": "styles",
      "mbtiles": "/data"
    },
    "serveStaticMaps": true,
    "formatQuality": {
      "jpeg": 90,
      "webp": 90
    },
    "maxSize": 8192,
    "pbfAlias": "pbf"
  },
  "styles": {
    "klokantech-basic": {
      "style": "klokantech-basic/style.json",
      "tilejson": {
        "bounds": [60.8786, 23.32744, 77.83562, 37.09664]
      }
    },
    "osm-bright": {
      "style": "osm-bright/style.json",
      "tilejson": {
        "bounds": [60.8786, 23.32744, 77.83562, 37.09664]
      }
    }
  },
  "data": {
    "v3": {
      "mbtiles": "/data/2017-07-03_asia_pakistan.mbtiles"
    }
  }
}
We haven’t added anything new in the config file. Go to Kitematic and restart the server. You should be able to access localhost:3000 and be greeted with this page:

At this point, you can click on the viewer and navigate the maps. If that is what you wanted all along, perfect. You are finally at your destination. You can plug in a web interface using mapbox-gl-js or something similar and call it a day.
However, I wanted something more. I wanted to create a custom blueprint style and render large maps using that style. Now we will go ahead and learn how to do exactly that.
Creating a custom style
Klokantech has a long history as an Open source company. Their support is top-notch and their tools are amazing. Lucky for us, they host an online map editor called maputnik. We can use that to create custom styles and use them with tileserver-gl. Go ahead open up the online editor.
Now you can always begin styling from scratch but it is always easier and faster to stand on the shoulder of the giants. We will be editing the Dark Matter style to suit our needs.
The way styling works is that a map is made up of multiple layers. These layers range from water layer to building layer to major road layer to minor highway layer. You edit the style of each layer and can even hide the layers you don’t want to show on the final map.
I changed the halo color, font-size and place names (from {name:latin}{name:nonlatin} to {name:latin}) along with a lot of other mundane stuff. This is the most time-consuming task of the whole process and takes time to get right.
After doing all the style edits this is what I ended up with:
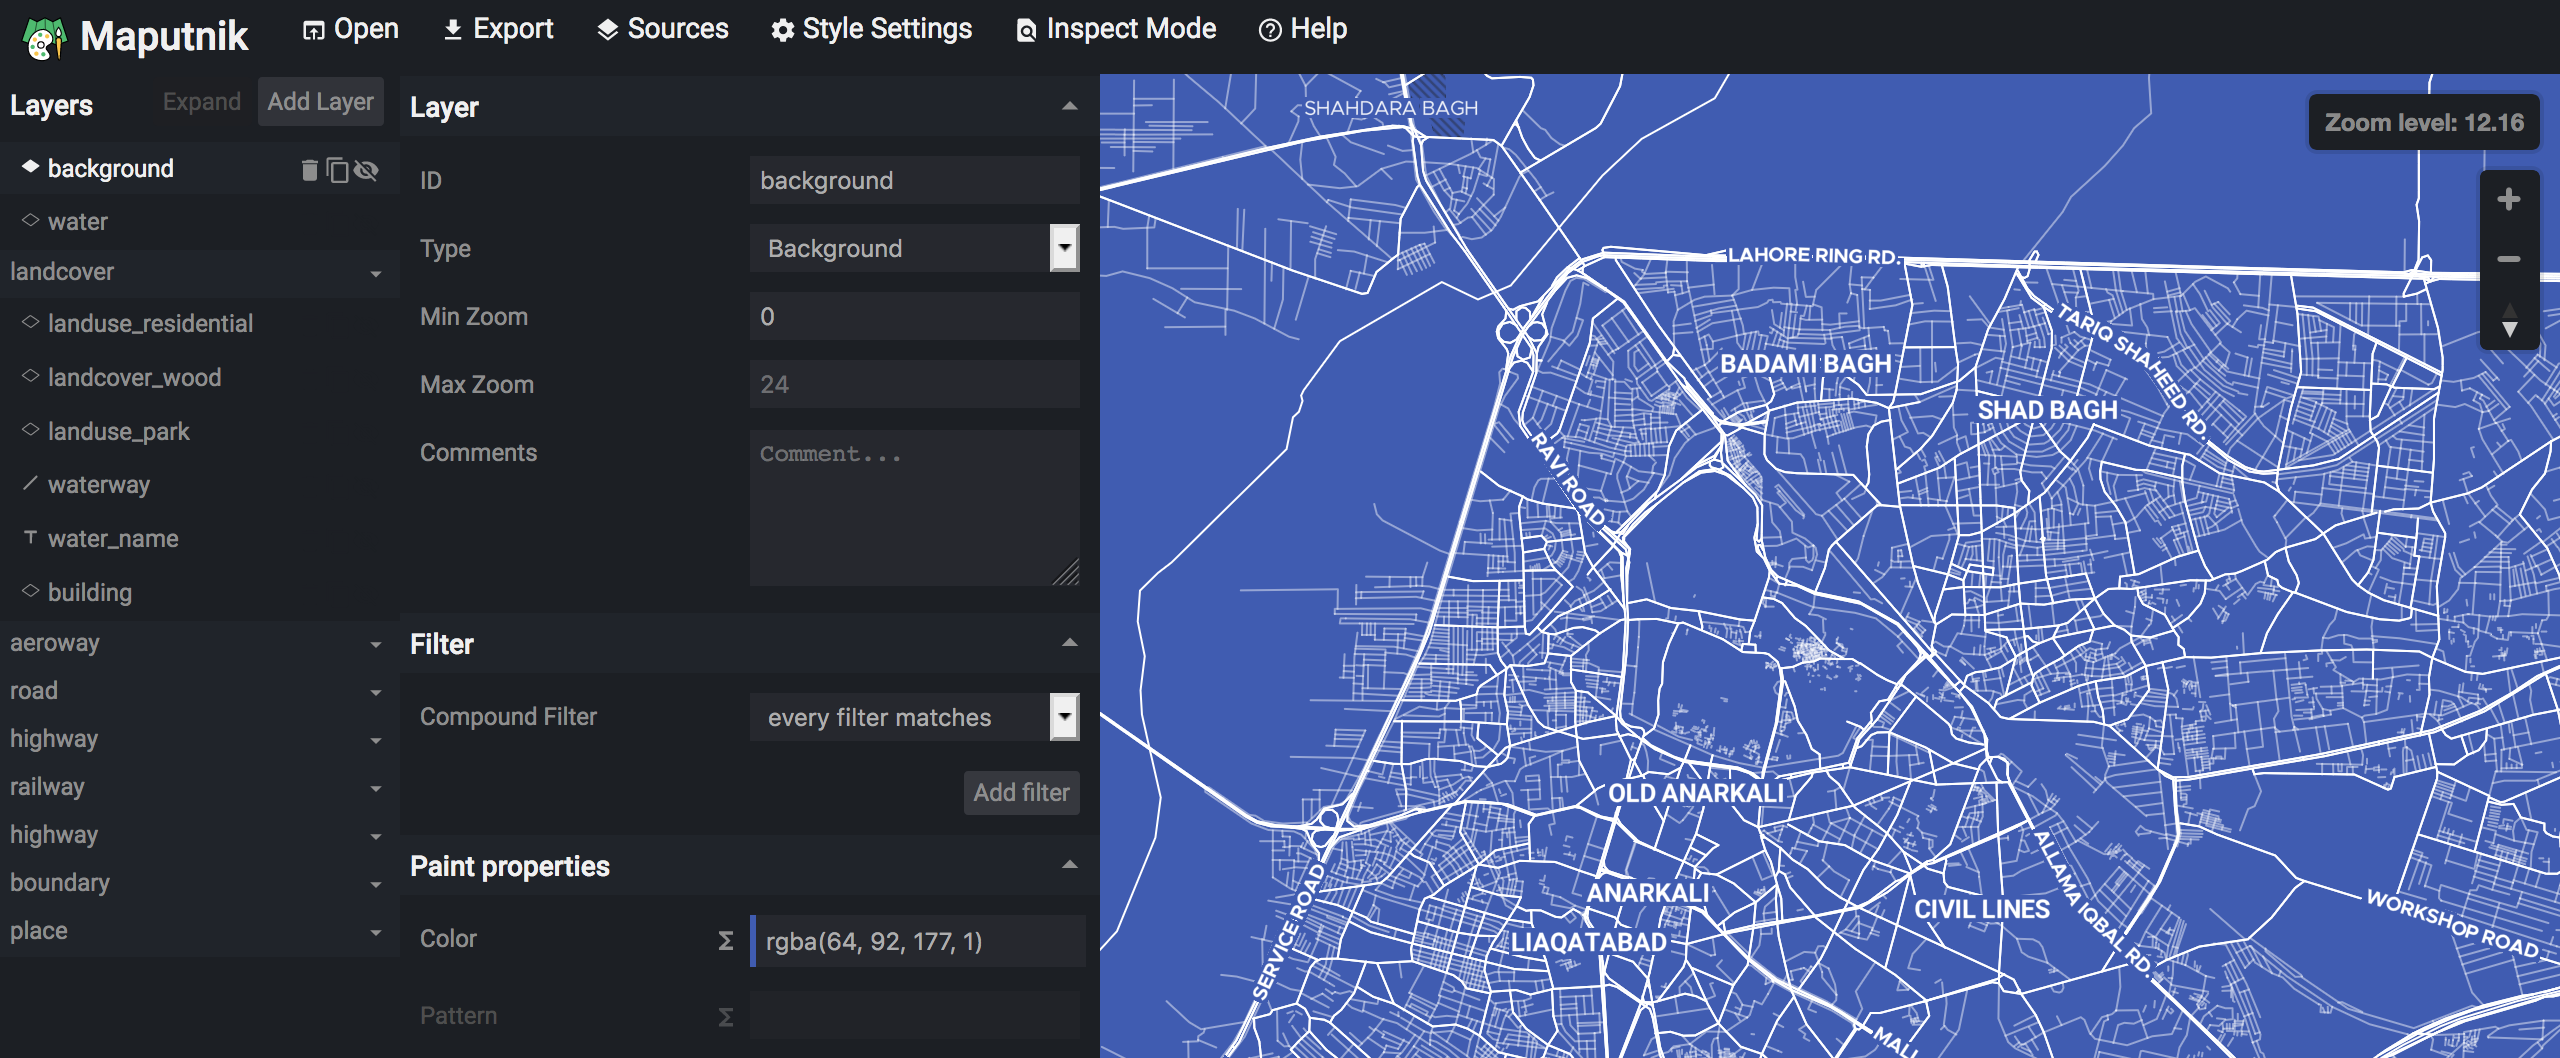
Exporting Custom Style
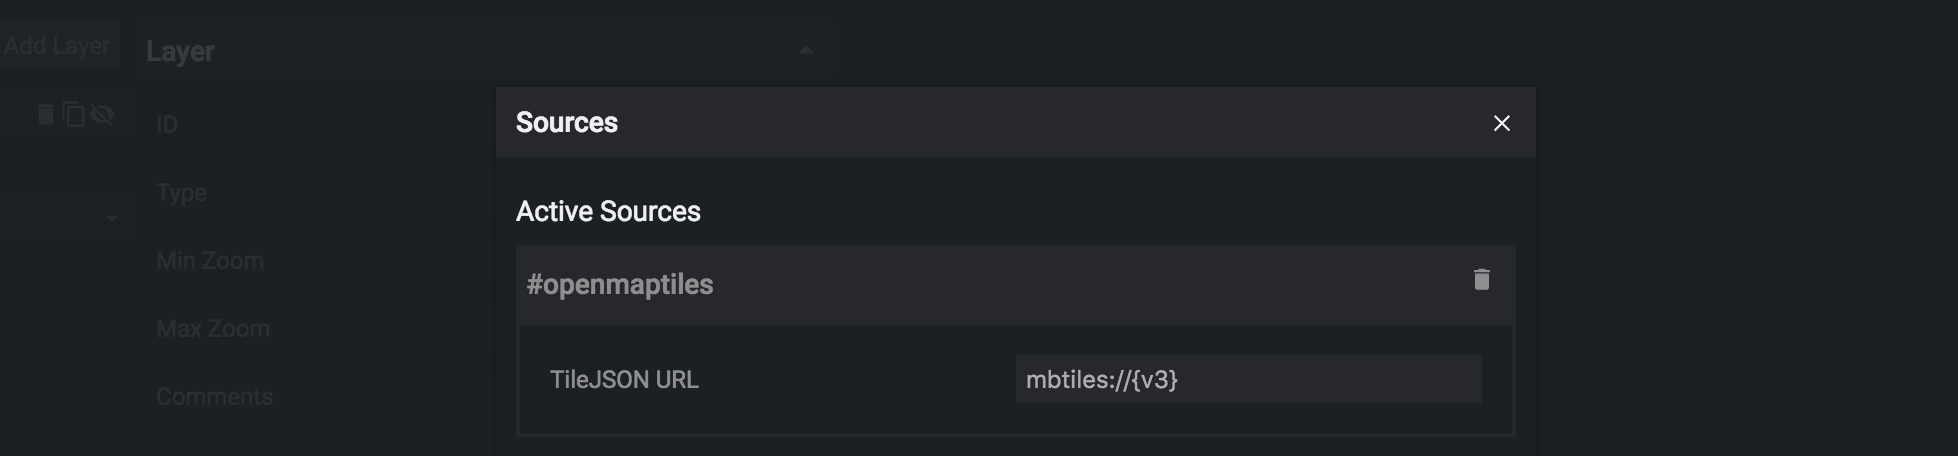
We can not simply export this map because it uses a free service graciously provided by OpenMapTiles to render the tiles in the editor. We have to change some settings so that the style.json file it produces is usable for us in our offline setup with our own data-source.
In the online editor click on Sources and edit the source like this:
And also click on Style Settings and edit them like this:
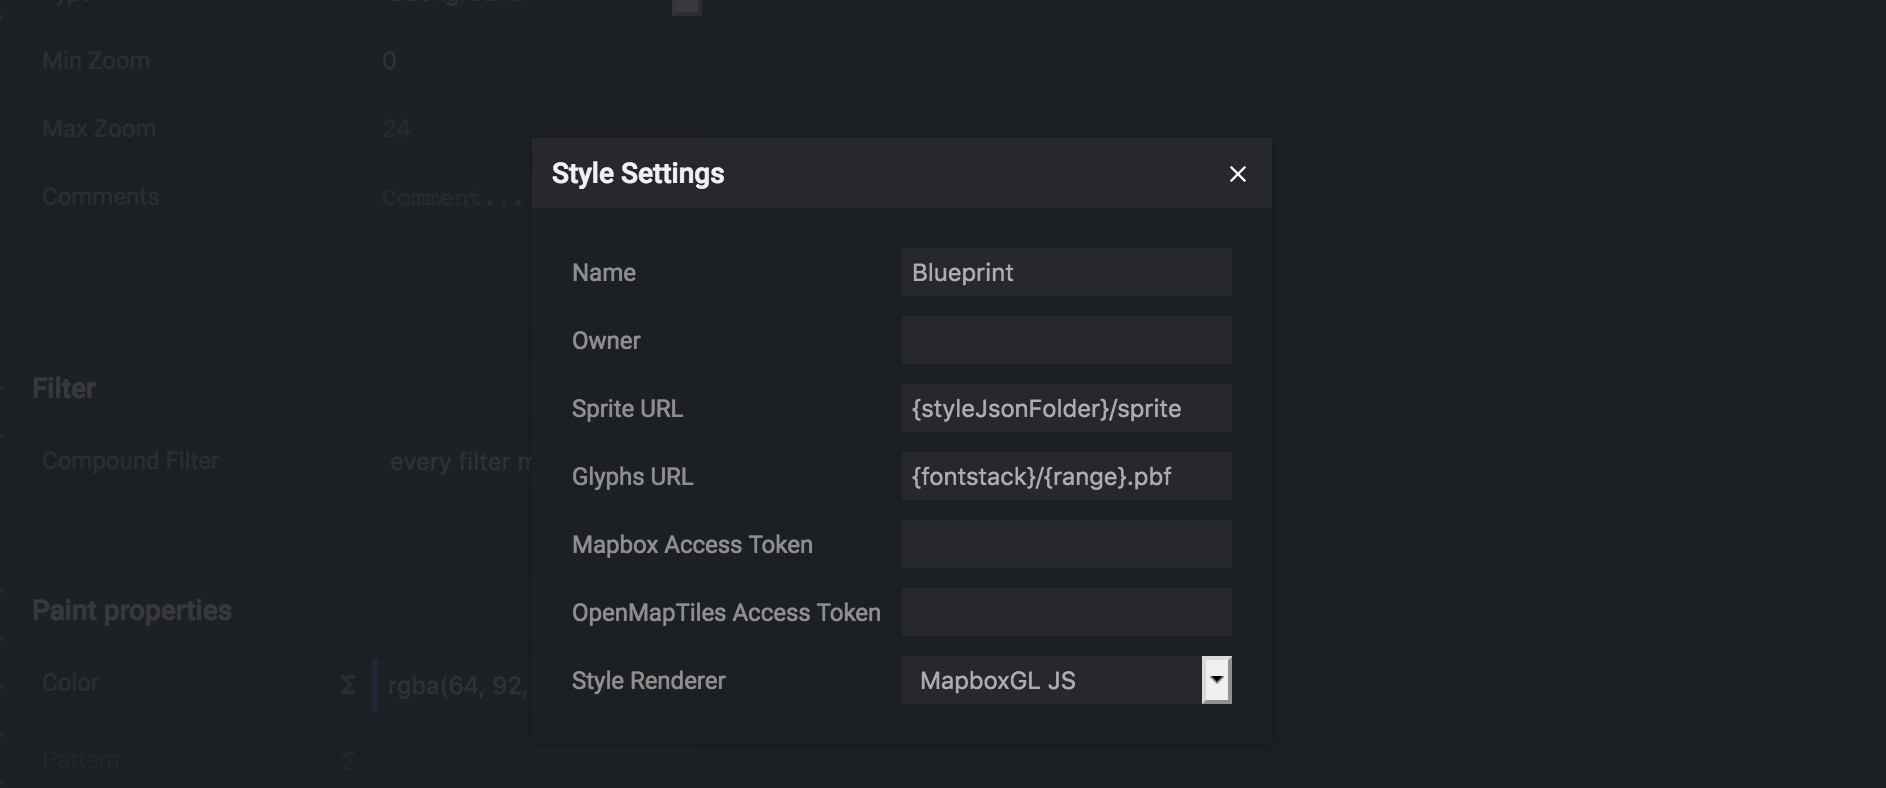
Now click on Export and download the JSON file. It will download a blueprint.json file. We used Dark Matter style as our base which uses some icons and sprites which we haven’t downloaded.
Download the following files and place them in the mapped /data folder like this:
.
├── config.json
├── styles
│   ├── blueprint.json
│   ├── icons
│   │   ├── circle-11.svg
│   │   ├── star-11.svg
│   │   └── wood-pattern.svg
│   ├── sprite.json
│   ├── sprite.png
│   ├── sprite@2x.json
│   └── sprite@2x.png
└── 2017-07-03_asia_pakistan.mbtiles
- sprite.json
- sprite@2x.json
- sprite.png
- sprite@2x.png
- icons/circle-11
- icons/star-11
- icons/wood-pattern
Enabling Custom Style
Now we just need to enable our custom style in the config.json file:
{
  "options": {
    "paths": {
      "root": "/usr/src/app/node_modules/tileserver-gl-styles",
      "fonts": "fonts",
      "styles": "styles",
      "mbtiles": "/data"
    },
    "serveStaticMaps": true,
    "formatQuality": {
      "jpeg": 90,
      "webp": 90
    },
    "maxSize": 8192,
    "pbfAlias": "pbf"
  },
  "styles": {
    "klokantech-basic": {
      "style": "klokantech-basic/style.json",
      "tilejson": {
        "bounds": [60.8786, 23.32744, 77.83562, 37.09664]
      }
    },
    "osm-bright": {
      "style": "osm-bright/style.json",
      "tilejson": {
        "bounds": [60.8786, 23.32744, 77.83562, 37.09664]
      }
    },
    "blueprint": {
      "style": "/data/styles/blueprint.json",
      "tilejson": {
        "bounds": [60.8786, 23.32744, 77.83562, 37.09664]
      }
    }
  },
  "data": {
    "v3": {
      "mbtiles": "2017-07-03_asia_pakistan.mbtiles"
    }
  }
}
If you use any custom fonts you can put them in the styles folder and hopefully, they should work. Now restart the tileserver-gl container from kitematic and you should be able to see “Blueprint” style on the homepage.
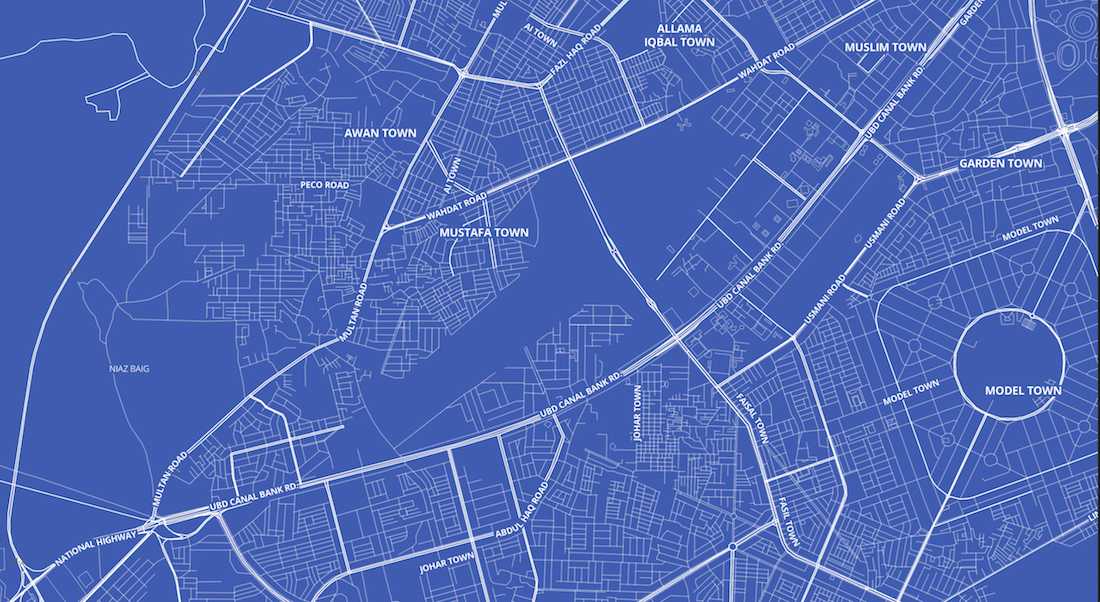
I went ahead and created a static map of my city out of this. You can too! Let’s first see how I did it. I used the viewer for the Blueprint style and went to my city (Lahore). I got the following URL:
http://localhost:3000/styles/blueprint/#13/31.49/74.28045
Next, I converted that URL to the form of a static image export URL:
http://localhost:3000/styles/blueprint/static/74.28045,31.49,14/1270x700@2x.png
You can read more about how the static export works in the online documentation.
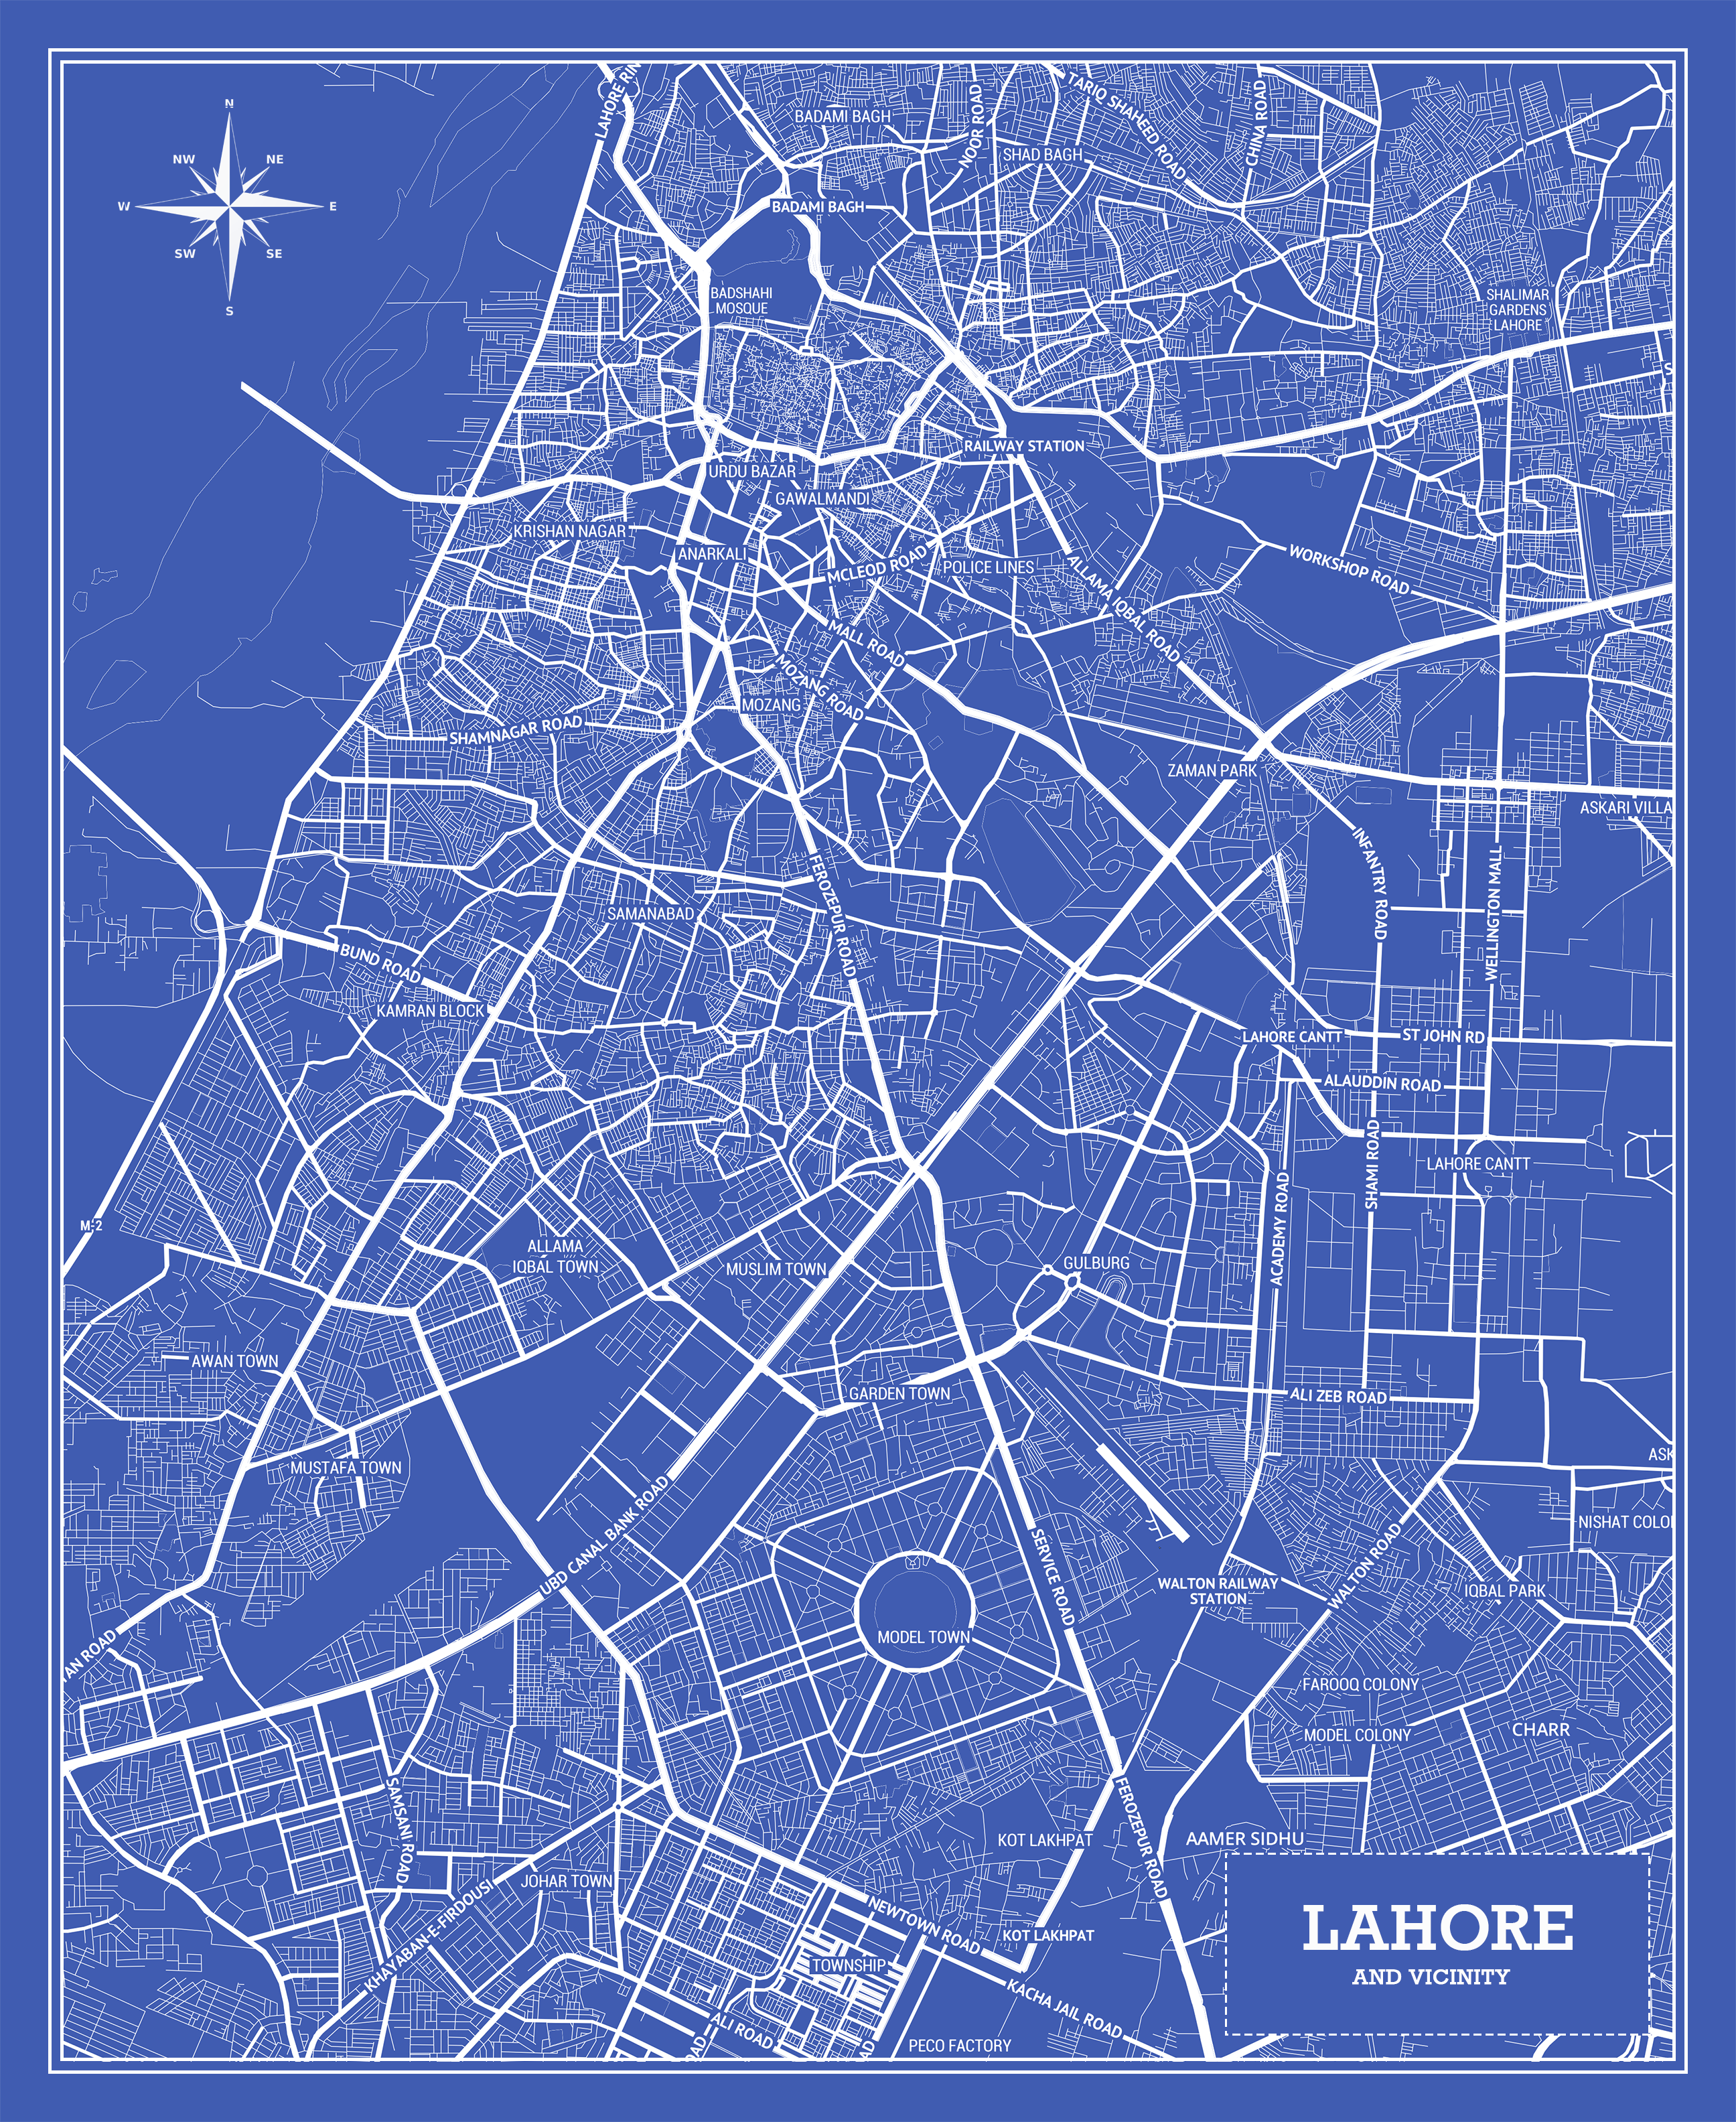
I created a nice looking poster using this as well!
Next Steps
Now that you know how the export works, you can go ahead and create a nice looking poster for your city or country. Just download the respective mbtiles file for your location and you should be good to go!
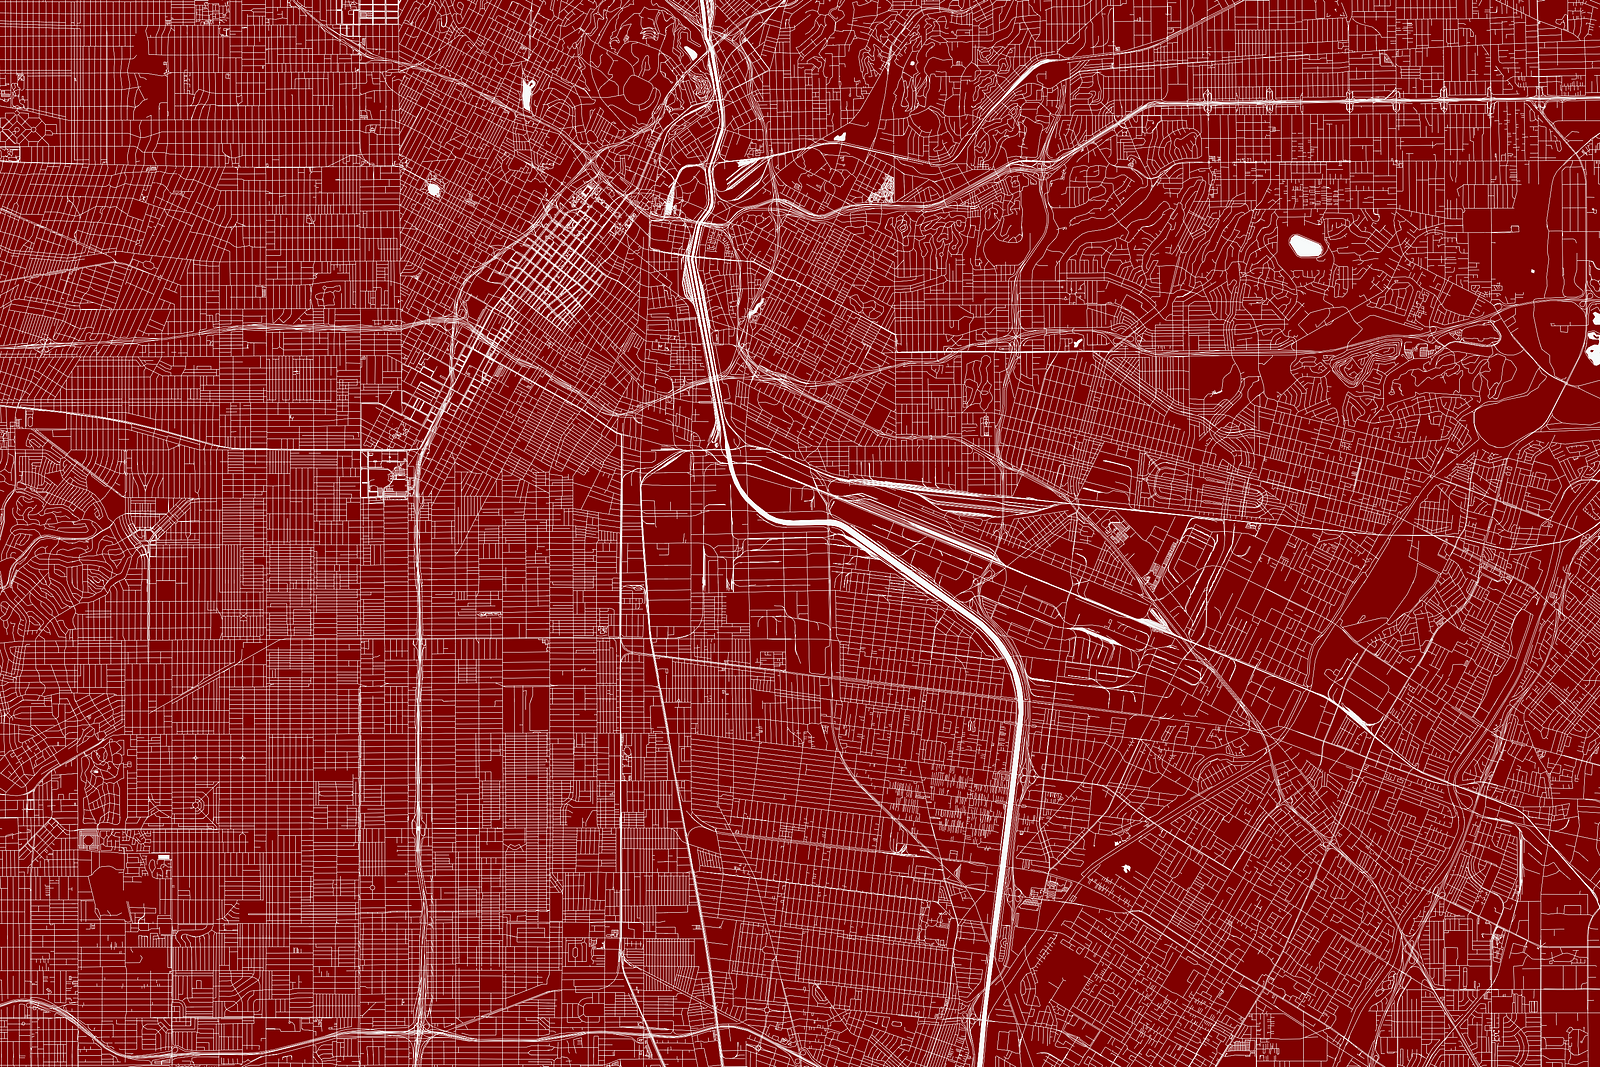
There are still some edges of tileserver-gl which I haven’t managed to fully explore. I might go ahead and use tippecanoe to create some cool looking maps like this:
I hope you enjoyed the post. If there is anything I missed or anything which I explained wrong please let me know. See you all in the next post! ❤️
Useful Links:
David
Manda
Yasoob
In reply to Manda
Sumit
BigBoi